
The best snow is always the hardest to access. Whistler Blackcomb is the busiest ski resort in all of North America. The overall capacity of all of the lifts combined is a whopping 65,507 skiers per hour. On a packed day with fresh snow, you can be certain that that the best and most easily accessed terrain will have tracks within the first 2 hours of the morning. Fortunately, Whistler is loaded with many sweet powder stashes and secret zones. The vast majority of skiers on the mountain aren’t willing to pop their skis off and break a sweat hiking up the mountain in their boots. Those who do, will be rewarded with some fantastic turns any day of the year.
Listed below are all the in-bounds hike accessed areas that you need to try the next time you are hunting for pow on Whistler and Blackcomb.
These runs are no joke so don’t forget to wear your brain bucket! If You’re looking for some high quality helmet picks, here are my favourites!
Table of Contents
The Best Whistler In-Bounds Hike Accessed Terrain
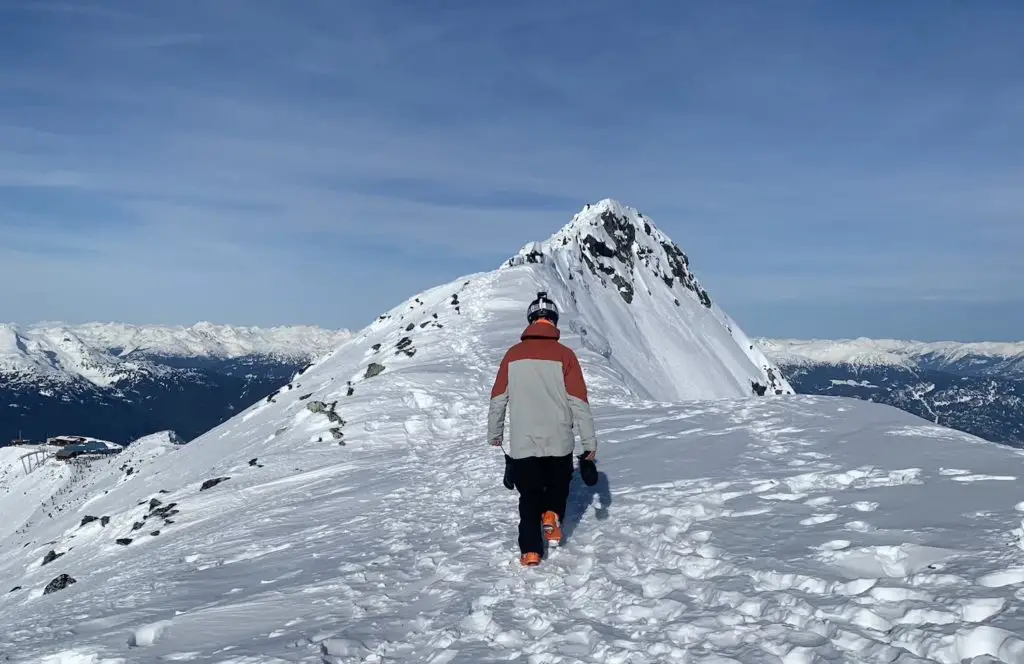
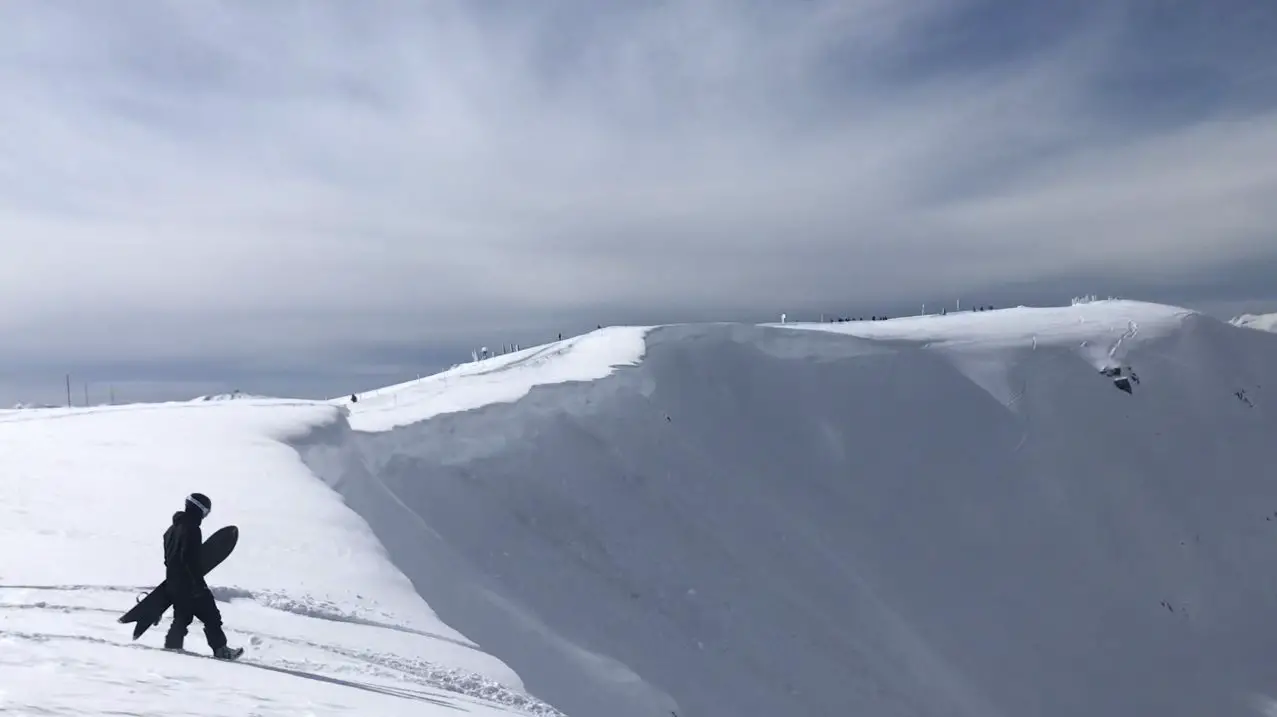
Flute Bowl
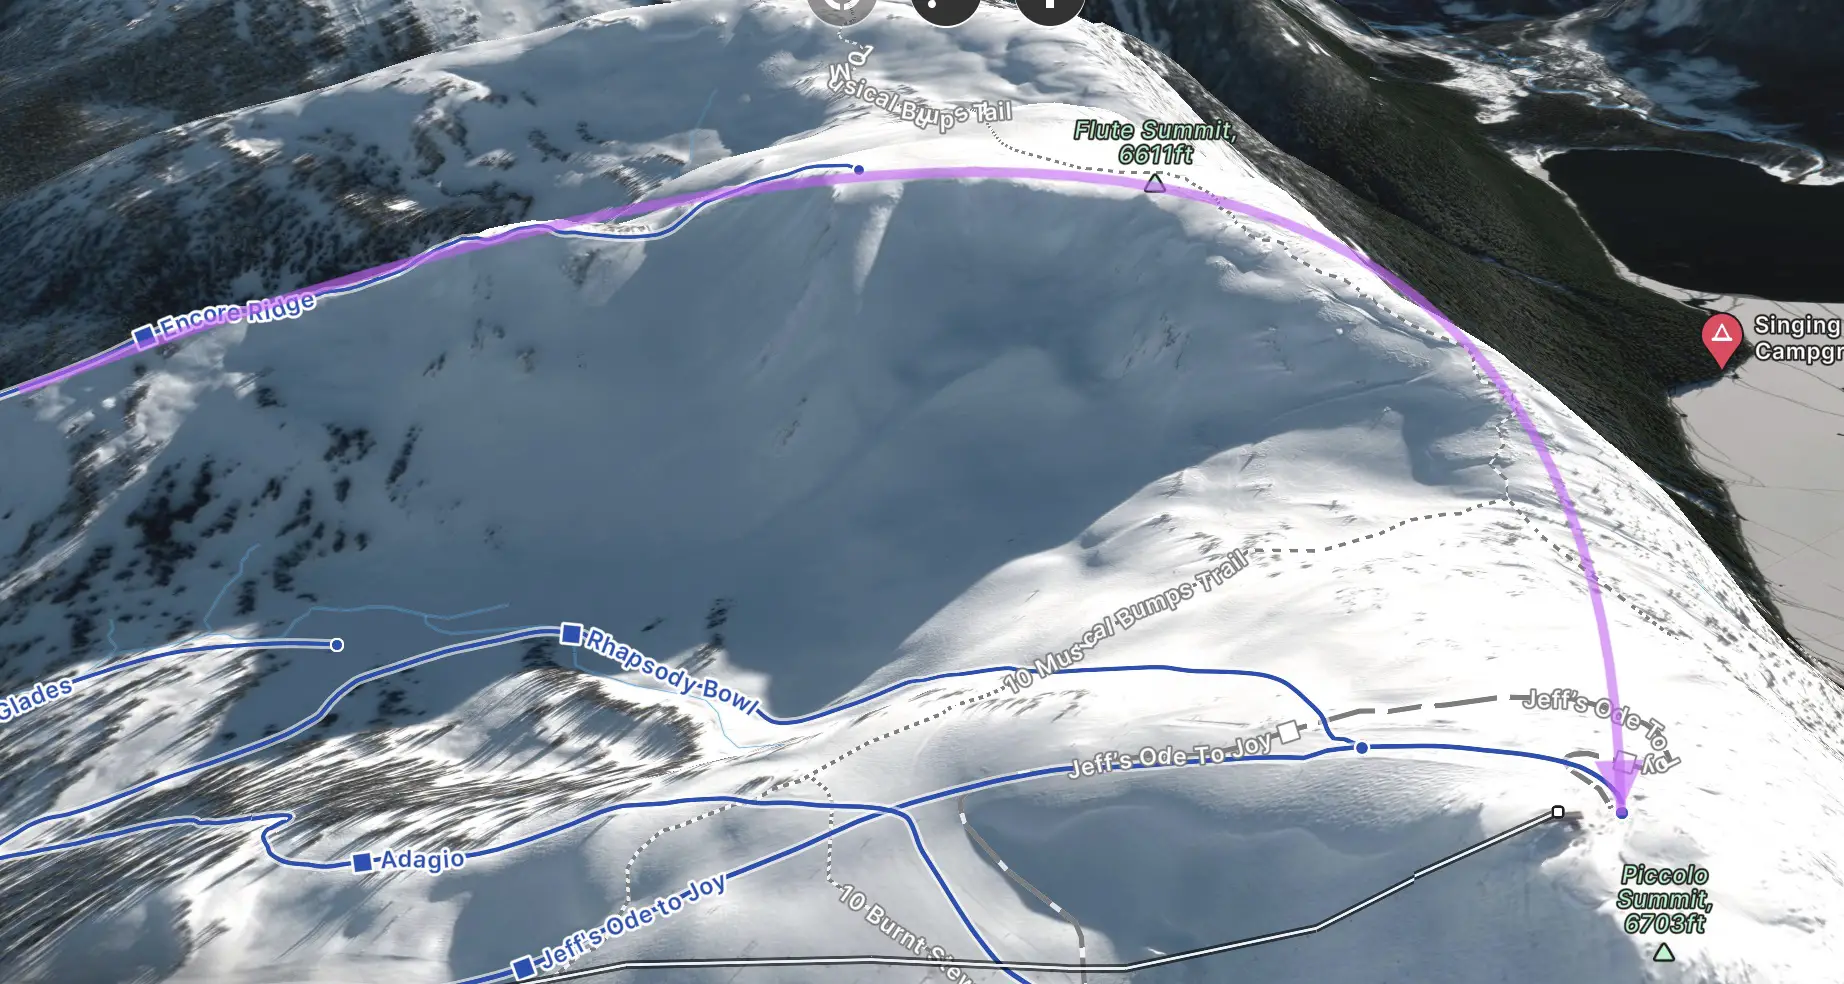
The Flute bowl is the mecca of in-bounds hike accessed terrain at Whistler. It is a remote/backcountry feeling bowl skiing paradise. The terrain in the flute bowl is North Facing, holds unbelievable snow and has loads of line choices of varying difficulties so choose you can choose your own adventure. The patrol does avalanche control so you don’t have to bring avalanche gear if you plan on a flute adventure. There is only one groomed up track (the musical bumps trail) which skiers can hike to the top and no marked runs down. The world is your oyster up on flute. You can drop off the burly cornice to your left, rip down the spine, or for those looking for a more mellow option you can follow Encore Ridge as it loops back around to the Symphony Express chair.
To access Flute head to the top of the Symphony Express chair. Take a left and ski between Piccilo and Flute and locate the groomed up track. If you can’t see the up track when skiing down to it, the visibility is probably too poor to attempt flute anyways. When exiting Flute locate the exit track which is marked with bamboo poles with florescent circles. Note: You cannot ski down to the base from the bottom of the Symphony Chair. If you miss the last symphony chair you will have to hike 30 minutes up the rescue road to get to Harmony Ridge.
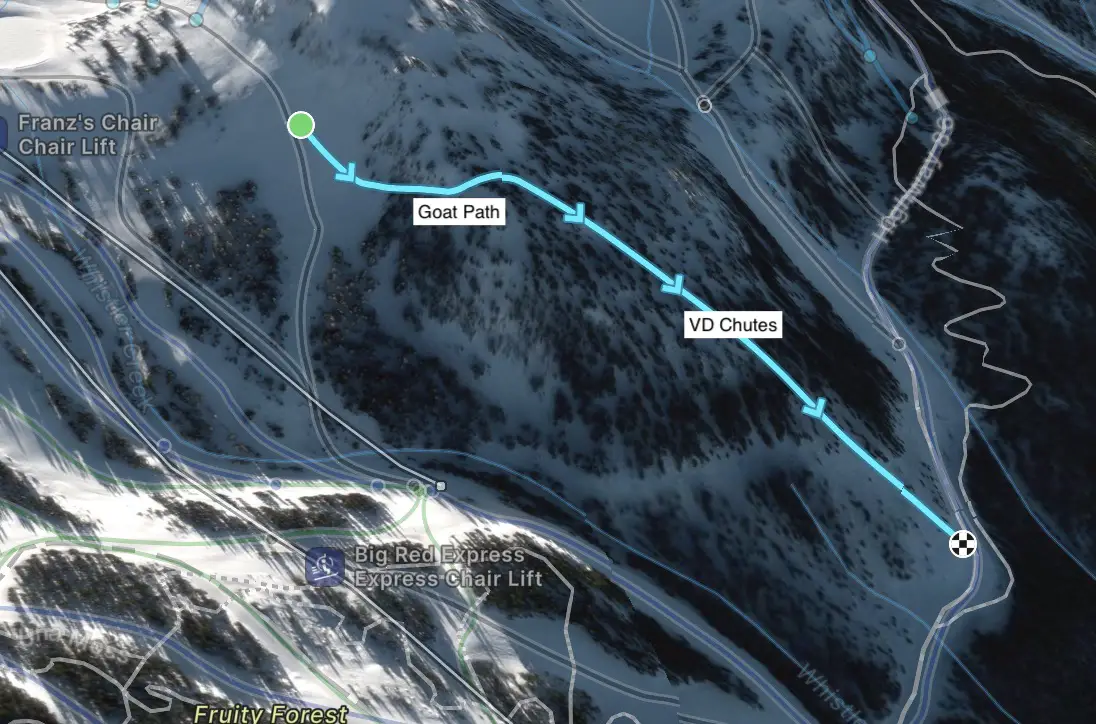
Goat Path to VD Chutes
The goat path is a hike located on the far left side of Franz Meadows. It provides access to the VD Chutes (Very Difficult) Chutes. This is a super fun tree area to explore especially when the alpine is closed for avalanche control. Make sure to traverse all the way across the goat path to the left and don’t fall as there are some serious cliffs to your right as you climb. Make sure you are with a friend in this area and prepare to do a little bit of hiking around cliffs and chutes the first few times you explore until you get the hang of it. Thanks to the hike access and inability to access it easily from above you can always find fresh lines in the VD chutes on a snow day!
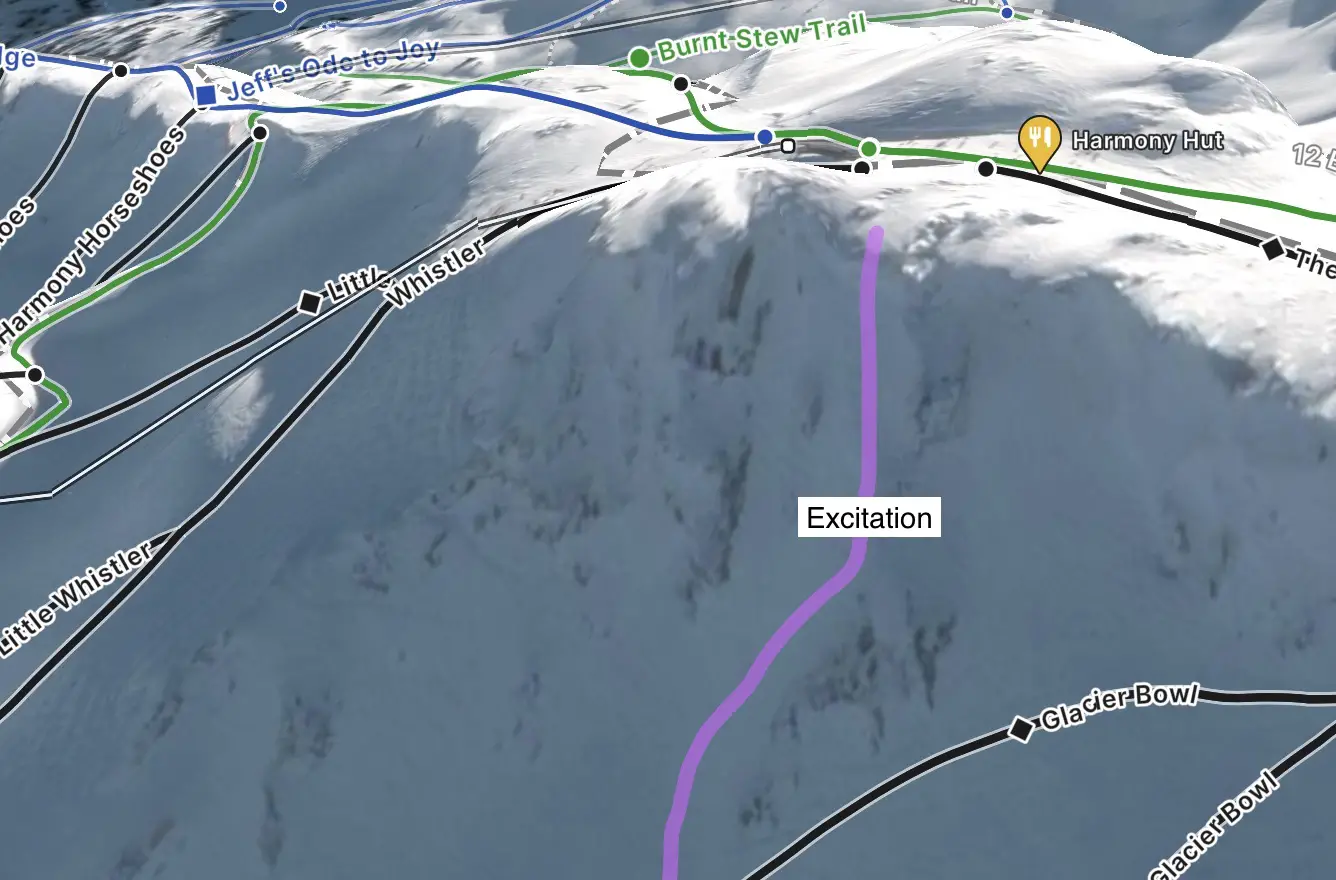
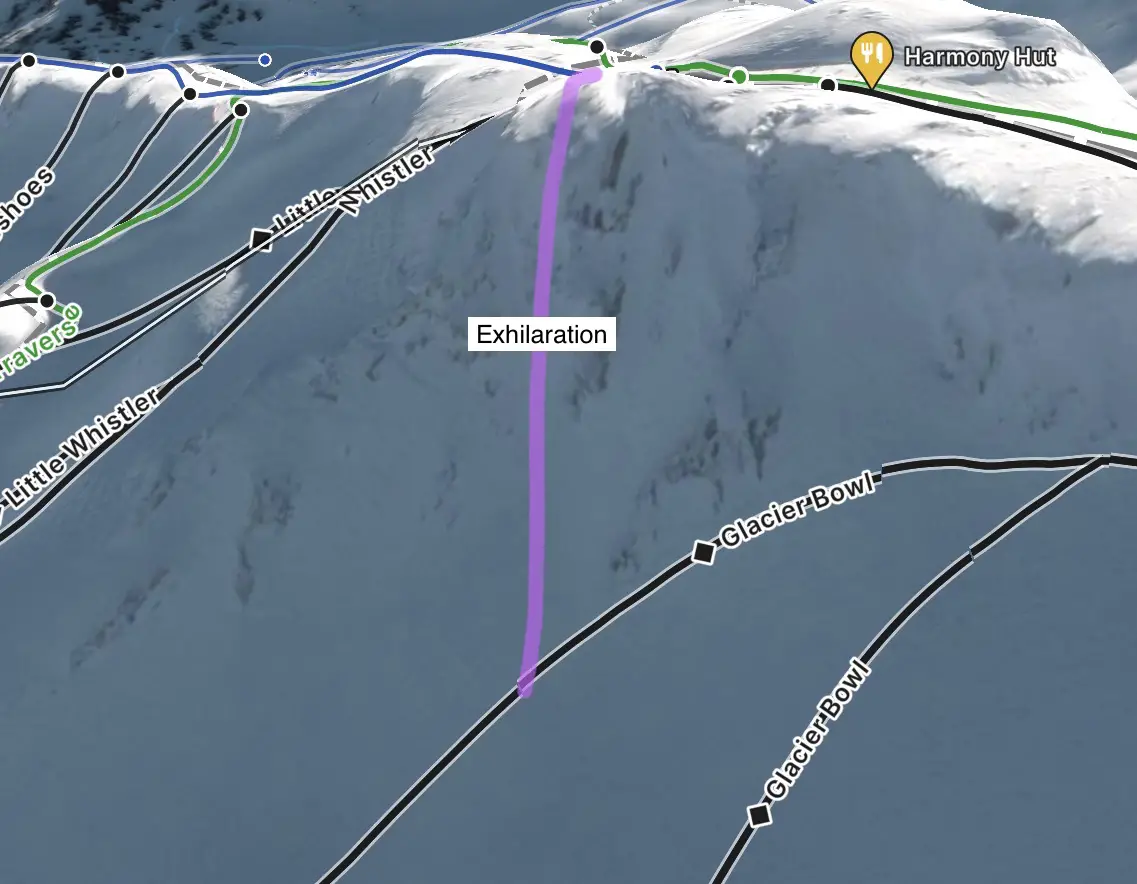
Excitation & Exhiliration
Excitation & Exhiliration are two super steep and extreme runs on Whistler mountain. A quick hike is required to access these insane lines. To access Exhilaration and Excitation ski right off the Harmony chair and hike up the ridge to the right. There is usually a well-worn boot back up to the top. Exhilaration is the first line down closest to the chair and Excitation is the second in line.
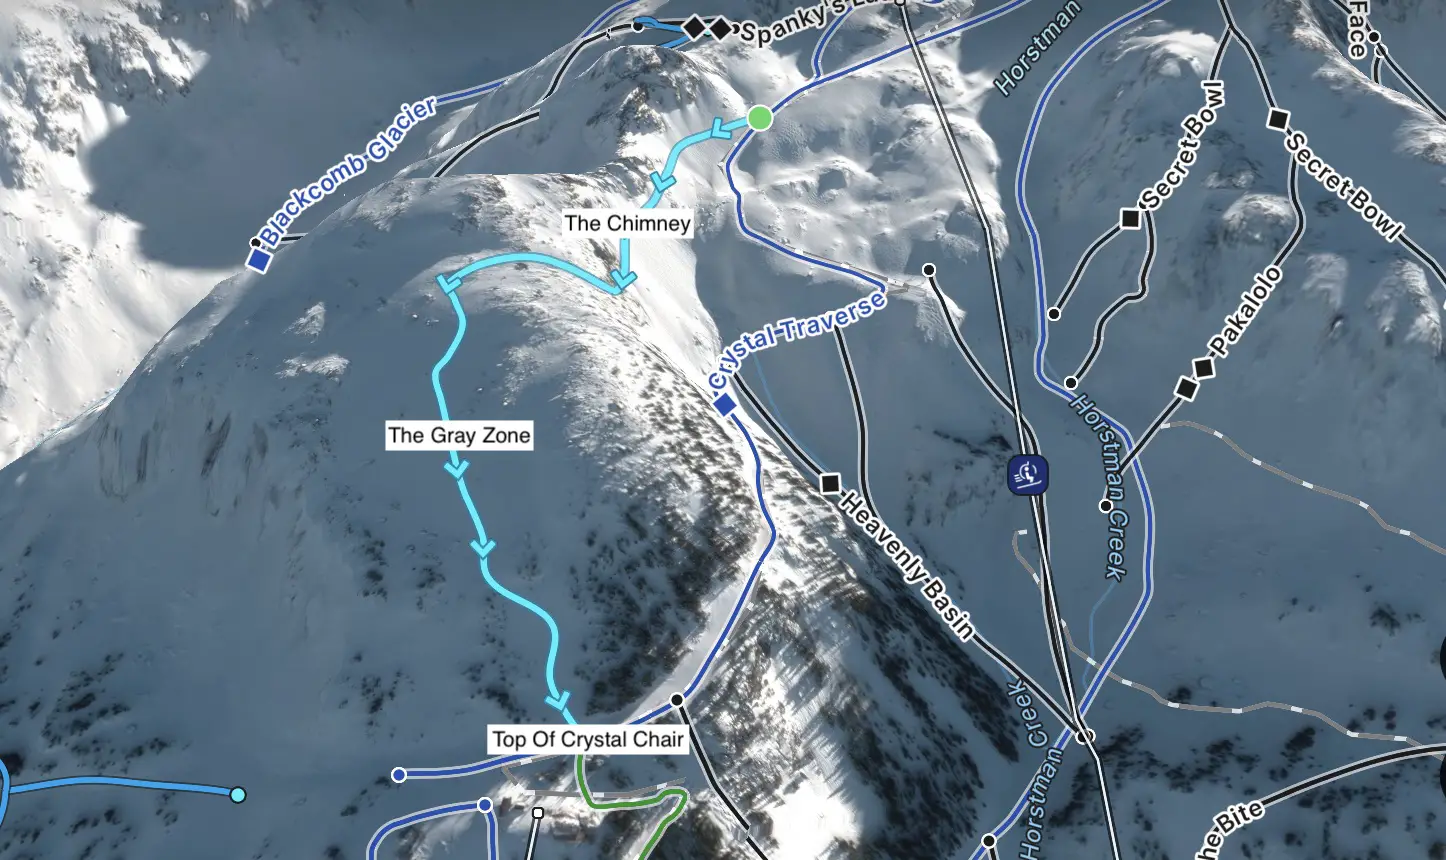
The Grey Zone
The chimney is a long, steep and challenging boot-pack providing access to some awesome open powder skiing above the crystal chair. To access this zone ride up the Glacier Chair and take a left on crystal traverse. At the sharp left turn continue to the right towards the steep hike (known as the Chimney) below the big rock face. The views at the top of the Grey Zone are some of the best on the mountain. This is one of my favourite spots to catch my breath and guzzle a bubbly pop if I have one in my backpack.
You can ski down the grey zone in any which direction just stay to the left of the boundary ropes on the far right which protect you from an absolutely insane cliff band that is impassable.
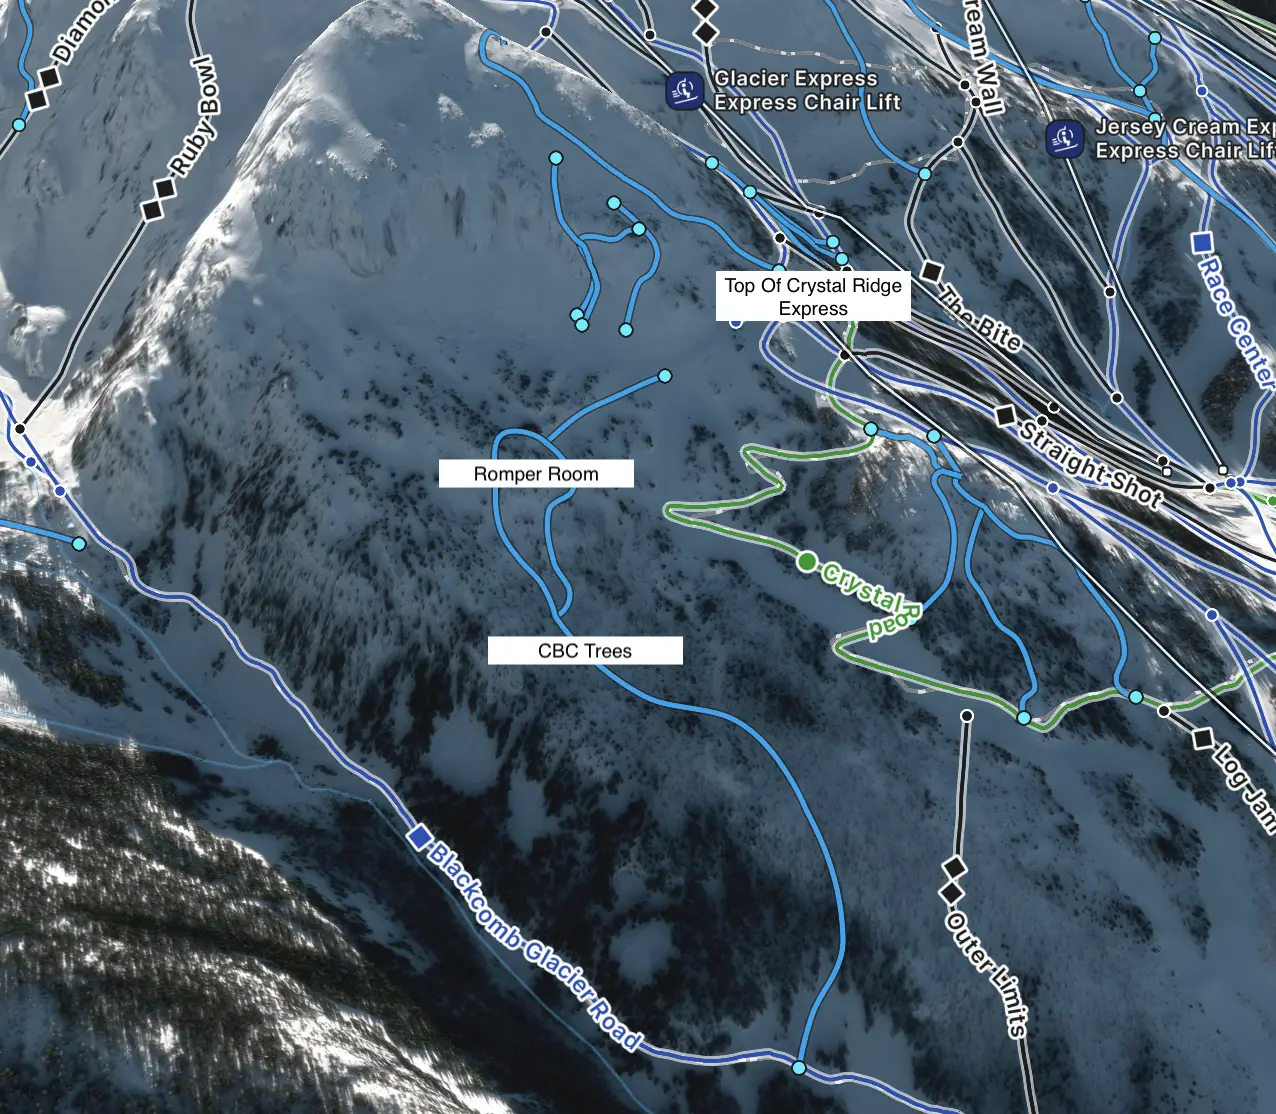
CBC Traverse
The CBC traverse is a super short hike/ski traverse on the crystal chair. It’s for experienced ski adventurers only and those who are comfortable with a little bit of navigation and hiking through the trees. It is best to learn how to ski this area from a guide or someone with lots of prior knowledge. You can be in this run for 15-20 minutes and see absolutely no one. From the top of the crystal chair stay right and traverse above ridge runner. You will see a designated hiking trail. Once the trees begin in front of you pop your skis on and turn down to the left. The top portion is known as Romper Room and the larger bottom portion is CBC trees. There are loads of hazards, cliffs and frozen waterfalls tucked in and around the CBC trees. The hazards are what make this area so exciting but also challenging. It is very easy to get lost in the CBC trees so only explore this area with friends always keep a bit of a trajectory to the left. It is common to get cliffed out in here and have to hike around to find a safe way down. After some exploration in this area you will become more familiar and be able to navigate your way to your favourite lines.
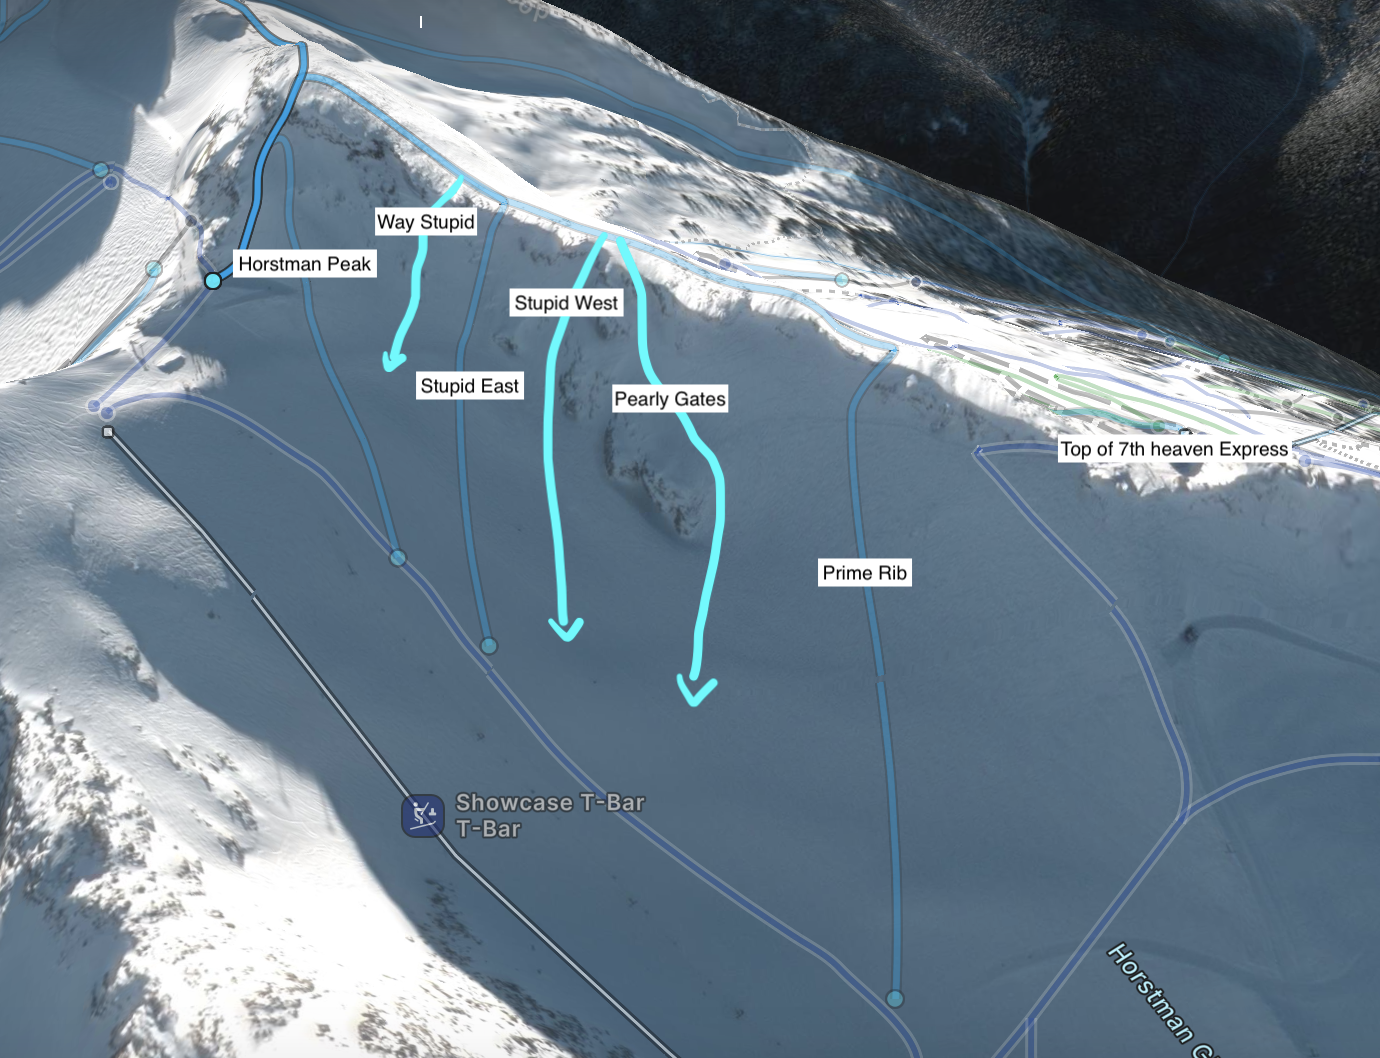
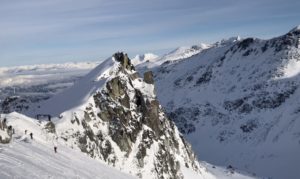
Horstman Peak
The Horstman Peak is the Ridge you see up and to the right of the 7th Heaven chair. Do not ski the chutes down the Horstman peak if the uphill travel sign is marked as closed. The bootpack takes only a few minutes and you will have your pick at 6 different lines along the ridge including Pearly Gates, Prime Rib, stupid East, Stupid West, and Way Stupid the most challenging of them all. I’ve never had the right conditions to do Way Stupid from the top but have traversed in from Stupid East. They are all steep, exhilarating and depending on the time of the year inaccessible due to the size of the cornices.
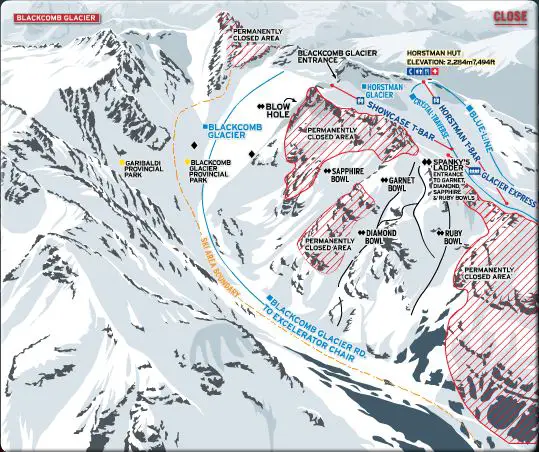
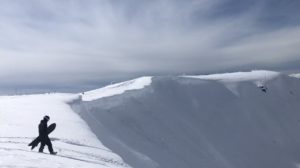
Blackcomb Glacier
A run down the Blackcomb Glacier is a must-do when riding on Blackcomb. Just a quick hike will allow you to reach some of the most unique resort terrain in North America. The Blackcomb Glacier is a wide open bowl with a super mellow slope. It’s an easy shred down for intermediate skiers and riders who are confident on blue terrain. There are also various skiing options for experts looking for a challenge with two of the most extreme runs being accessible via the ridge beside the glacier (click here to learn more about the most extreme runs accessed via the Blackcomb glacier).
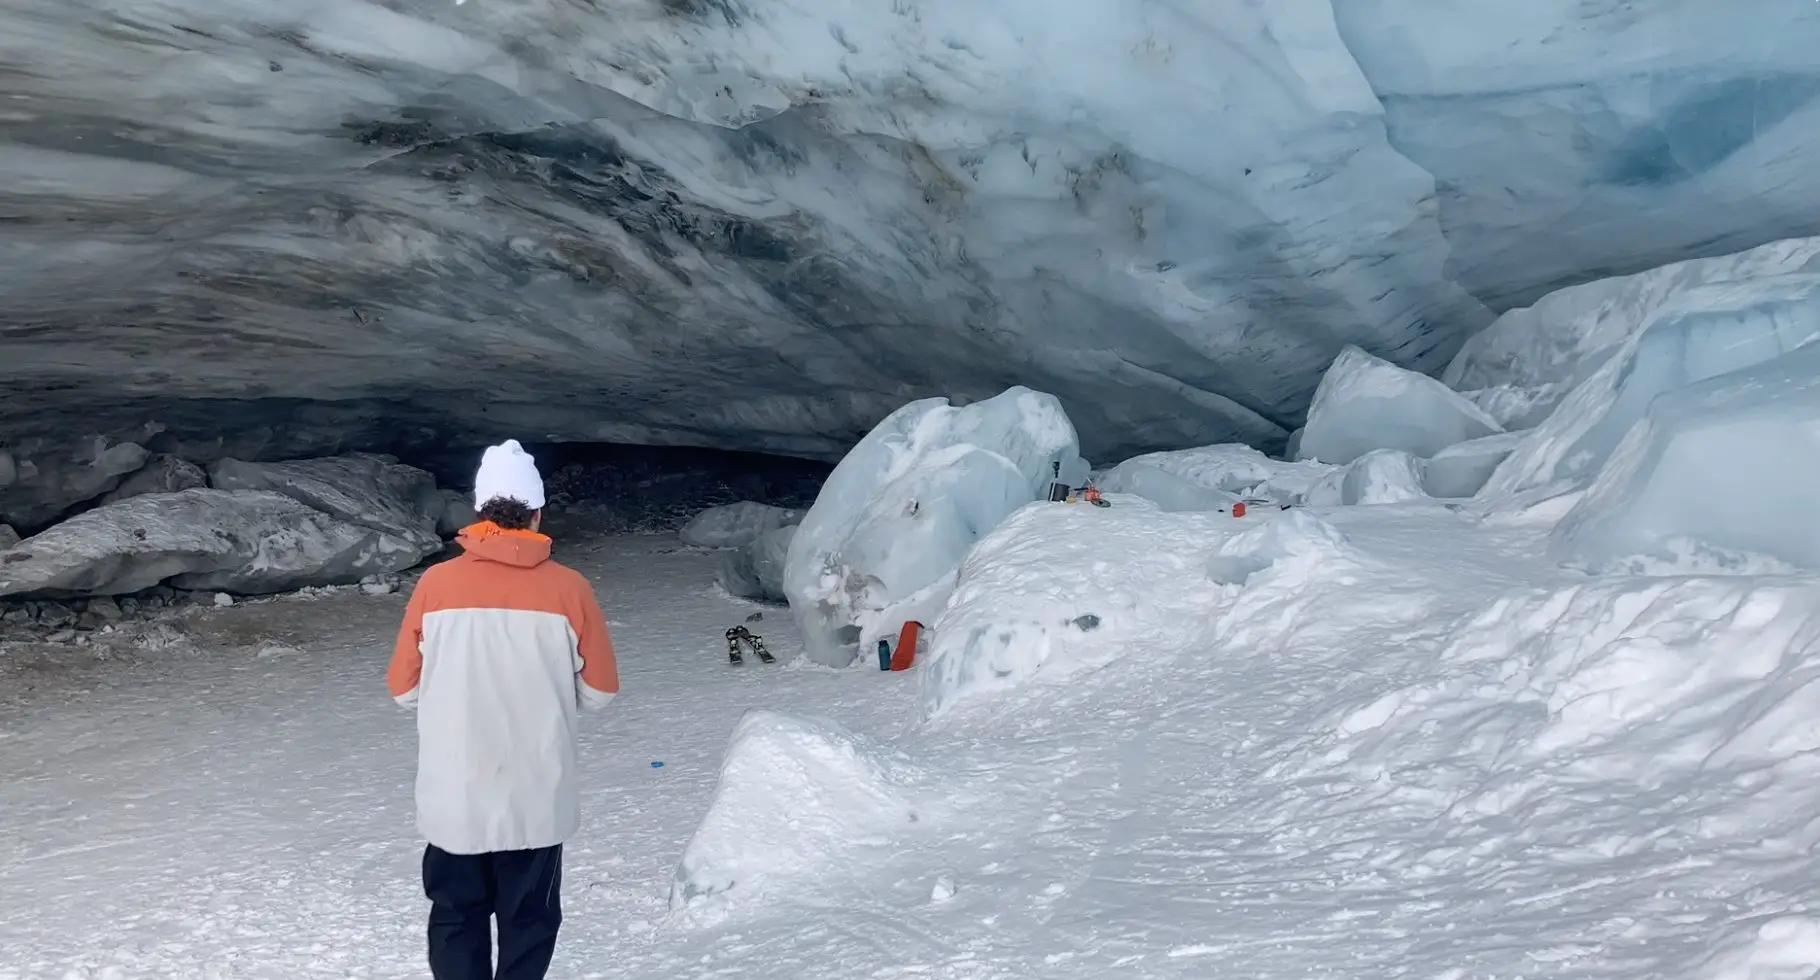
The Blackcomb glacier is a true spectacle and is the closest you will get to backcountry skiing without having to travel in remote mountains. One of the biggest highlights other than the snow and fantastic open powder turns is the ICE CAVE. If you are skiing down the glacier make sure to make a pit stop at the ice cave! To access the Blackcomb Glacier ride to the top of the Glacier Express chairlift and take the Horstman T-bar to the top. If the visibility is bad I would recommend skiing between the orange and blue markers which mark the easiest route down. If the visibility is clear ski down any direction you like. The Ice Cave is located on the bottom right side of the glacier run. If you follow the orange and blue run markers and keep your eyes to the right you won’t miss it. For a more detailed guide on how to find the Blackcomb Glacier Ice Cave CLICK HERE. Once you have completed a fantastic run through the glacier follow the cat track (Glacier Road) all the way down to the bottom of the Crystal Chair. If you’ve never skied Blackcomb Mountain make sure the glacier and the ice cave are on your hit list!
Spanky’s Ladder
Spanky’s Ladder is one of the most epic on resort free-skiing playgrounds in all of North America. It’s my all-time favourite area to play around on Blackcomb mountain and I hardly spend a day at the hill without doing at least one Spanky’s lap.
Most locals refer to the entire area as Spanky’s Ladder. However Spanky’s Ladder is just the name of the 15 meter boot-pack required to reach the top of the Gemstone Bowls. The Gemstone Bowls is the formal name for this zone. Four bowls, Garnet, Sapphire, Ruby and Diamond make up the Gemstone Bowls. They are all fantastic and there are countless lines through the bowls that vary in difficulty level.
There is no specific map pertaining to Spanky’s on the Whistler Blackcomb trail map. The entrances to the bowls vary in difficulty and there are no signs marking which direction to ski or safe routes. Anything Goes! I think this is part of the allure and makes the area feel more exciting and remote. To ski great lines in Spanky’s you just have to do a little bit of research, exploration and planning.
The first step is to become familiar with the basic routes and chutes down each bowl. Once you feel comfortable in the area you will be able to ski a little more aggressively and focus on enjoying your turns instead of waiting for the next monster cliff to appear in front of you.
Spanky’s Ladder is the bread and butter of Blackcomb mountain and sometimes I can’t even believe that this is skiable resort terrain. It can be quite intimidating if it is your first time skiing it, especially if the visibility isn’t perfect. In fact, Spanky’s is so intricate that I have put together a completely separate guide for skiing it. You can check out the complete beginners guide to skiing Spanky’s here.
Or, if you prefer to watch things in video, I’ve got a complete YouTube guide dedicated to helping you navigate all of the epic chutes and fun lines that the Gemstone bowls have to offer. Give er’ a watch here.
When skiing the gnarliest of terrain it’s essential that you have crystal clear vision. Don’t mess around with a crappy pair of ski goggles. Here are my top picks for ski goggles that you can trust to help you see cliffs, rocks and snow contours regardless of the conditions.
So shed a couple layers, loosen those boots and get ready to hike into some of the best and most unique terrain on Blackcomb Mountain.


2 Responses
Love your videos and articles. I’ve got an advanced group(all watching and reading your stuff) at Whistler/Blackcomb this coming Sunday through Saturday. Weather’s looking good! I’m curious about the chairs to choose and avoid long lines on the weekends but still enjoy glades and advanced terrain. Assuming that the weekdays are going to be same but smaller lines. Really appreciate your help. Thank you for your time!
Hi Gregory, I appreciate you reaching out and stoked that your whole gang is studying up using my content! Other than an early start there is really no way to dodge long weekend lift lines for the Alpine lifts. A good strategy is always to start early, ski through lunch and have some later afternoon beers.