It used to be so simple in the 80’s…. Skinny and long was the name of the game and every skier was hot doggin’ on the same planks. With the invention of shaped skis everything changed!
Nowadays there are far too many skis to choose from. If you owned the ideal pair of skis for all conditions you would need a house sized storage area for all of your planks. Most of us are lucky if we can own two sets!
Choosing the perfect pair of skis can be extremely overwhelming. This guide will provide you with an essential understanding of ski shape, size and design. Understanding these basics will completely simplify the ski purchasing process and help you to narrow down the skis that work will work best for your skiing style, goals, body type and skill level.
Table of Contents
The Essential Ski Measurements
If you want to buy the PERFECT skis for yourself you need to understand the basics of ski design and size and how they will impact your performance. There are two important measurements integral to understand before we take a deep dive into the nitty gritty of ski shape and performance. Length and Width.
Length
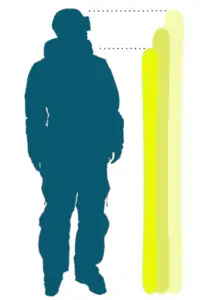
Ski length is the most basic but, the most important measurements to consider when choosing the right pair of skis. A ski that’s too short will not be able to support your height and weight and something too long may not be manoeuvrable. We’ve all heard the classic ‘rental shop rule of thumb’, “Chin height for beginners and between the eyes and head for experts”.
Thanks to modern ski shape and technology, experts and beginners alike can run the same size skis. I think the eyebrows are a great starting point for beginners allowing lots of room for growth. For experts, you’re going to end up owning many skis of many lengths depending on the conditions and your style of skiing for the day.
The longer the ski, the greater the float and larger the turning radius providing much better performance on powder and greater stability for huge carving turns. The shorter the ski the less float and tighter the turning radius will be providing much better performance on-piste.
Ski Waist Width
The width aka (waist or underfoot) size of a ski is simply the measurement edge to edge of a ski in the middle. The waist is typically a skis narrowest point. It is the second most important measurement to decide upon when picking the perfect ski. The wider the ski, the better the performance in powder snow and the skinnier the waist, the stronger it will perform on the groomers. I’ve written a guide SIZE MATTERS specific to ski widths and determining what’s best for you. Give it a read when you’re wrapped up with this article.
So Let’s Dive A Little Deeper Into This
How To Read Ski Shape Measurements
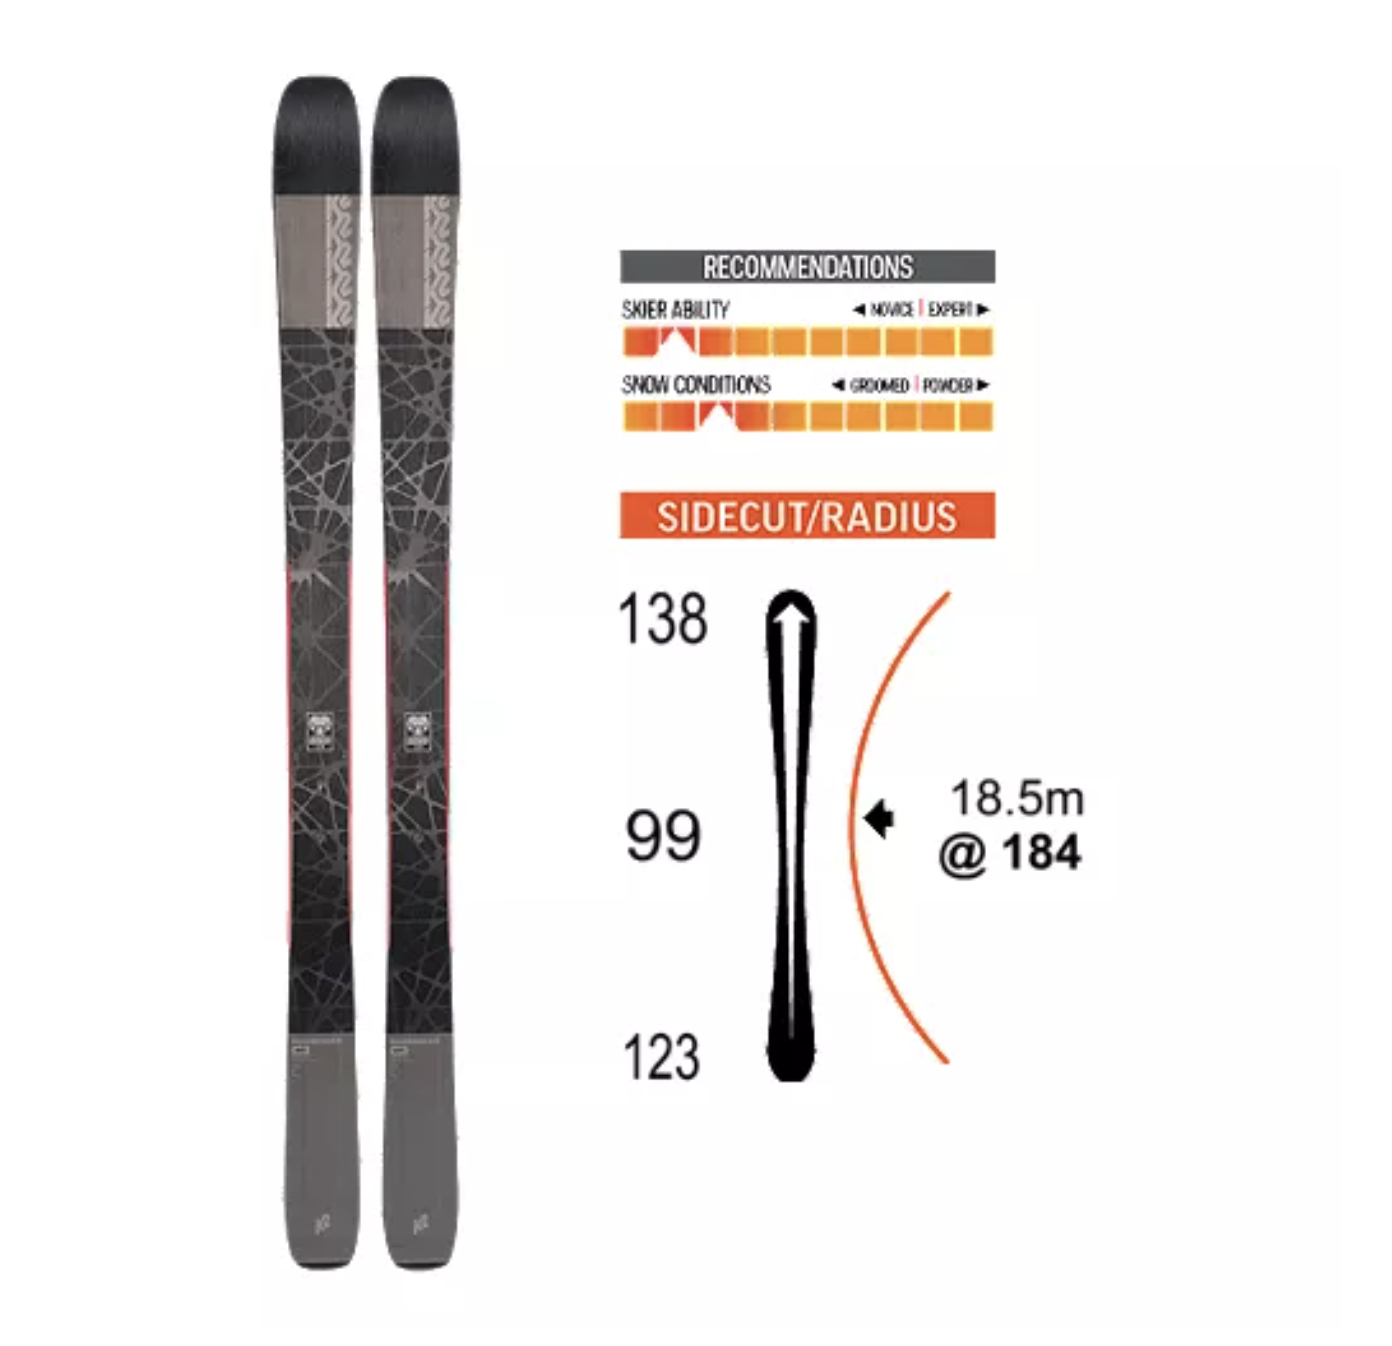
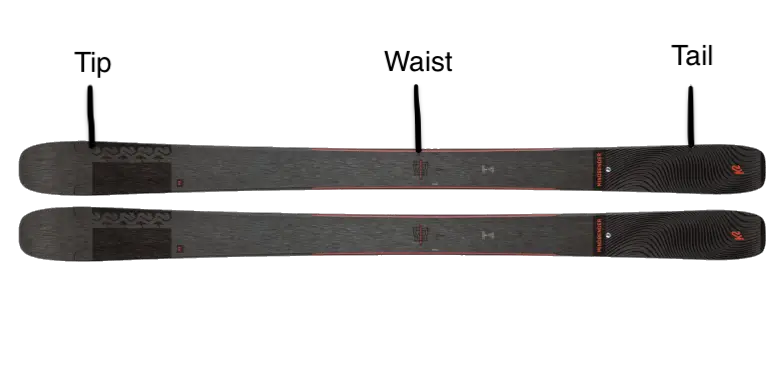
On every set of skis you can find 3 numbers printed on the top sheet that designate a skis dimensions. Let’s use the award winning K2 Mindbender 99Ti as an example. Its measurements can be found on the tail as follows, 138-99-123.
These numbers define the width measurement in millimetres (mm) for the Tip, Waist and the Tail of the ski respectively. The first number 138 represents a 138mm tip width (the widest point of the ski). The second number 99 represents the 99mm underfoot/waist width. The third and final number 123 represents the widest point in the tail at 123mm.
Why Are Ski Measurements Important?
Because they indicate and help riders quickly understand the ski’s sidecut and turning radius.
The Sidecut
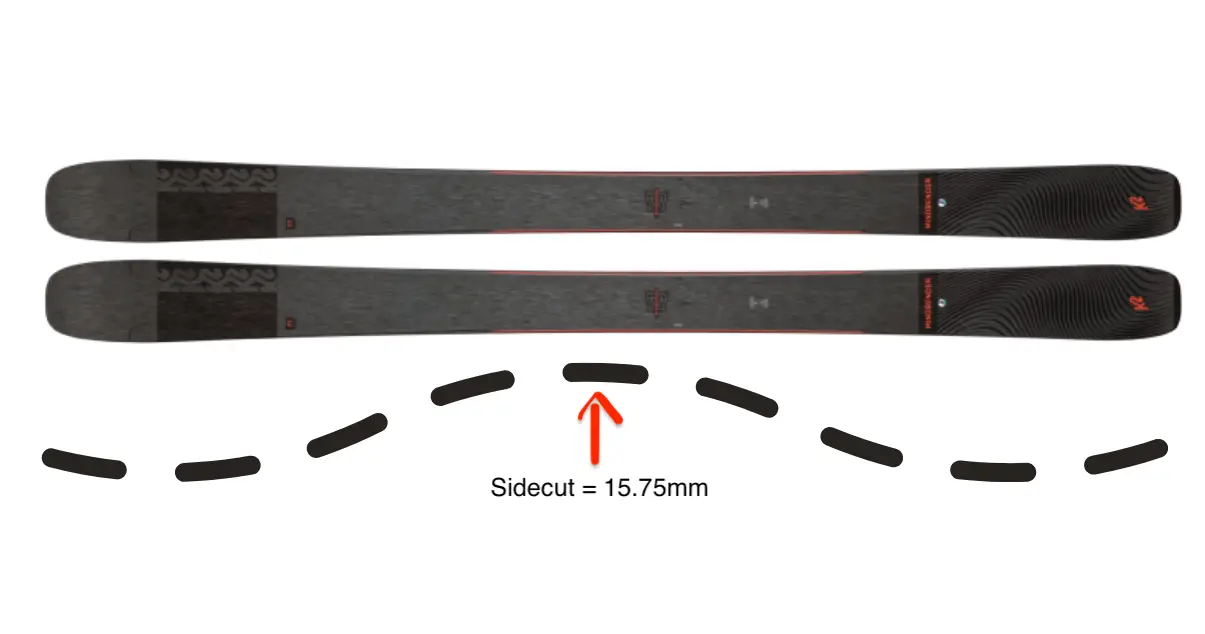
The sidecut of a ski is the apparent hourglass looking tapering of a ski. The greater the difference between the tip, middle and tail, the deeper the sidecut.
It is measured by a simple calculation that you will never need to use. However, I think it’s fun to know the simple math behind it all!
Sidecut = [(Tip Width + Tail Width) / 2) – Waist Width
2
Plugging in the specs of the K2 Mindbender 99Ti into this equation the sidecut would be as follows.
K2 Mindbender Sidecut = [(138 + 123) / 2) – 99 = 15.75mm
2
Why Is Sidecut So Important?
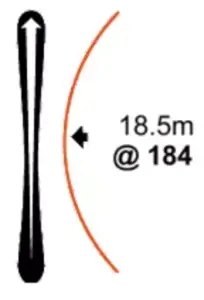
Simply, the sidecut determines the turning radius that a ski is going to have and turning radius is extremely important! Another more practical way of measuring the sidecut is to lay your ski on its side edge and measure the gap between the floor and middle edge of the ski. A skis sidecut forms an arc when turning, the imaginary circle created by this arc is known as the Turning Radius.
Turning Radius
The turning radius is an important metric to consider when purchasing the ideal set of skis. The turning radius determines how maneuverable and tight the skis will be able to turn and the stability at higher speeds.
The deeper the skis sidecut (the higher the sidecut measurement) the shorter the turn radius. A short (carving) turn radius is considered anything less than 16m. A medium (all mountain) turning radius is 17-22m and a larger (powder ski) turn radius is 22m and above.
A ski with a deeper sidecut will have a shorter turning radius allowing you to be more agile and take shorter turns but, will have less stability at speed. Skis with a shallower sidecut will want to turn larger but have much more stability at speed.
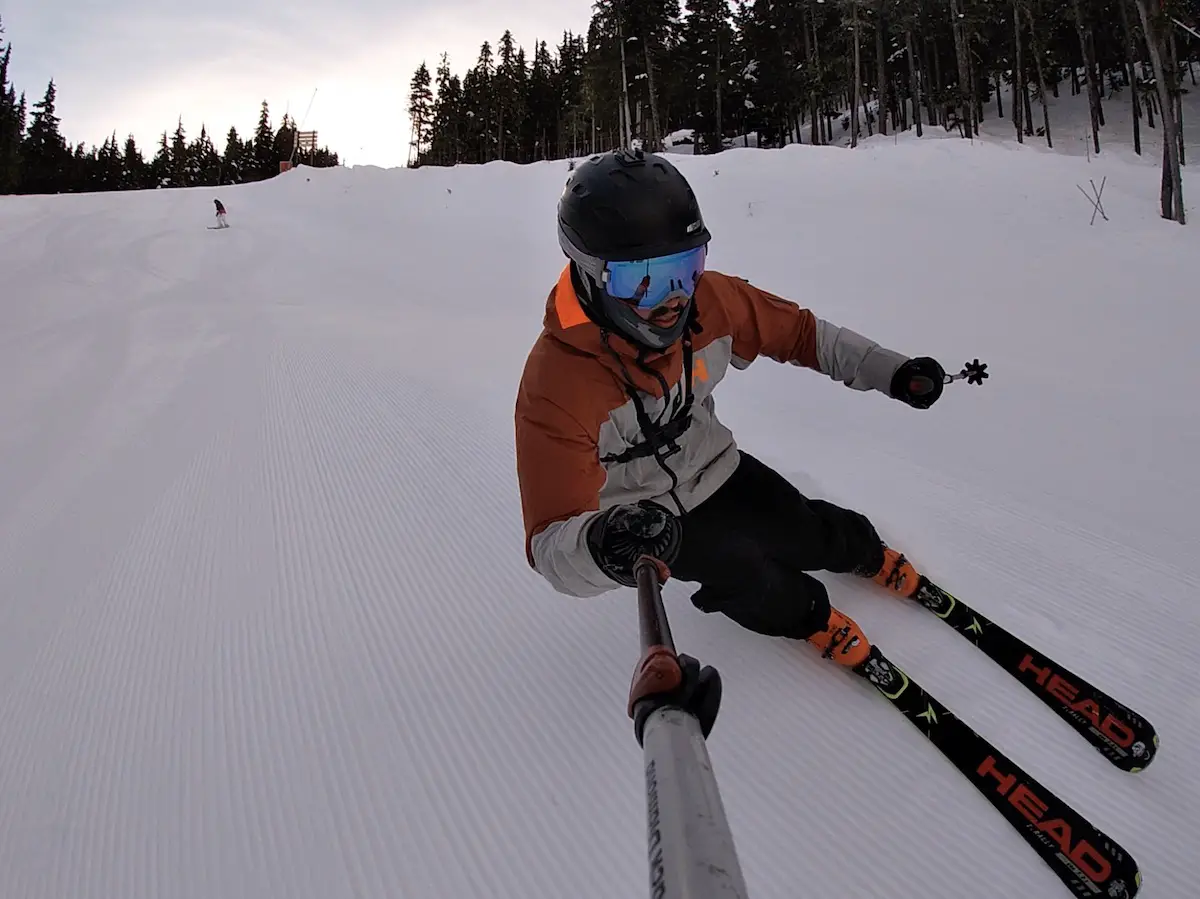
Remember that skis of the same model with identical measurements will have a slightly different turning radius depending on the ski length. Longer skis will have a larger turning radius and shorter skis will have a tighter turning radius. If you’ve ever watched ski racers you’ll notice a huge difference in their ski size depending on which event they are competing in. For Slalom (close gates) their skis will be very short which is optimal for making quick turns through gates with little space. For Super-G or Downhill (spaced gates) the racers will have extremely long skis allowing for the optimal stability at high speeds.
Keep in mind that the actual turning radius of a ski on the snow also depends on the skier. The calculation just offers an estimated average but, a skiers skill, strength, and terrain will also determine the turning radius on the hill.
Camber
Next time you toss your ski onto the ground crouch down and take a look at the centre of the ski. The centre of the ski may not be touching the snow and the tip and tail sections will be making contact with the ground surface. The area between these two points of contact is known as the effective edge. The effective edge is the portion of ski that is in contact with the snow when the ski is carving. Having a longer effective edge will translate into increased ability to carve turns, more precision, stability, edge hold and edge engagement when skiing. However, the effective edge needs a hard surface so you will not reap the same benefits when skiing on powder snow.

Reverse Camber (Full Rocker)
Reverse camber is simply the opposite of camber, think water ski. The waist of the ski is in contact with the snow and the tip and the tail arc upward. Traditional reverse camber skis were designed to steer easier but only really worked well in insane powder conditions (which we only get a few times a season). They essentially have no effective edge and are extremely hard to carve. If you are heli-skiing all the time this might be an optimal design for you, but for the most of us average shmucks, we need an effective edge to rip up the resort.

Rocker
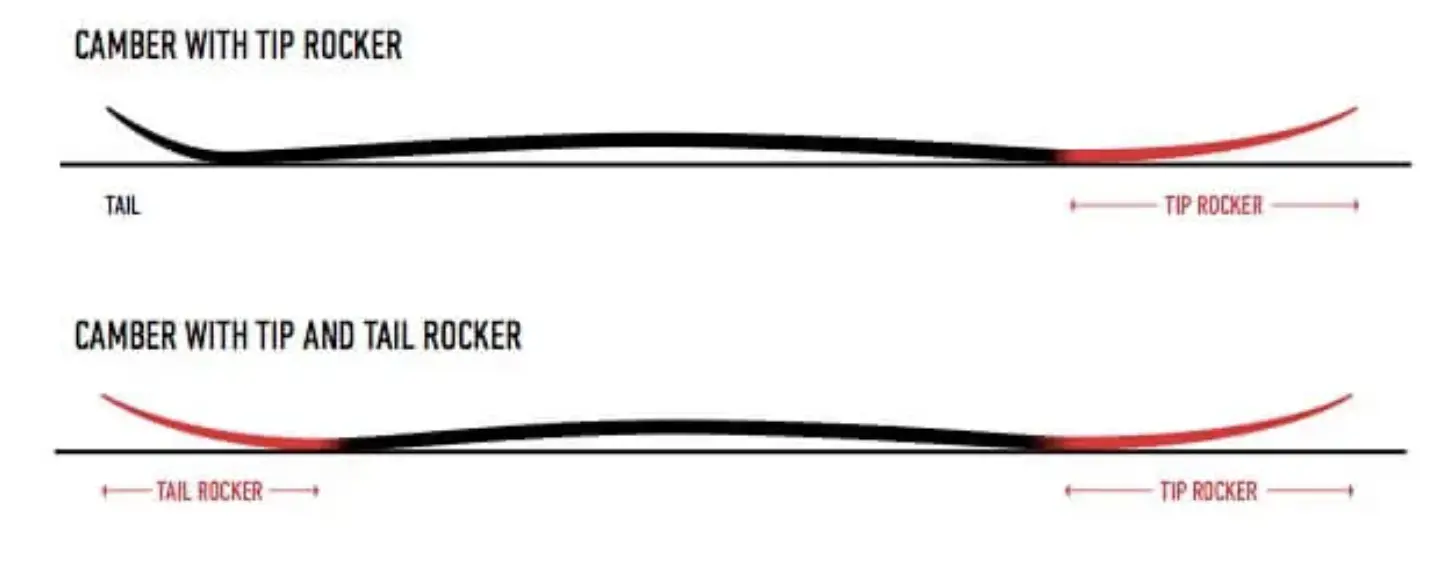
Rocker is the love baby of Camber and Reverse Camber. It can be in the Tip (early rise) or Tip and Tail (All Mountain Rocker). It is the perfect combination and a happy middle ground in ski design. The centre of the ski has a mild camber and the rise in the tip and the tail usually begin around the largest point. Rocker is very different among ski’s and a ski can be designed with tip and tail rocker or just a bit of rocker in the tip. For most all mountain skiers a bit of rocker in the tip is the way to go! Tip rocker allows for more float on powder and makes riding on variable snow much easier. With the right rocker combination you will still have stability and manoeuvrability of a cambered ski without sacrificing too much off-piste performance. Nothing can beat a carving specific ski on the groomers and with a rockered ski you can expect a little bit of vibration (speed wobble) in the tips when skiing fast on packed snow.
Ski Flex and Stiffness
The flex pattern in a ski is the relative stiffness of the tip and tail. It changes with load and skier ability. All skis have a different amount of flex throughout the entire ski. The flex is balanced with the camber and sidecut of the ski. Ski flex is longitudinal and torsional. Longitudinal flex is the flexibility of the ski length-wise and is most often the flex rating manufacturers provide in ski details. Torsional flex is not usually mentioned by manufacturers and is the flex of the ski from side to side and effects turns and edge hold while skis are pushing and twisting.
Finding an ideal ski stiffness depends on your ability and style. This is when it pays dividends to demo some skis with different flexes to get a feel for what works for you. Stiffer skis are powerful and stable in hard snow at high speed. Stiff skis will be very responsive and will maintain great edge contact on the snow. However, if a ski is too stiff for you it may toss you around like a salad, and that’s no fun.
A ski with more flex (a softer ski) will be much easier to initiate and release turns. Softer skis will feel forgiving in the bumps and allow you to ski in a more playful manner. However, more flex is not always a good thing, if you’re going fast and on harder snow you will not feel as stable, have less control and may feel speed wobble (ski tip & tail vibration)
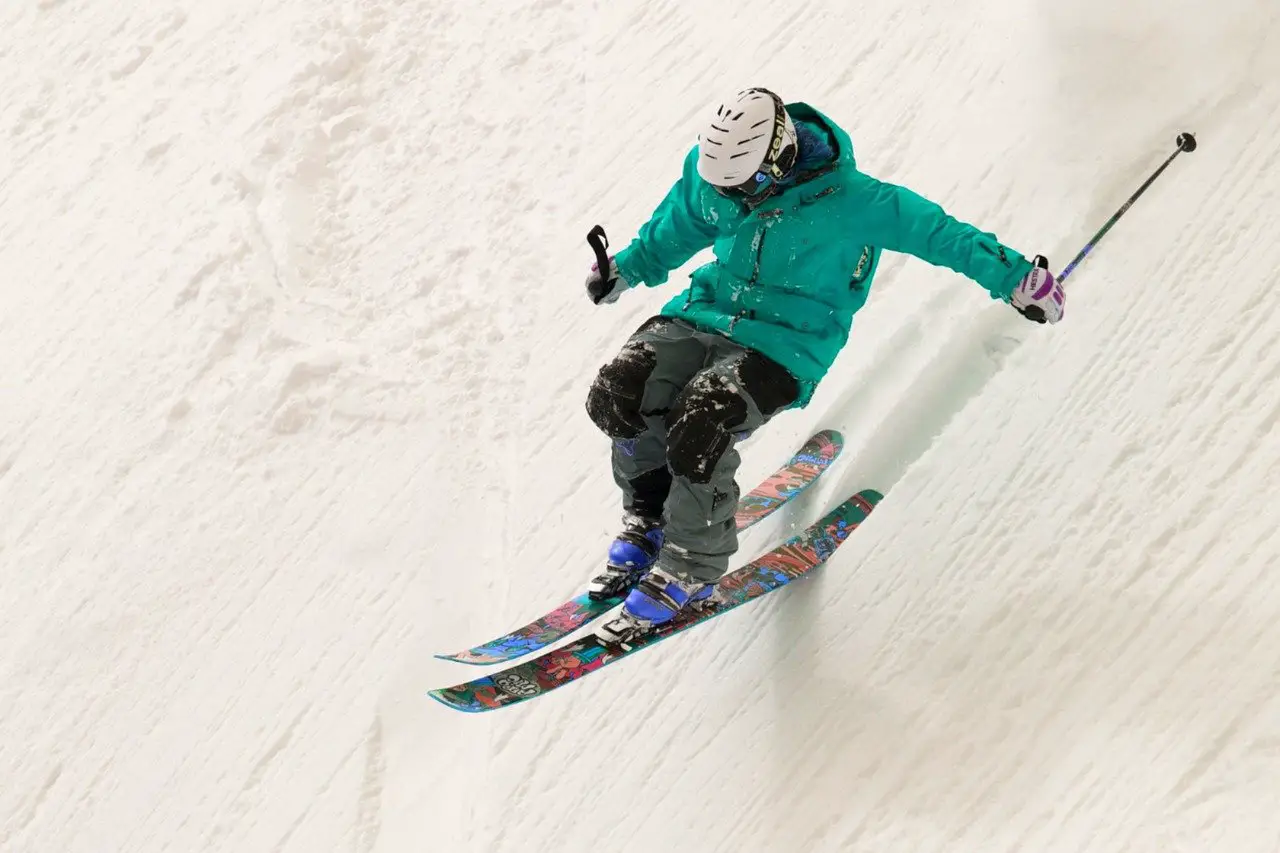
So now you know the basics about ski length, width, sidecut, camber and rocker. The next step is to match the right ski design with your skiing style and ability!
Picking A Ski For Your Style and Preferred Terrain
There are optimal skis for every terrain type, style and ability levels. Personally, I have 3 different pairs of skis. A set for powder/off piste, a set for carving and a set for park. Having the right ski for the job will make your days so much better and will help you improve technically as a skier!
Types Of Skis
On-Piste Carving
If you love ripping up groomed terrain and want to charge hard laying down perfect turns into the corduroy. Look no further than a carving specific ski. Carving skis have a narrow waist width (typically between 64-80mm), are stiff and feature a significant sidecut. The small waist and big sidecut (hourglass shape) allow you to transition quickly and confidently between turns and hold a very firm edge on hard snow. Carving skis typically have a turning radius less than 17m and they are hungry to be in a constant state of transition from edge to edge. Carving skis with a smaller sidecut are meant for big GS type turns and skis with larger sidecuts are ideal for smaller poppy slalom type turns.
There are different ranges of carving skis suitable for beginners and performance skiers. Beginner models have slightly wider waists and more flex allowing for an easy and secure feeling turn. Performance carving skis are as stiff as hardwood and meant for an assertive and aggressive skier.
Less and less recreational skiers turn to skinny waisted carving skis these days. I’m a huge advocate for learning how to properly carve and believe it’s an integral component of skiing technique and always recommend a carving style ski to anyone who is serious about improving their technical skiing abilities.
Once you try a carving specific ski on groomers you’ll never want to take your all mountain ski on-piste ever again! Although the small waist gives you an advantage on the packed snow it can be a challenge when turning in deep powder!
I Recently tested a Blizzard Thunderbird Sport Ti ski and absolutely fell in love. It ripped the groomers like a race specific ski and crushed all the other aspects of the resort and snow types. You can check out the specs and get more details HERE.
All-Mountain
All mountain skis are the most popular option for recreational riders that want one ski that can do it all! Your run of the mill all-mountain ski is anything with a waist width between 80-95mm. Most newly designed all mountain skis have a little bit of rocker so you can ski on and off piste with ease. Their turning radius is typically between 17-22m allowing for easy cruising and hard shredding. For an average day on the slopes at your local resort all-mountain skis will provide the best overall experience no matter what the weather decides to do.
If you’re in the market for an All-Mountain that can do it all. Take a look at the K2 Mindbender 99Ti. I’ve tested the Minbender numerous times and it is a resort killer. It’s stiff and has great edge grip for those hard packed days but also has loads of play offpiste. You can check out the specs and get more details HERE.
All-Mountain Freeride
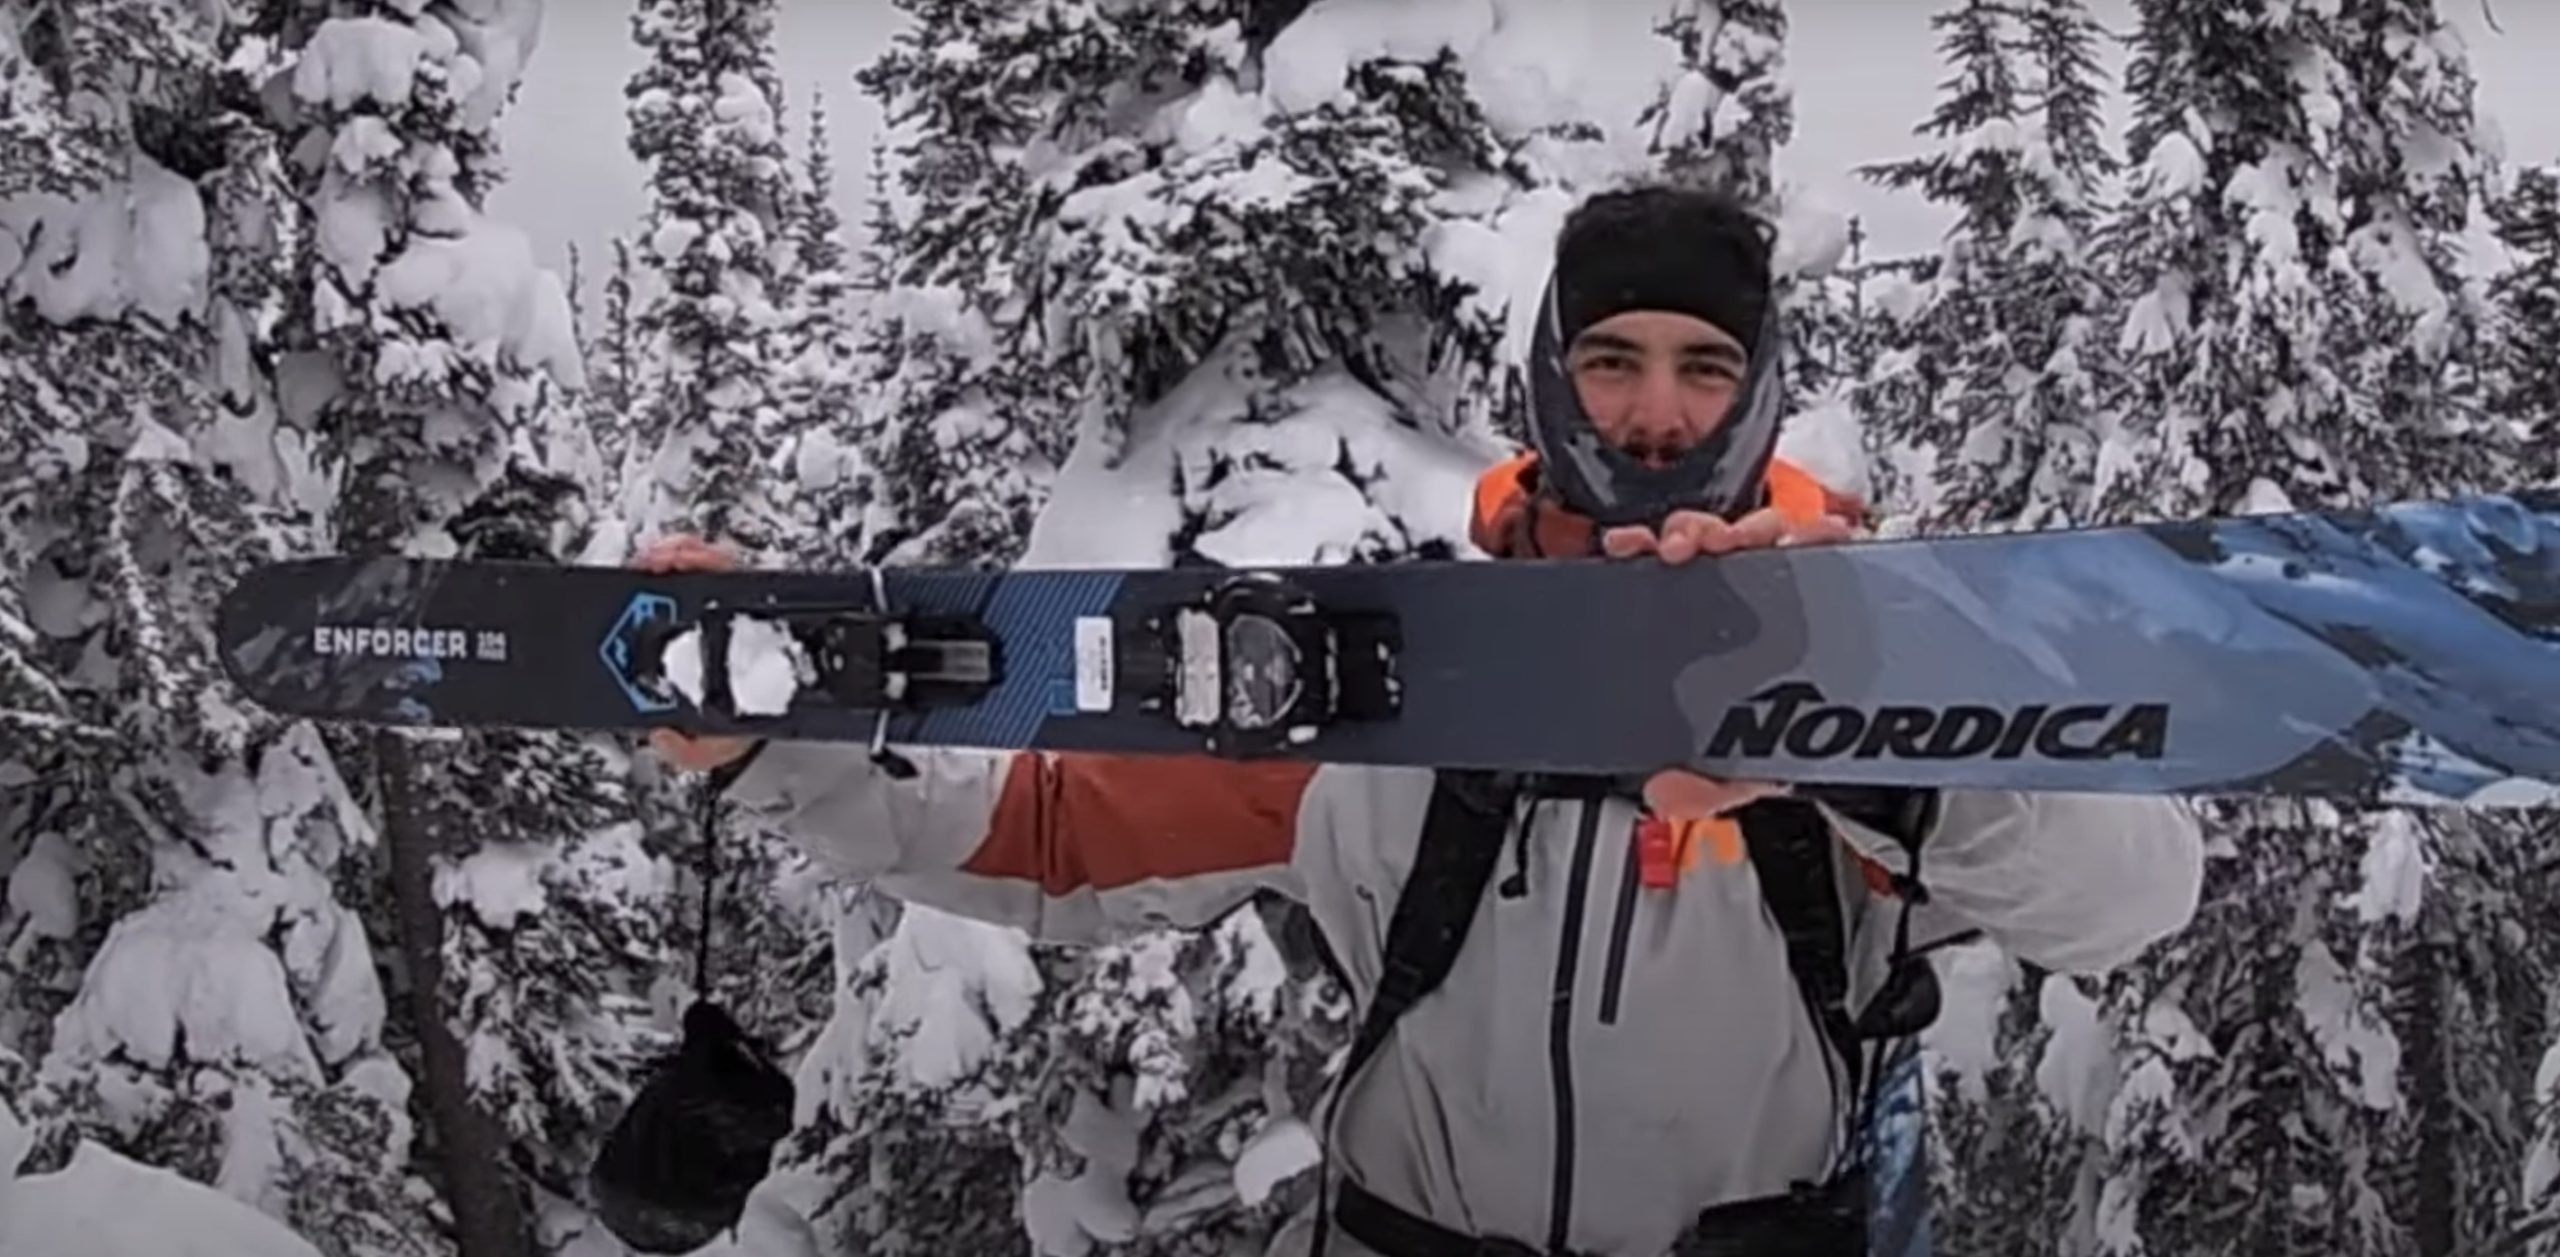
If you are a powder junkie who likes to ski the gnarliest terrain possible while hunting for a new natural feature to jump off then you need a Freeride ski. All-Mountain Freeride skis are wider than traditional All-Mountain skis (95-110mm waist width) and are flexible in the tip with large rockers. This large rocker and thick waist allow you to float in pow all day long and will help disperse your weight and save your ACL’s from exploding when dropping of mammoth cliffs. Freeride skis usually have good play so you can ski bumps and a variety of terrain with ease while still having solid edge shredding down a couloir. All-Mountain Freeride skis don’t perform well on the hardpack, but the new technology is making them better and better on crud and on-piste.
I tested out the Nordica Enforcer 104 Free 2023 skis this season and fell in love with them. They had loads of play and float but also held their own on the resort groomers and crud. I can’t say enough good stuff about the Enforcer 104 Free. They absolutely Rocked!
If you want to explore some of the best Freeride skis of the year, I encourage you to take a read through my top picks.
Powder
A big day requires a big ski. Powder skis are usually larger than 110mm underfoot and some of them are clinically obese with waist widths over 130mm. All powder skis have a form of rocker and some even have zero or reverse camber like water skis. These skis are built for powder but thanks to new technology aren’t as useless on adverse conditions as they used to be. Although they won’t feel amazing on harder snow, they’ll get the job done until the next snowfall arrives.
One of the most popular and award winning powder skis which actually performs surprisingly well on a variety of conditions is the Atomic Bent Chetler 120. It’s the king of skis to have clipped to your feet on powder days and will still treat you well on most resort days.
Touring/Backcountry
Any skis can be a touring ski if you drill a set of touring bindings into them. Ideally, a touring ski will be a tad shorter in length and have a medium width in order to keep things light. When touring you’ll be climbing uphill most of the time and will be thankful that you opted for a wood core or carbon ski over metal laminates!
If you are looking for a Backcountry Specific ski Check out the Salomon MTN Explore 88. They performs exceptionally in the high alpine and its small waist width makes them extremely efficient on the uptrack.
Park/Freestyle
Park skis are designed to be super playful allowing you to butter through turns, spin easily and slide rails with ease. They have a very soft flex rating and an average to semi wide (85-100mm) waist width. You can have loads of fun messing about on park skis without going the speed of light.
I’ve only owned one pair of park skis in my life! A set of Armada T-Hall’s from 2001. They are old technology but when you’re beating skis up on rails who the hell cares. I love em’ but I’m sure the technology has greatly improved. Go a little smaller in length when buying park skis, especially if you are starting out so they can be more maneuverable when you’re spinning and flipping.
If you’re doing some research on park skis make sure you check out Faction! They are an awesome brand that designs loads of park specific twigs. I recently did some laps on the Faction Prodigy 2.0 and found spinning of jumps and sliding rails to be effortless.
So Now You’ve Decided On A Pair Of Skis…
How Long Should Your Skis Be?
How To Choose the Right Ski Length
Your ideal ski length can be determined by taking into account your style of skiing, physical build and skill level. Here are the basic ski length parameters I would recommend based off your preferred terrain and height.

Park/Freestyle Skis : Choose a ski 5-10cm shorter than your actual height.
Keeping them short and light will help you be more nimble and spin easily.
Touring/Backcountry Skis: Choose a ski +/- 5cm but any size goes (shorter is lighter for the uphill but longer can improve floatation and downhill performance)
All-Mountain Freeride Skis: Choose a ski that is 5-10cm longer than your height. You want the ultimate floatation, stability and landing pad when dropping off cliffs.
Powder Skis: The longer you can control the better! Choose a ski that is 10cm+ taller than you for maximum float in the fluff.
All-Mountain: Choose a ski 5cm less than your actual height (eyebrow height). This is the ideal length to be nimble and crush all sorts of terrain on your home resort.
Carving Skis: If you like making short and snappy carves Choose a ski 15cm shorter than your height. If you like to command the hill and make large fast GS type turns choose a ski close your height or higher for maximum speed.
Take Your Weight Into Account
If you are heavy for your height choose a longer ski that’s stiff because it is going to be a much more stable ride.
Within these recommendations you can go longer or shorter depending on your preferences. Remember that the longer the ski, the more stability you will have at speed and better flotation on powder but the larger your turning radius will be. Shorter skis will have a tighter turning radius but less performance off-piste.
Best Place To Buy Skis Online
So now you know everything there is to know about ski measurements, why they matter, and what type of ski is best for your skiing. The next step is to pick the perfect pair of skis. I like to do all my ski shopping on evo.com. They’ve always got the newest and greatest in stock, shipping is free and you can pair your skis with the ideal set of bindings.
My Perfect Quiver
If I had all the money in the world this would be my perfect quiver.
The Nordica Enforcer for 104 Free as my daily driver.
The Bent Chetler 120 for big pow days.
Blizzard Thunderbird Sport Ti to carve on the hardpack days

Demo Before Buying
I’d always recommend heading off to your local demo centre/rental shop and trying out some skis before purchasing. I’ve had many instances where I did loads of research, thought I found the ideal ski for my needs and hopped onto a demo set that I absolutely hated. In this particular instance I thought I would have a loved a stiff powder ski but it turned out I like something a little softer and flexier for playing around in the trees and bumps. If you demo you can find the skis that are best for you and purchase them fora deal on evo.com.
Owning Multiple Skis
All serious skiers need more than one pair of twigs! In the end I think it’s important to be realistic and understand that for most expert/performance skiers you will never come across a compete quiver killer. Nothing feels better than carving the hard pack with carving specific skis or floating in 40cm of powder on your big freeride planks. I have 3 skis in my quiver and it is constantly growing and changing.
Understanding the ski measurements, sidecut, rocker, camber and length and how they change the performance of any given ski will help you best choose the ski that suits your needs and ability.
Have Fun Picking Those Perfect Planks!
Let me know if you have any ski questions in the comments.






4 Responses
I really appreciate your ski buying guide. Could you also provide a guide on ski bindings? I’m struggling to choose the right ski bindings and mount them in the correct position.
Thanks Yu! That’s a great idea, I’ll get working on one 🙂