
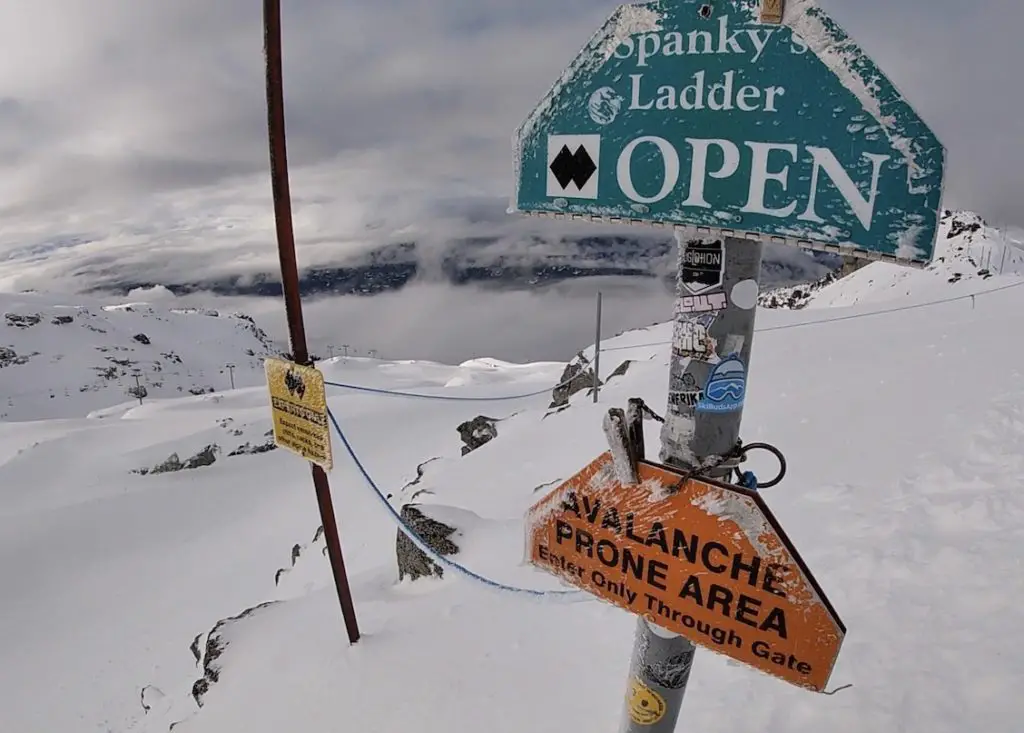
Spanky’s Ladder is one of the most epic on resort free-skiing playgrounds in all of North America. It’s my all-time favourite area to play around on Blackcomb mountain and I hardly spend a day at the hill without doing at least one Spanky’s lap.
Most locals refer to the entire area as Spanky’s Ladder. However Spanky’s Ladder is just the name of the 15 meter boot-pack required to reach the top of the Gemstone Bowls. The Gemstone Bowls is the formal name for this zone. Four bowls, Garnet, Sapphire, Ruby and Diamond make up the Gemstone Bowls. They are all fantastic and there are countless lines through the bowls that vary in difficulty level.
Spanky’s ladder can feel quite intimidating for first timers who hike up and have absolutely no idea how to ski down. I remember the first time I climbed up the ladder. It was a foggy, windy and I was scared out of my wits. When I got to the top I was breathing heavy and couldn’t see a darn thing. I looked everywhere for trail markers but other than cliff warning/closure signs there were no trail markers. I decided to wait until some more skiers climbed up, asked them for advice and followed them down.
There is no specific map pertaining to Spanky’s on the Whistler Blackcomb trail map. I think this is part of the allure and makes the area feel more exciting and remote. To ski great lines in Spanky’s you just have to do a little bit of research, exploration and planning.
The first step is to become familiar with the basic routes and chutes down each bowl. Once you feel comfortable in the area you will be able to ski a little more aggressively and focus on enjoying your turns instead of waiting for the next monster cliff to appear in front of you. Personally, I need to see things to remember them, so I’d also recommend you review my Complete Video Guide to skiing Spanky’s Ladder when you’re finished with this post.
This post will teach you everything you need to know about Spanky’s Ladder and the Gemstone bowls so you can enjoy them as much as I do when skiing and riding at Whistler Blackcomb.
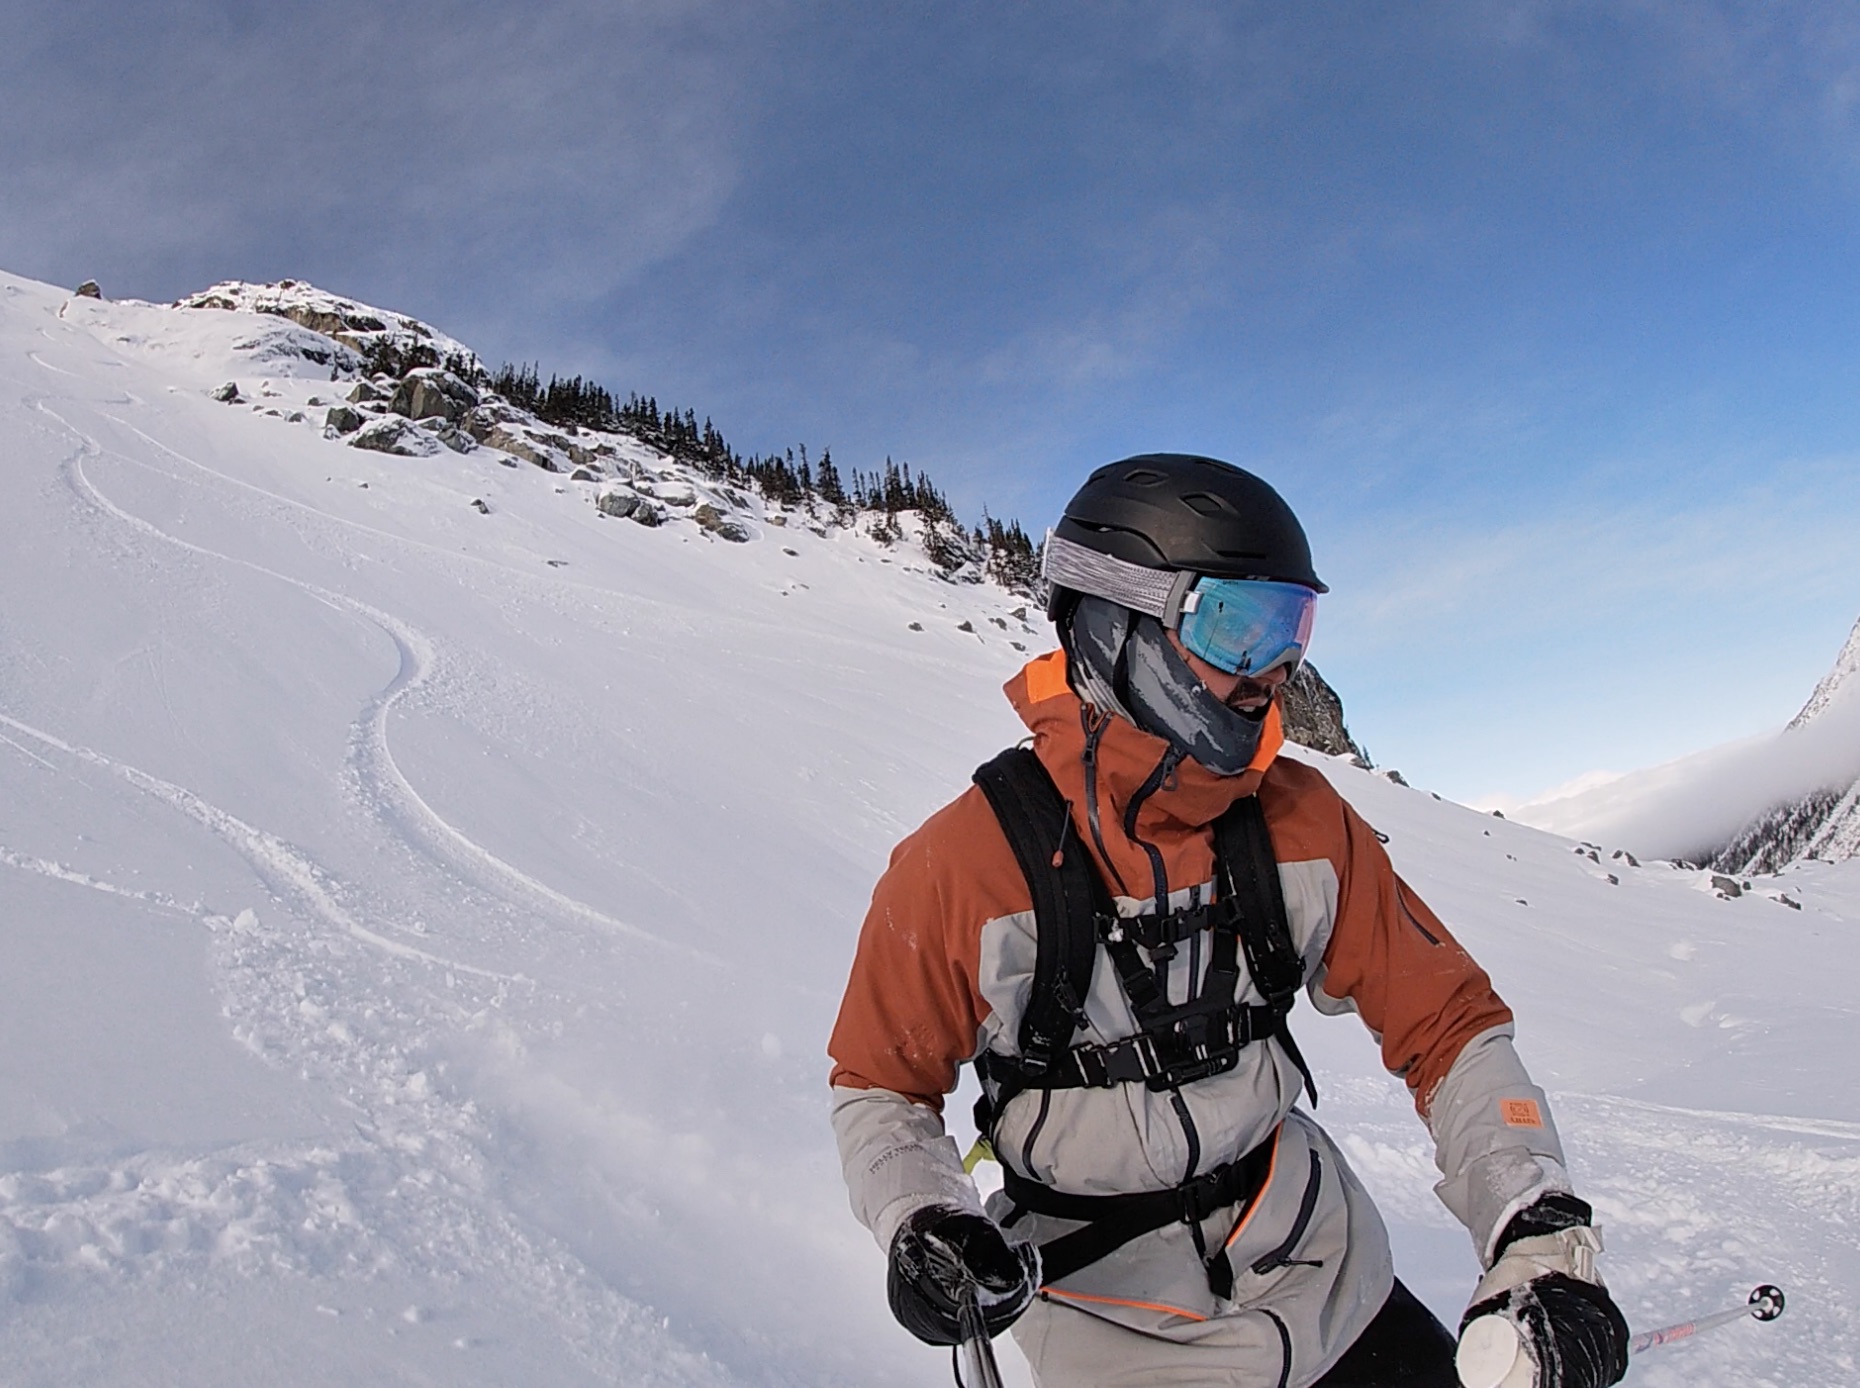
Spankys’s Ladder is serious terrain so make sure you’re always wearing you brain bucket! If You’re looking for some high quality helmet picks, here are my favourites!
Spanky’s Ladder History
The Gemstone Bowls were named by Peter Xhignesse (A legendary ski patroller who was the first Avalanche forecaster on Blackcomb Mountain) and Hugh O-Reilly (The Whistler Mayor). They had just named Crystal Ridge and agreed that the area was so epic it deserved a name more valuable than Crystals. The rest is history and the Garnet, Diamond, Ruby and Sapphire bowls were born.
Where Is Spanky’s Ladder?
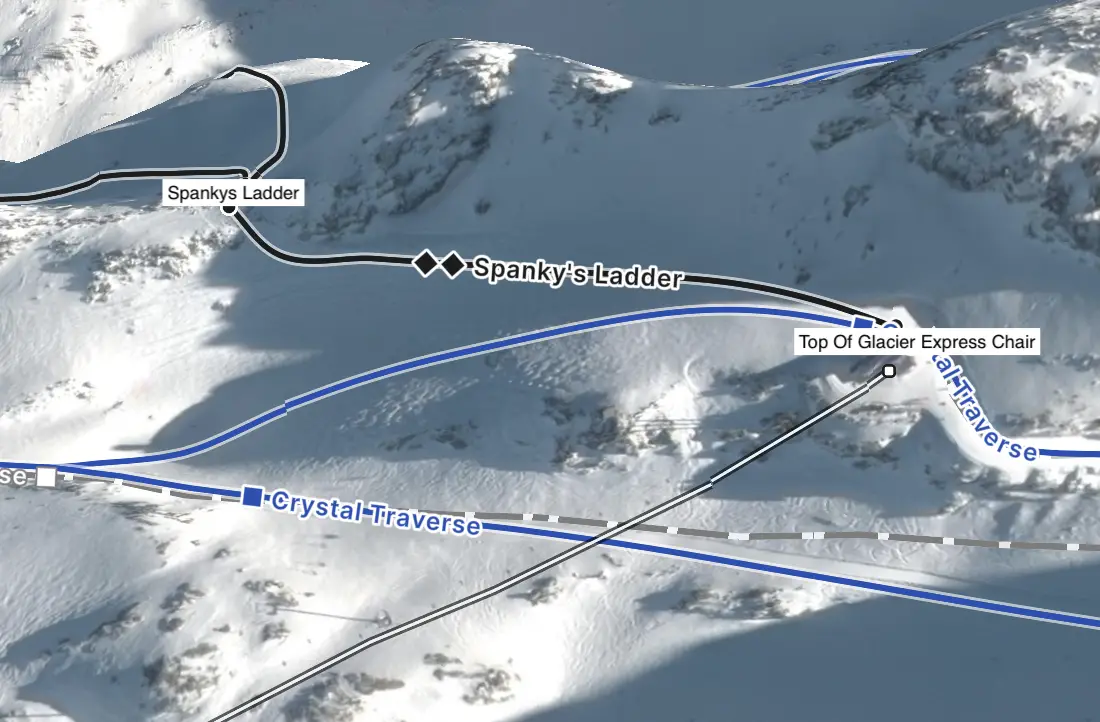
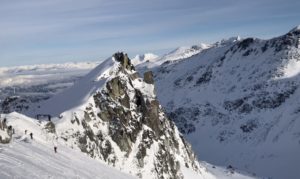
Finding Spanky’s ladder is very simple. Start on Blackcomb mountain and head up the Glacier Express chair. As you near the top of the lift you will likely see many skiers to the left scaling the short boot-pack up onto the ridge. Exit the chair and turn to your left. Traverse staying to the right along the mountainside until you arrive at the base the hike. This is the only entrance into Spanky’s and there will almost always be other people ascending with you. Do not hike up any other way as it is prohibited and will result in losing your pass. You will need to take your skis off, pop them on your shoulder and follow the well walked boot trail up the ladder. If this is your first time hiking in your ski boots make sure to kick your toe piece into the snow for extra grip. People like to hike fast up the ladder so don’t stop to catch your breath until you reach the top.
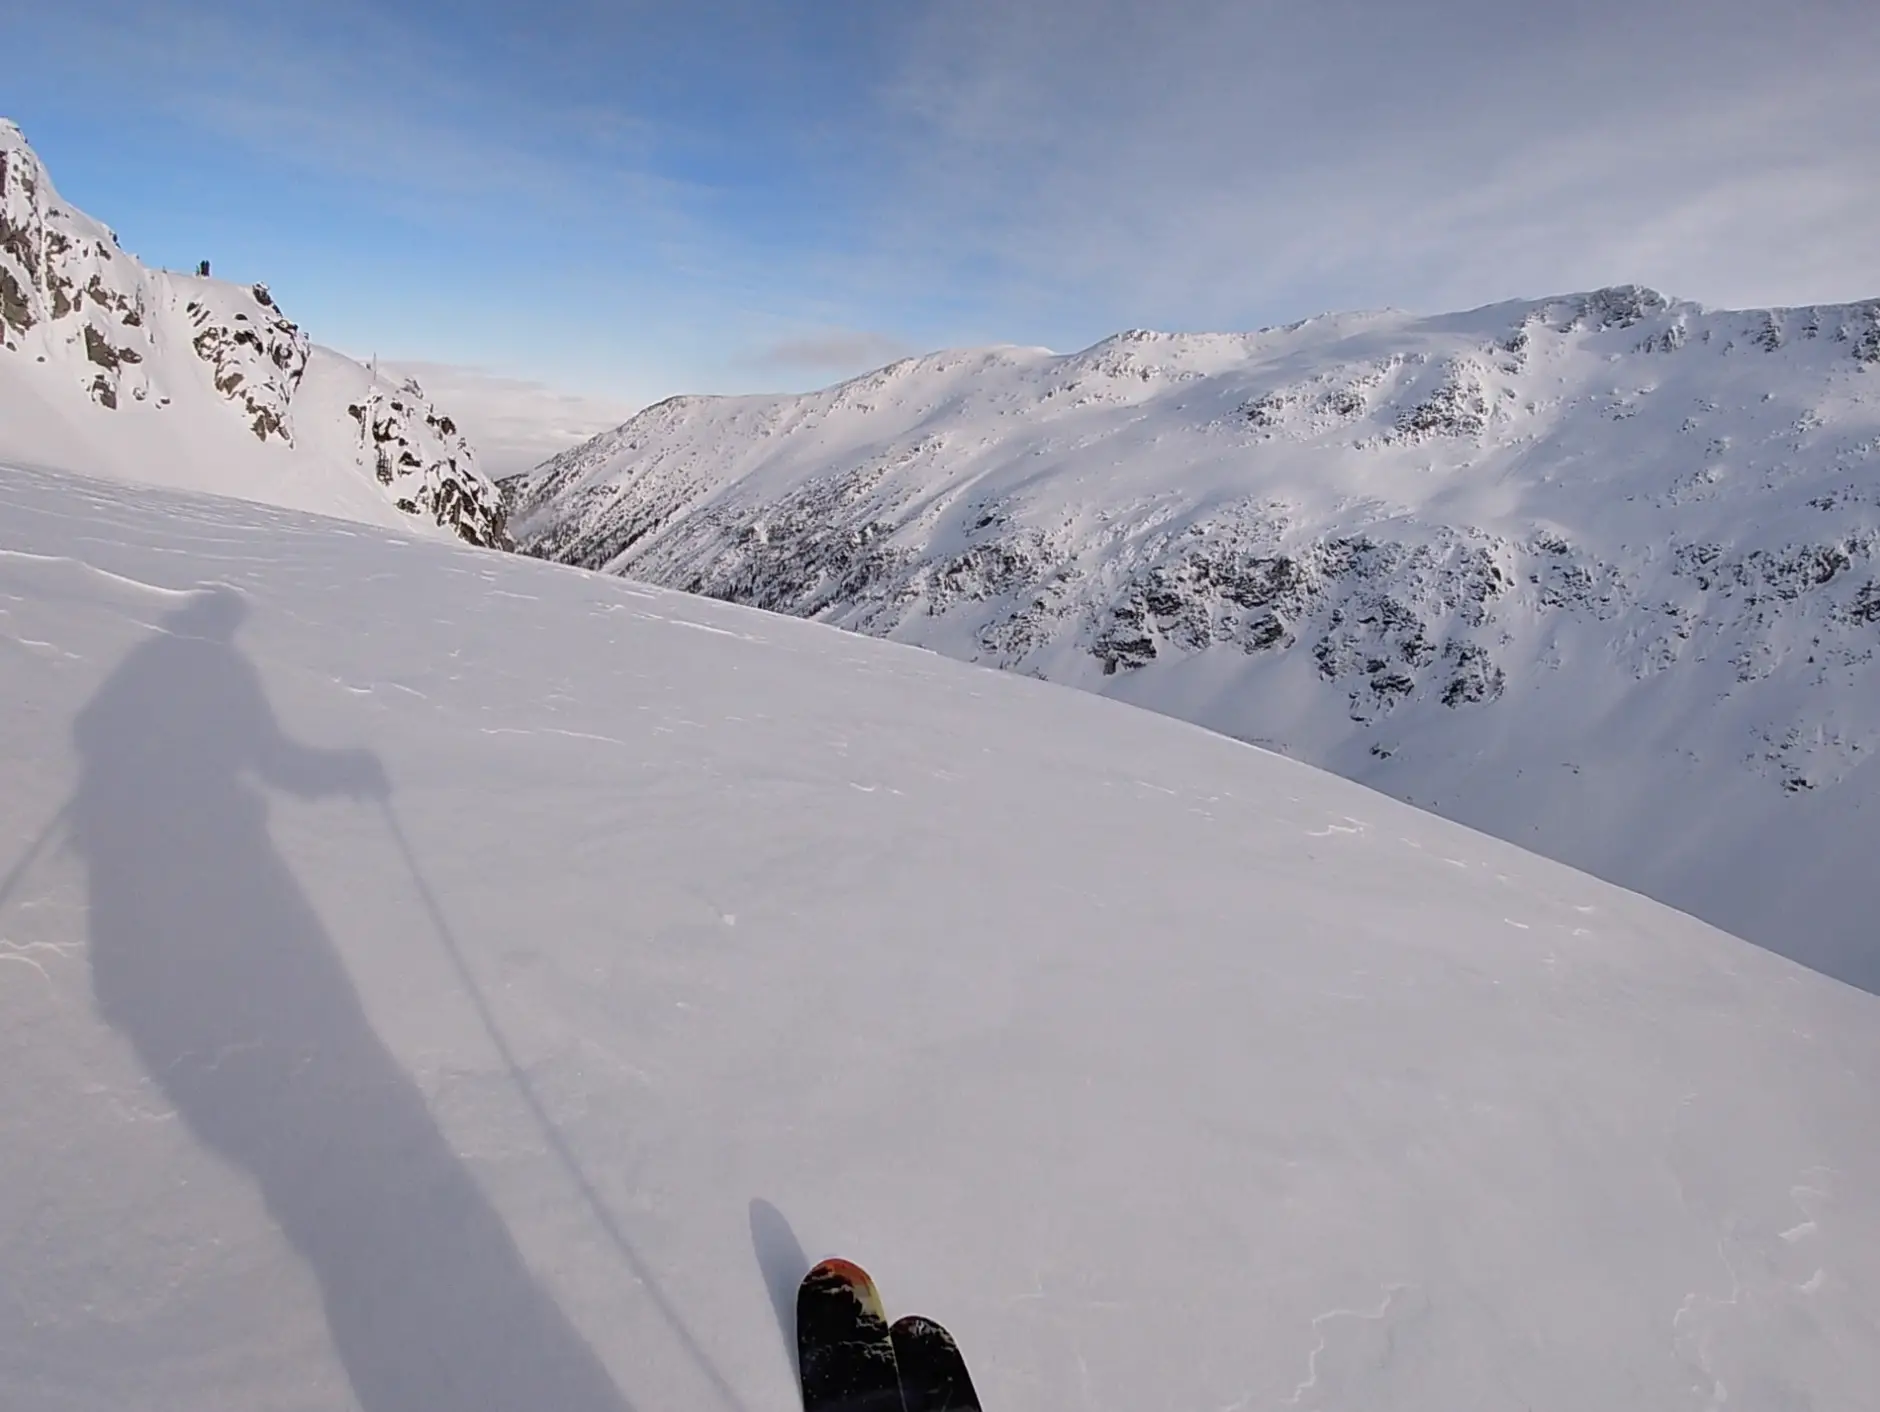
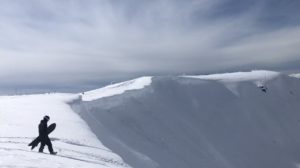
When you arrive at the top, catch your breath, enjoy the views and get ready for an amazing descent.
Garnet Bowl
The Garnet Bowl is the upper bowl that funnels skiers into one of the three bowl options. If you traverse high right on the Garnet Bowl you will be headed towards Sapphire, to the left is the Ruby Bowl and dead ahead is the Diamond Bowl. Skiing directly into the Garnet Bowl and traversing to skiers left towards the Ruby Bowl is known as Spanky’s Shoulder and is the EASIEST route down any of the Gemstone Bowls. This route is rated as a double black because of the various cliff hazards that exist but it can be conquered by any confident and competent black diamond skier.
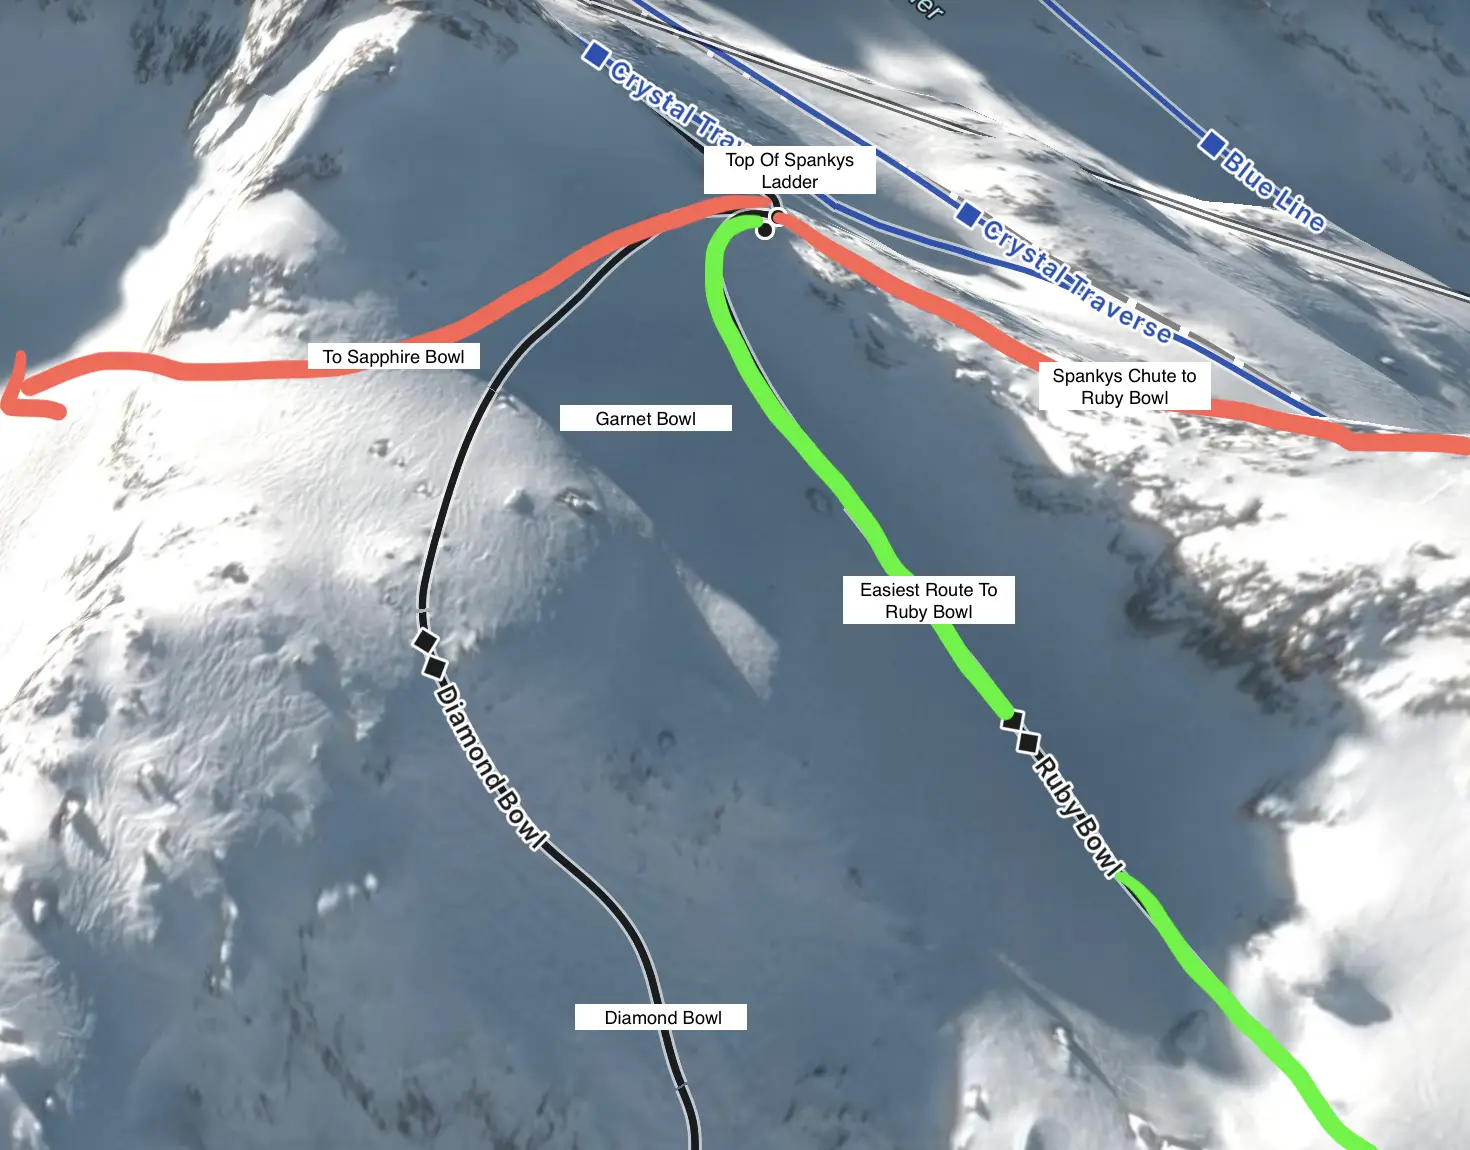
Ruby Bowl
The Ruby Bowl is the bowl furthest to the skiers left. It can be accessed either by a low or high entrance. It’s the most popular of the three bowls and is usually the first to get skied out on a powder day. My favourite way to ski the Ruby bowl is to start up on Spanky’s Chute, stay right above the cliffs on Skid Lips and finish on Playland.
Spanky’s Shoulder (Low Entrance to Ruby)
This is the easiest way to ski Spanky’s Ladder and is the line I recommend for your first ever run in Spanky’s. Traverse to the left and through the Garnet Bowl to the left of the cliff ropes on your right. Then follow the rolling slope into the Ruby Bowl. If there is substantial snow coverage I would personally rate this route as a single black diamond. Always stay well clear of cliffs and take your time because there are many small cliffs and big rocks scattered throughout the bowl.
Spanky’s Chute (High Entrance to Ruby)
From the top of Spanky’s Ladder stay left on the ridge and traverse until you reach the obvious entrance to the Ruby Bowl at the far end. There are several ways you can ski the upper section of Ruby. The line furthest to skiers right tends to be the least icy if you want to turn. Sometimes if it’s an ice sheet I straight line closest to skiers left on the rock and take my first turn on the softer snow below.
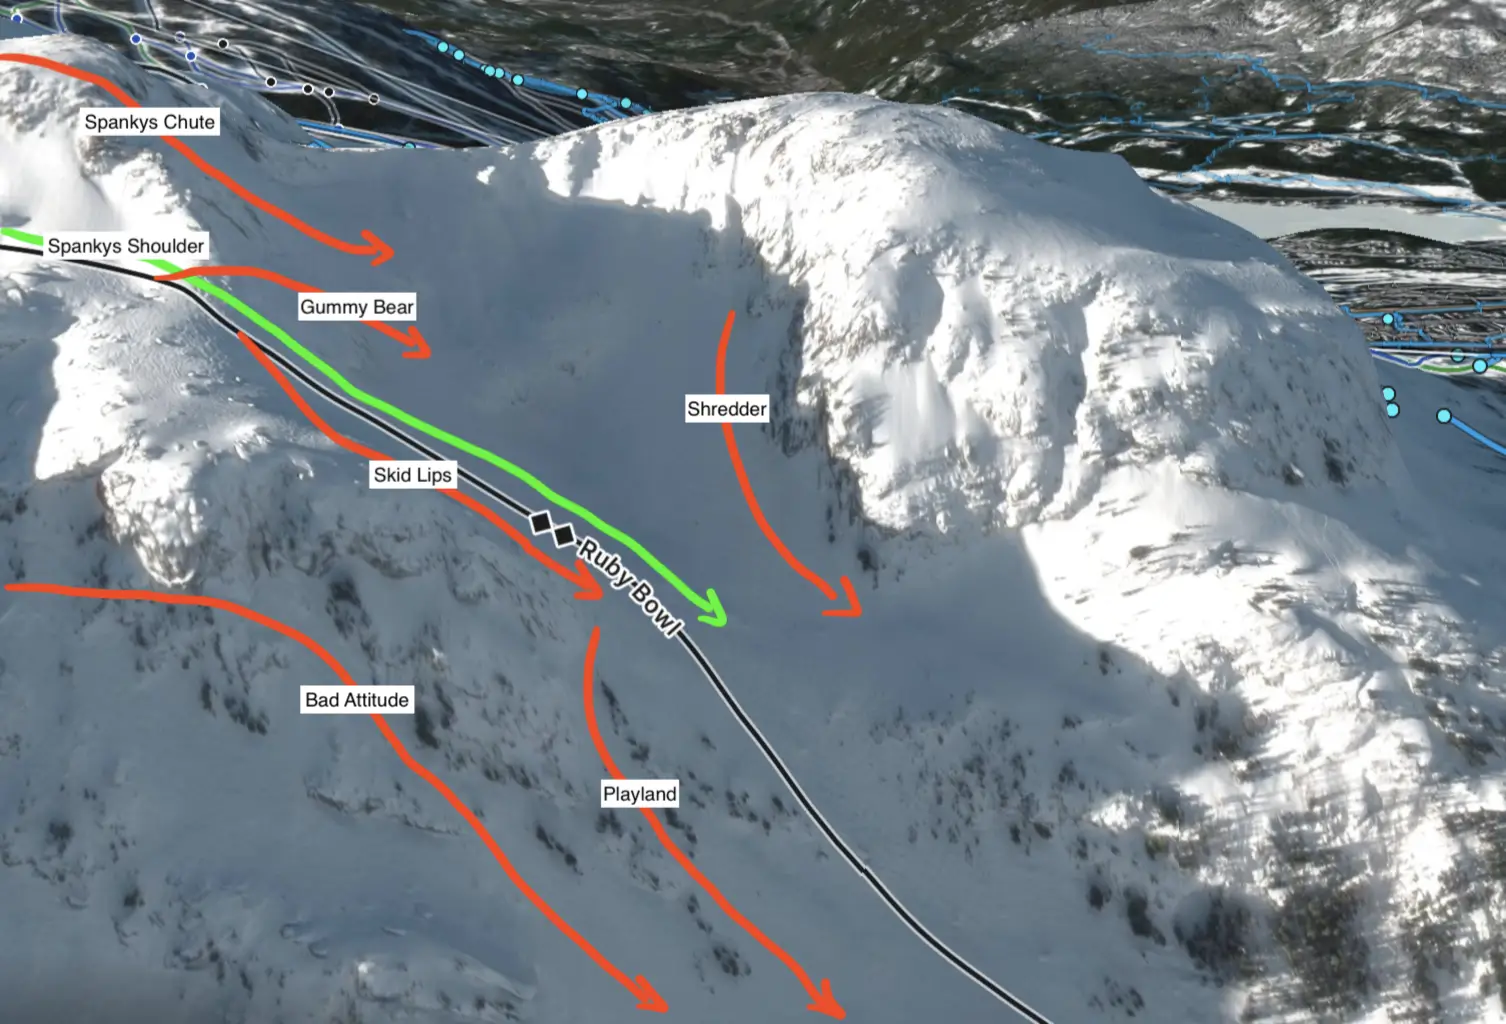
Gummy Bear
A sweet zone of snow located at the bottom of Spanky’s Chute. You can also access gummy bear by staying left off of Spanky’s Shoulder navigating around the cliffs to the right.
Skid Lips
This line is just to the right of Spanky’s Shoulder. It hugs the rocks on the right side of the Ruby Bowl. It is nice and steep and tends to hold decent snow. Be careful to not go to close to the cliffs on your right because they are huge!
Playland
At the bottom of Skid Lips hang a right at the obvious opening where the rock ends before the trees start. There is an awesome and decently wide chute (Playland) which is so much fun to ski down. Its steep and reminiscent of a mini halfpipe that you can jump your way through. Near the bottom right side of playland there are some small chutes and cliff drops that can be pretty fun when there is substantial snow.
Shredder
Traverse over from Spanky’s chute. Stay as high as possible on the hillside to maximize the amount of turns you get on the descent. Once you reach the rocks you will see a tight couloir above you known as Shredder. You have to waste some fall line and turns to traverse to the far left side of the Ruby Bowl but your efforts will aptly be rewarded with fresh turns!
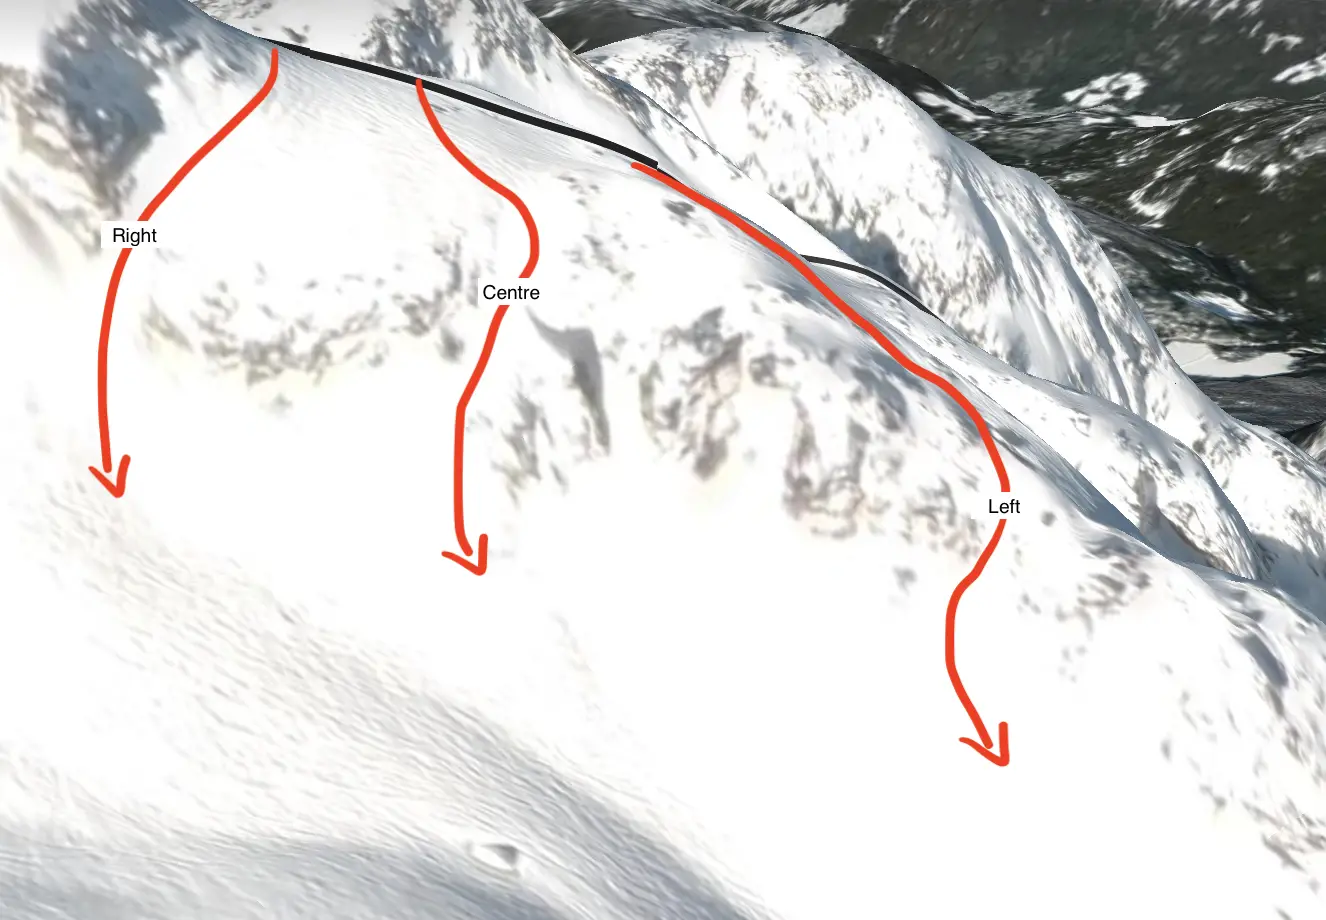
The Diamond Bowl
The Diamond Bowl is the middle bowl of the Gemstones. The Diamond Bowl is a favourite among many skiers as it offers the most skiable vertical with the least amount of traversing. There are three different options to enter the diamond bowl. Diamond Roll (Right), Diamond Centre, and Diamond Left. Diamond Centre is the simplest and least exposed route into the Diamond Bowl. My favourite line in the diamond bowl is simple. I like heading entering via the centre entrance and skiing straight through the middle, less thinking + more turns = the most fun!
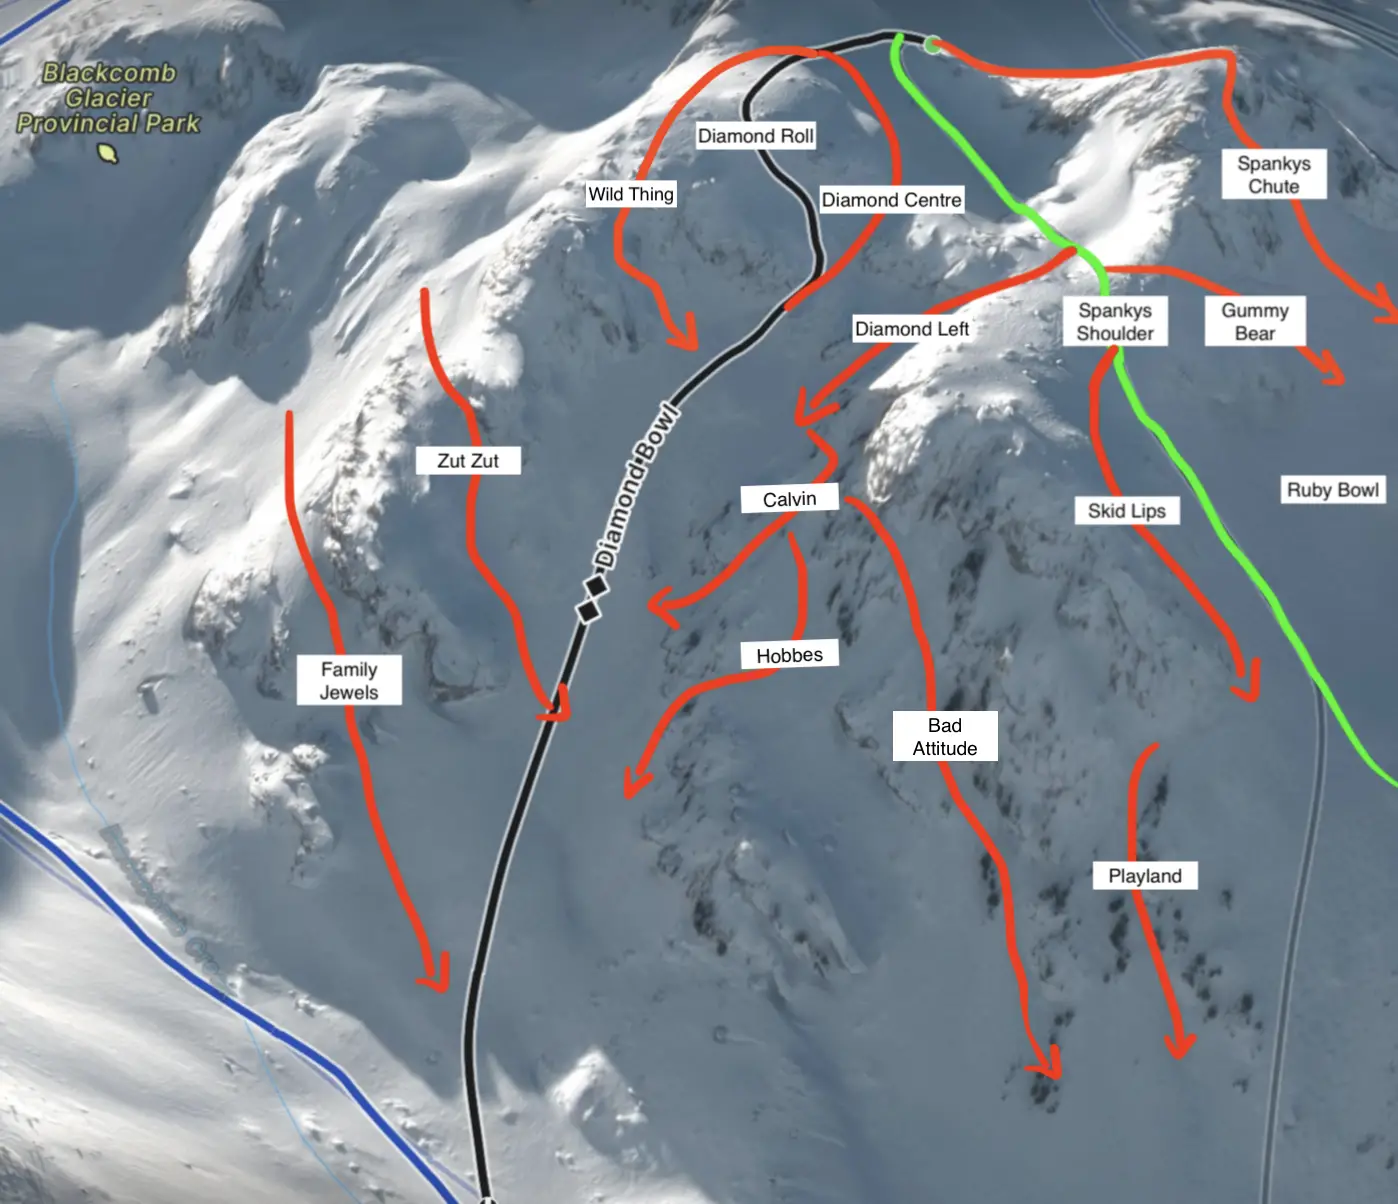
Wild Thing
Another sneaky and tricky way to enter the Diamond Bowl is from top of the Sapphire Bowl. This one can get quite rocky and there are cliffs on either side so make sure you spot it from below before giving it a whirl. You’ll be rewarded with a few solid turns as you meet up with the main bowl.
Calvin
Enter from Diamond Left entrance or traverse across from Diamond Roll or Diamond Middle. Stay left and traverse just below the open area below the massive cliff. This line is seldom skied and often combined with Hobbes. The snow is often fantastic on Calvin.
Hobbes
Skied in conjunction with Calvin. Hobbes is the name for any of the short chutes that are located in the rocks below. Take a look at the different options and variations and choose the one that looks the best!
Bad Attitude
Accessing bad attitude involves a spooky traverse over some very large cliffs. Frankly, I think you have a pretty good attitude if you are willing to adventure above the cliff band below. On the descent hug the rocks on the left and enjoy. To spice it up even more add a little cliff jump off the rocks near the end!
Sapphire Bowl
The Sapphire bowl is located on the far right of the Gemstone Bowls. All of the entrances to the Sapphire Bowl are tricky, dangerous and exposed. Sapphire is undoubtedly the most challenging of the three Gemstone bowls and should only be attempted by expert freeskiers. Thanks to the expert technical entrances the snow in the Sapphire bowl is usually lasts for days after a big storms.
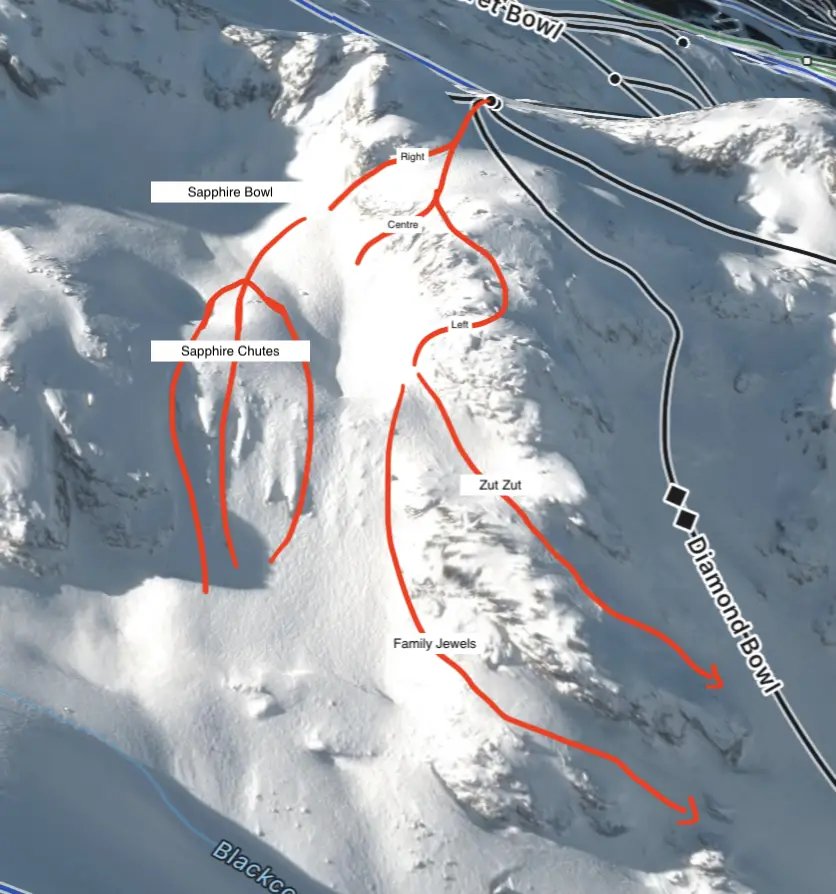
Sapphire Bowl Entrances
You can choose to enter on the skiers right, centre, or far left.
Far Right
The entrance on the far right requires straight lining through a chute underneath the bomb tram into the Sapphire Bowl below. This is my favourite, and probably the safest way to enter the Sapphire Bowl. Just wait to fall until you are out of the chute, the rocks on the sides are not forgiving
Centre and Far Left
Both these entrances don’t require bombing through a chute but they are much more exposed. Take your time skiing the centre and left entrance as these are no-fall zones. These entrances tend to be rocky and very icy because most people will opt to side slip them instead of ski through.
Sapphire Chutes
There are three main chutes you can ski down all of which are steep and loaded with fantastic snow most of the season. Make sure to watch out for cliffs/rocks in-between each chute, they can be hard to spot in flat light. My personal favourite is to stick to the chute to the skiers left and jump off the cliff at the end!
Zut Zut
Once you have entered the Sapphire bowl turn left into the first opening below the rocks. Snow really stacks up in here. Enjoy your turns and watch out for the monster cornice before the steep descent begins. Zut Zut will spit you out in the middle of the Diamond Bowl.
Family Jewels
Stay to the left of the Sapphire bowl all the way down. Enjoy your turns until you reach the second clear opening below the massive cliffs and hang a right. Keep on turning down and to the left until you reach the middle of the Diamond Bowl.
Please Note: Just because these lines are mapped out does not mean they are skiable. You will have to use your experience to make a judgement as to whether or not any given line is safe to ski. When steep skiing in chutes and near cliffs always ski and ride with a safety first approach.
Now you know everything there is to know about Spanky’s Ladder and how to navigate the Gemstone Bowls. I wish a had a guide like this when I was first becoming familiar with the area! It would have saved me a lot of spooky hikes above horrifying cliffs.
Your vision is important when you’re exploring Spanky’s so don’t forget a really good pair of goggles. Here are my top picks for ski goggles that you can trust to help you see cliffs, rocks and snow contours regardless of the conditions.
Have Fun Exploring Spanky’s!


2 Responses