
The Chief, formally the Stawamus Chief Mountain is the most recognizable hunk of rock in all of British Columbia. Its Gargantuan Granite wall towers 800m above the ocean in Howe Sound. Believe it or not, it is one of the largest Granite Monoliths in the entire world. Rock climbers flock to the chief all times of the year to have a crack at scaling its grandiose wall.
Fortunately, you don’t have to be an experienced rock climber to get up close and personal with the chief. Hikers of all skill levels can climb up to one or all three of the Stawamus Chief Peaks.
First Peak is the shortest and most popular of the three peaks. Second Peak is considered by most to be the best view and requires walking a more rugged trail. Third Peak is the true summit of the Stawamus Chief Mountain.
No matter which way you slice the pie it’s an absolute calf crusher on the way up and a knee Blitzer on the way down. Your pain will be aptly rewarded when you feast your eyes upon the unbelievable panoramic view of Howe Sound and the city of Squamish
This post will provide all the details you need for hiking the first, second and third peaks successfully.
Remember the Backcountry Basics
- Carry your Survival Kit & Essentials
- Let someone know where you’re going with a Trip Plan
- Know how to avoid negative wildlife encounters
- Practice Leave No Trace to keep the wilderness pristine
- Carry a Satellite Communicator like SPOT X
2021 Day Pass Required
From June 23rd to October 15th a free AM or PM day pass is required to hike the Stawamus Chief Trail. AM passes require arrival before 1pm and PM passes require an arrival after 1pm. There is a park ranger checking for day passes at the trailhead.
Table of Contents
Directions to The Chief Trail
It’s under an hour’s drive from Vancouver to the trailhead. From Vancouver, follow the BC-99 towards Squamish, continue 50km North until you reach the exit to the Stawamus Chief Provincial Park parking area on your right. If the parking lot is full you can also try parking in the lower lot, the Sea To Sky gondola parking lot or the Shannon Falls parking lot all within close walking distance from the trailhead.
Chief First Peak Out and Back (Most Popular)
The Breakdown
| Distance (Round Trip) | 3km |
| Elevation Gain | 540m |
| Time (Round Trip) | 1-4 hours |
| Dogs | Yes |
| Camping | No |
| Season | Year Round |
| Difficulty | Moderate (Some steep/difficult portions) |
| Remoteness | Very Busy |
| Highest Point | 613m |
The Route
When most people talk about ‘hiking the chief’ they are usually describing the trail up to the first peak. The first peak is the classic and offers hikers the opportunity to stand atop the massive rock wall you see from the highway.
The trail itself is very well marked, and easy to follow. It is usually very busy, especially in the spring/summer months so be ready for a crowd if it isn’t early in the morning or late at night. From the parking lot follow the wide gravel path until you reach the sign marking the trailhead.
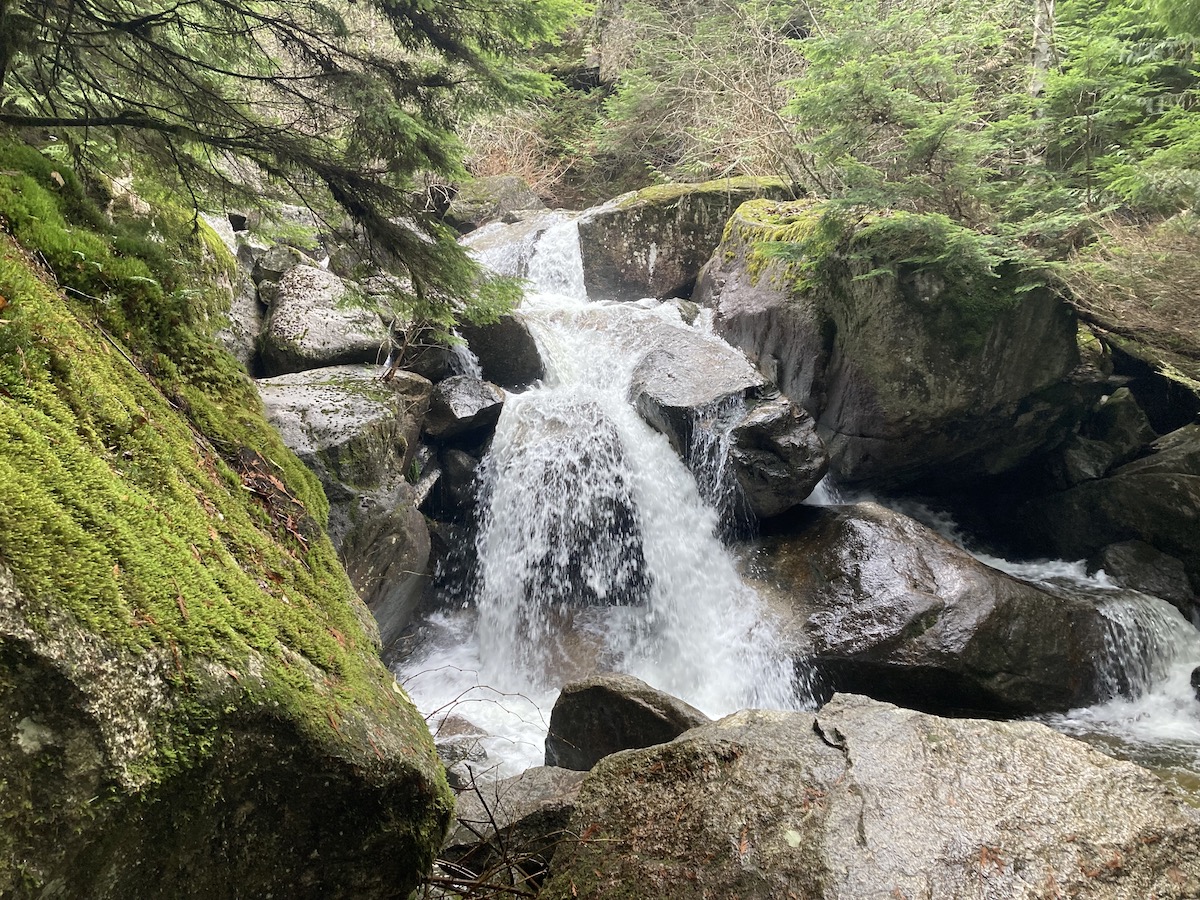
Right off the hop, the trail is relentless, punishing you with extremely high and steep stairs. The first 15-20 minutes of this trail is painful, but after that, it’s all pleasure. As you sweat and groan up the stairs you will hear the loud crashing of the Oleson creek to your right. It’s not your average creek. It’s a very steep runoff exhibiting many cool albeit rather small waterfalls and pooling areas. There are a few nice viewpoints where you can stop to catch your breath and take a look at the crashing water to your right.
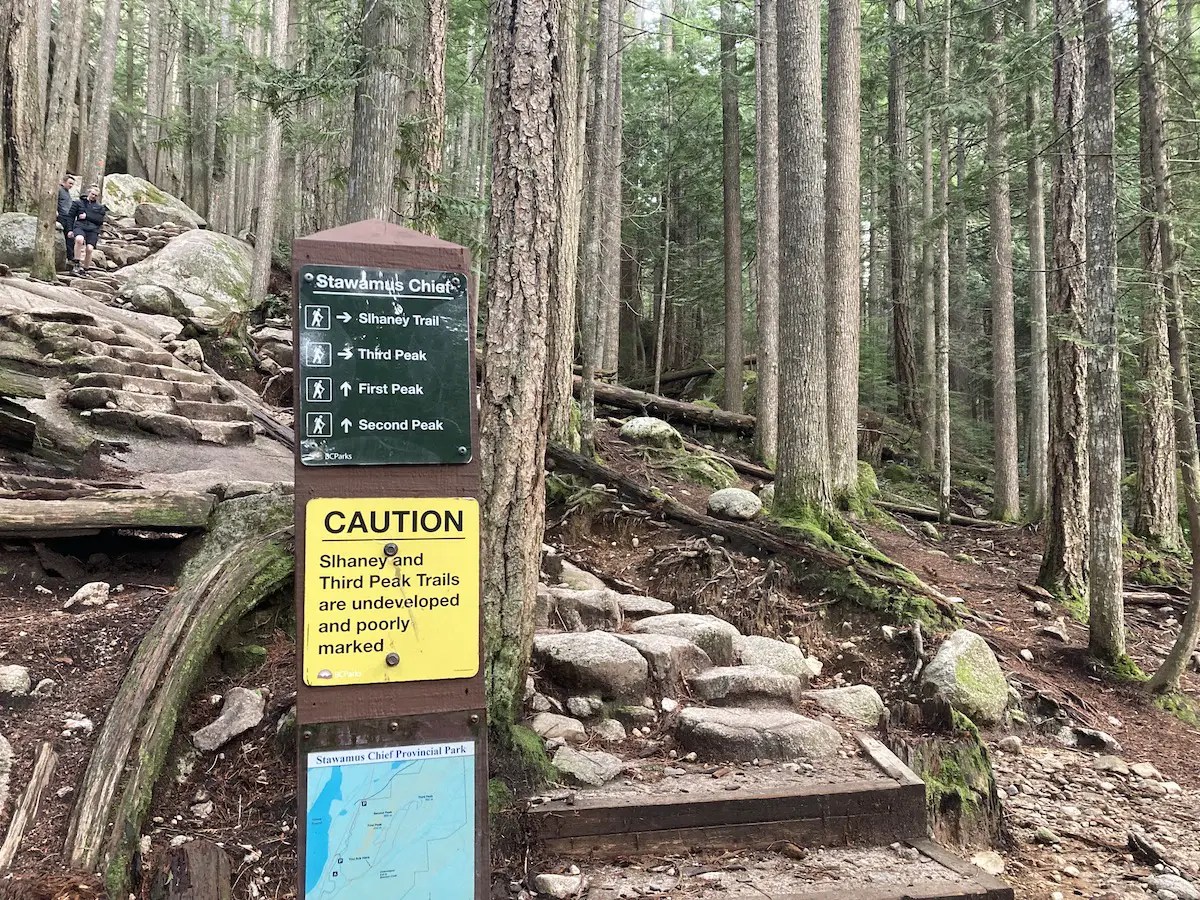
After about 15 minutes of nature’s stair climber the trail flattens out briefly and you will reach the first intersection. Right takes you along the sea to summit trail and left continues up the chief peaks trails. 100m ahead you will arrive at the chief peaks junction. The second and third peak trail veers off to the right again, and the climb to the first peak continues to the left.
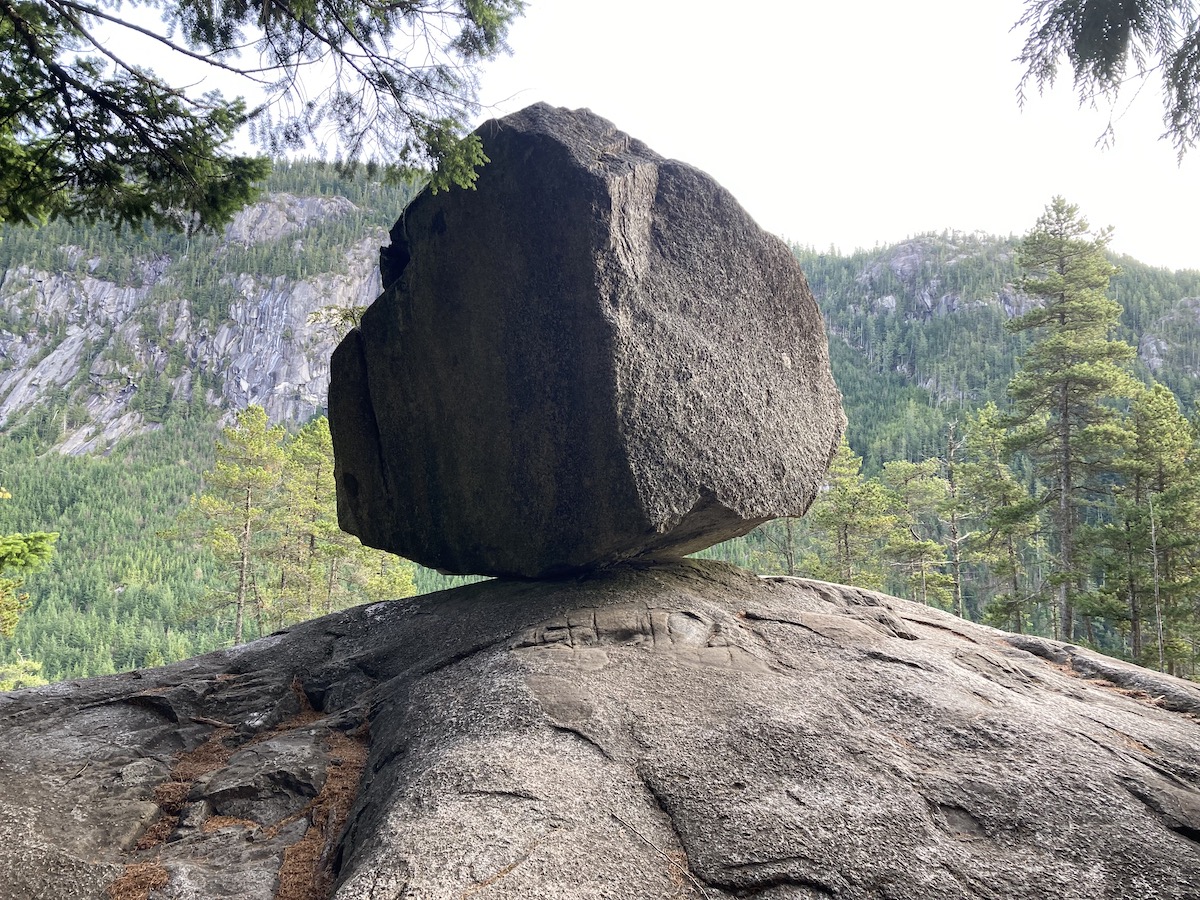
Shortly after the conjunction you will begin to climb steeply through the forest. Make sure to keep your eyes peeled for one of my favourite rocks in the park. I like to call this one the ‘circus rock’ because of its incredible balancing capabilities.
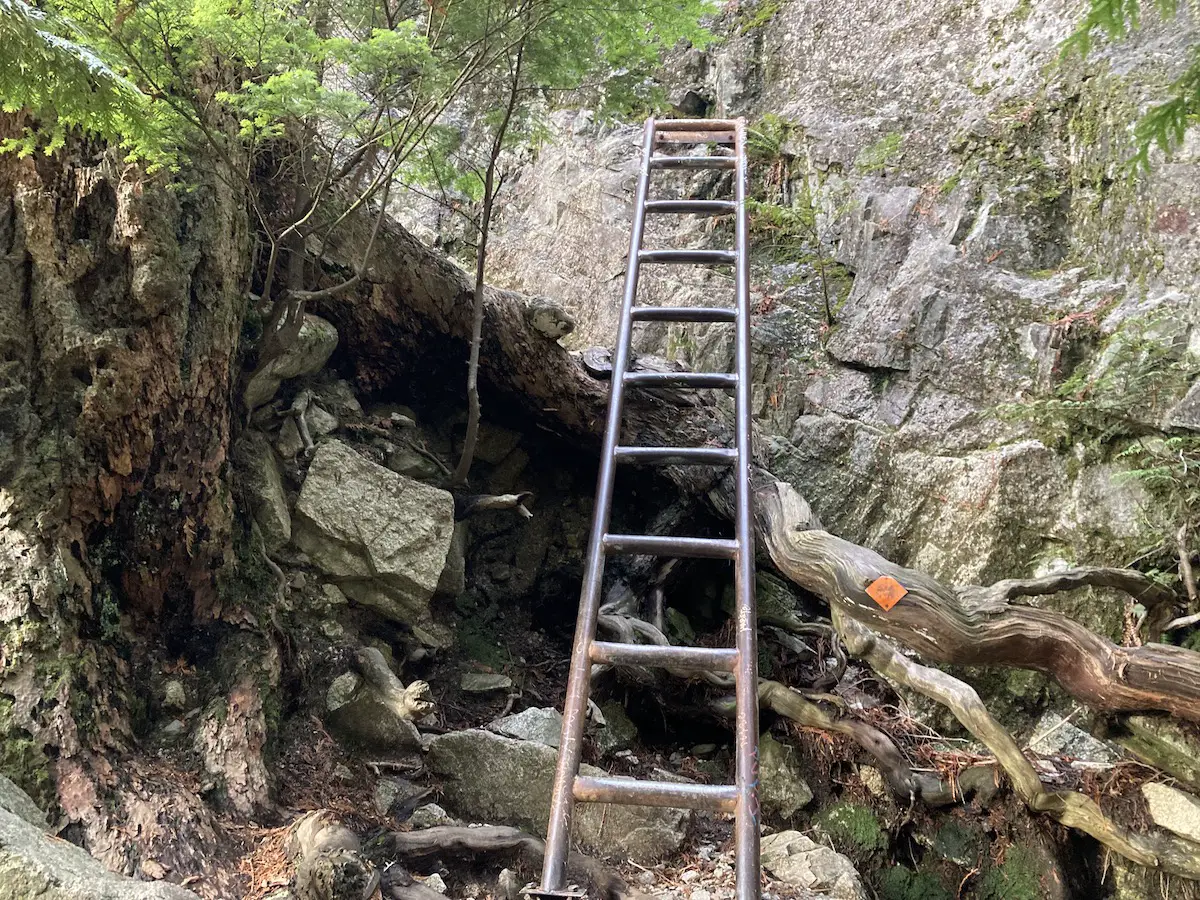
At the 1.5km mark things begin to get a lot more fun. As you edge closer to the peak you will be challenged with a few ladders and some chains helping you scramble up the rocks. Don’t get too excited and keep your eyes on the markers in the trees so you don’t veer off course on one of the little rock climber trails.
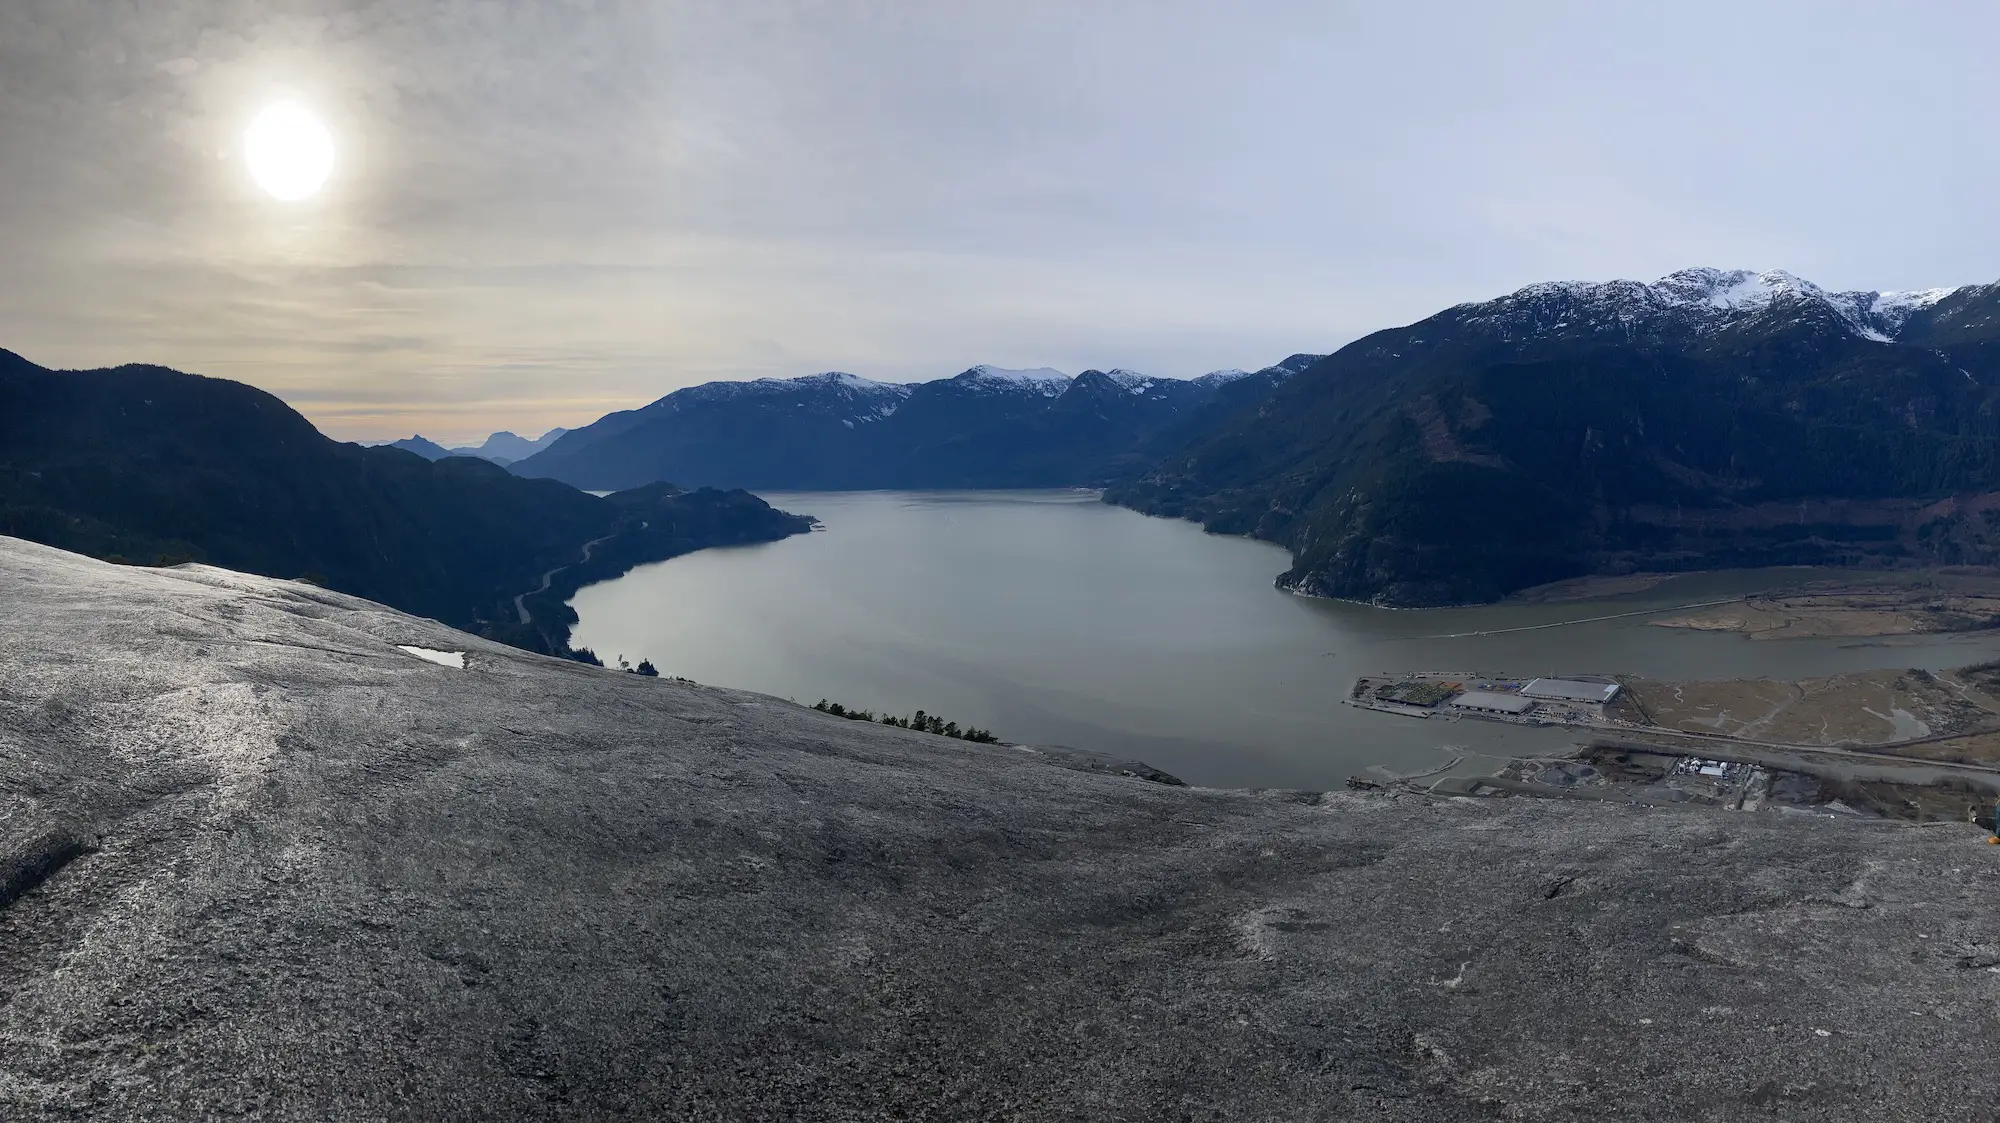
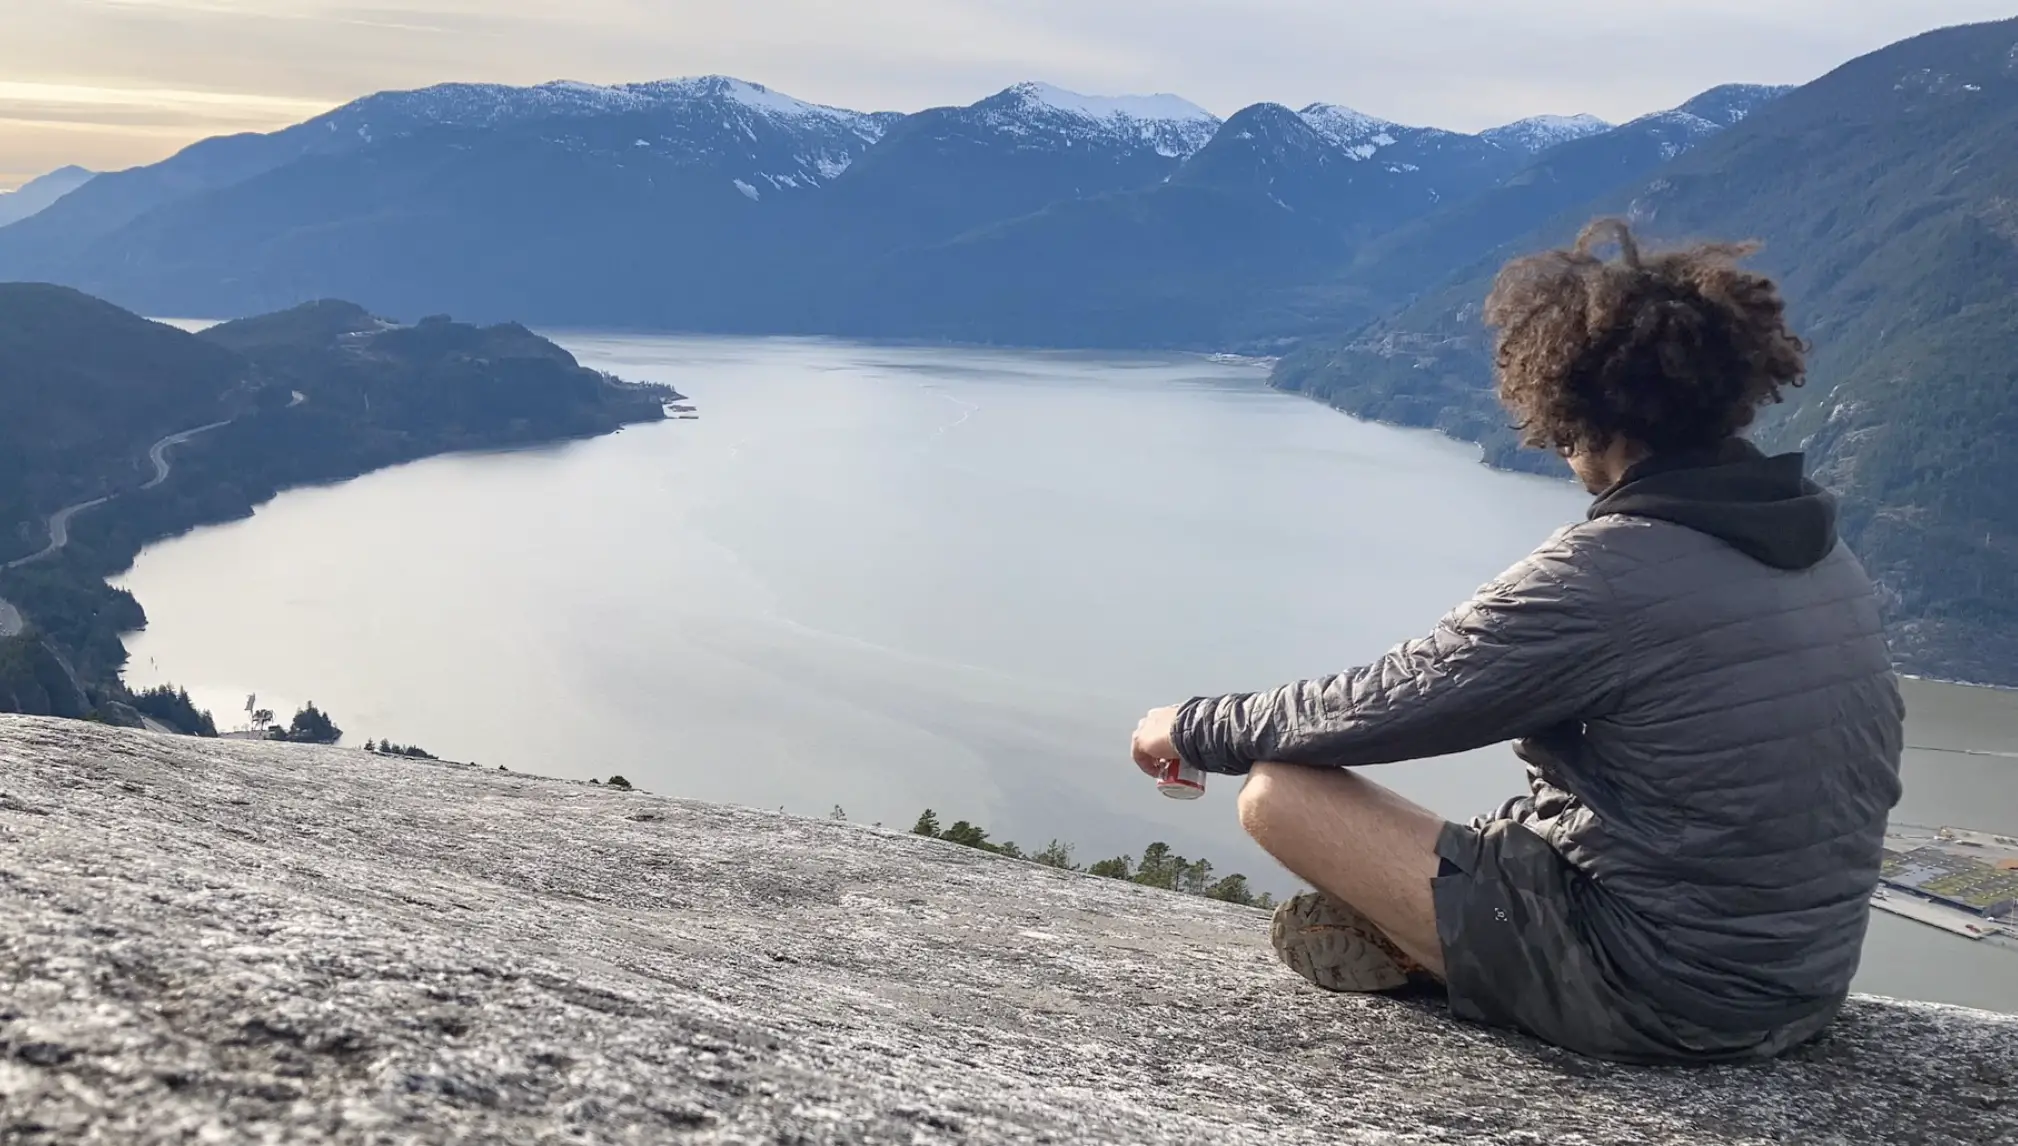
The final portion of elevation is up the steep rock face to the final viewpoint on the first summit. It’s rare to have the first peak to yourself but don’t worry, there are 360 degree views so you’ll get great pictures and enjoy a much deserved snack at the top. Make sure to take a walk around the summit so you can enjoy the views from all sides. Keep your distance from the cliff edges and ensure you don’t throw rocks or accidentally drop anything off the edges as it could kill the many climbers recreating below.
The 3 Peaks Loop (My Recommendation)
The Breakdown
| Distance (Round Trip) | 5.7km |
| Elevation Gain | 563m |
| Time (Round Trip) | 3-5 hours |
| Dogs | Yes |
| Camping | No |
| Season | Year Round |
| Difficulty | Difficult |
| Remoteness | Moderately Busy |
| Highest Point | 700m |
The Route
If you’re not pressed for time, and want to have a more classical hiking experience, I would totally recommend hiking the 1st, 2nd and 3rd peaks in a loop. This way you can experience every part of the chief trail and even get to challenge yourself with a short, nerve wracking, but very doable scramble connecting the second and first peaks. The view from the second peak is the favourite among hikers and the trails to the summit are typically much quieter.
The route to third peak follows the same path as the first peak trail for the first 15-20 minutes. You can refer to the description above if needed. Continue past the sea to summit trail following the chief peaks trail for 100m. When you arrive at the fork, follow signs to Chief third peak trail to the right.
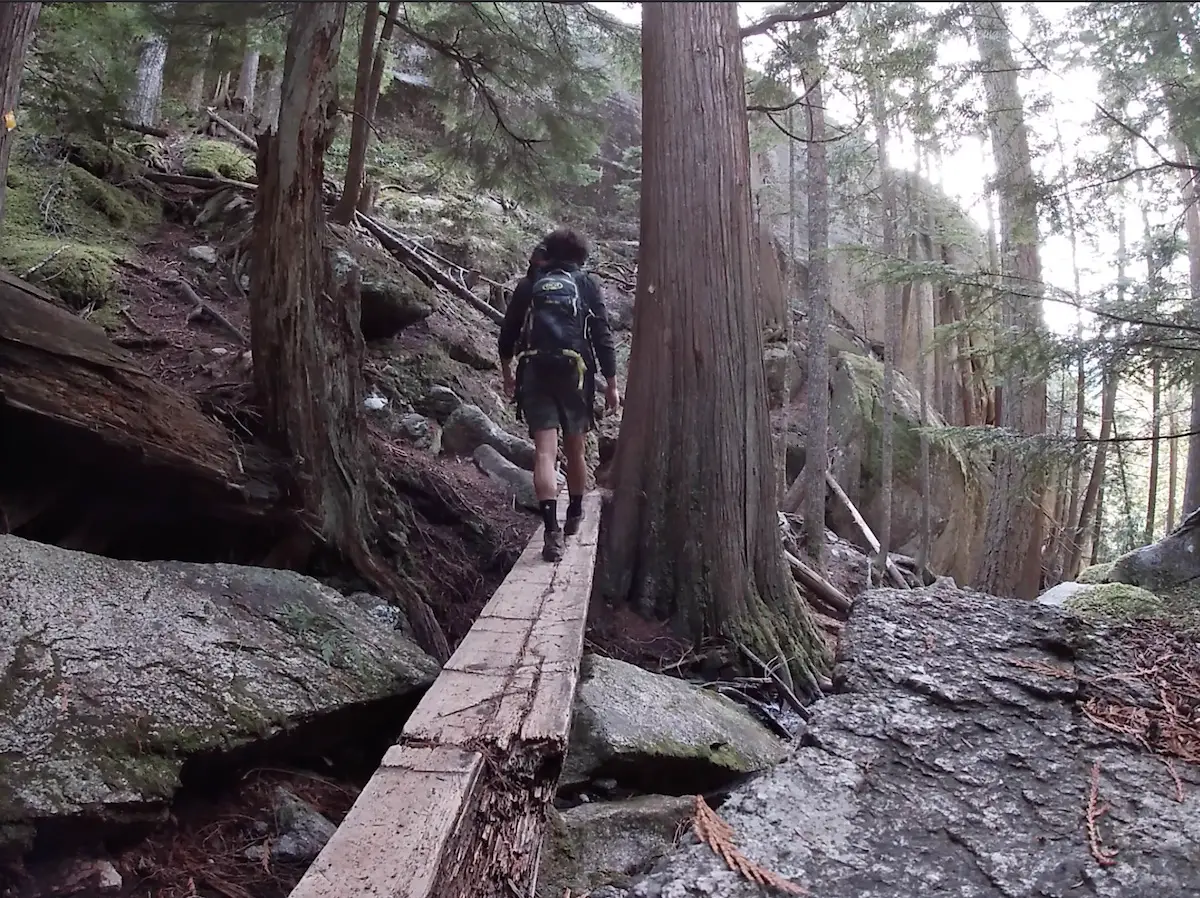
Terrain on the third peak trail feels unmaintained and is stimulating compared to the well walked first peak trail. The trail tucks you into a small valley along a streambed between the granite rocks of chief mountain. There are loads of roots, rocks, and bridges you will have to climb over as you ascend. About one kilometer in you will arrive at an intersection with the Slhanay trail, a lesser walked trail that actually leads you to the Mamquam forest service road (Yes, there is a secret backside trail to get to the chief, it is just more rugged). Follow the yellow markers to the left to continue up to the third peak.
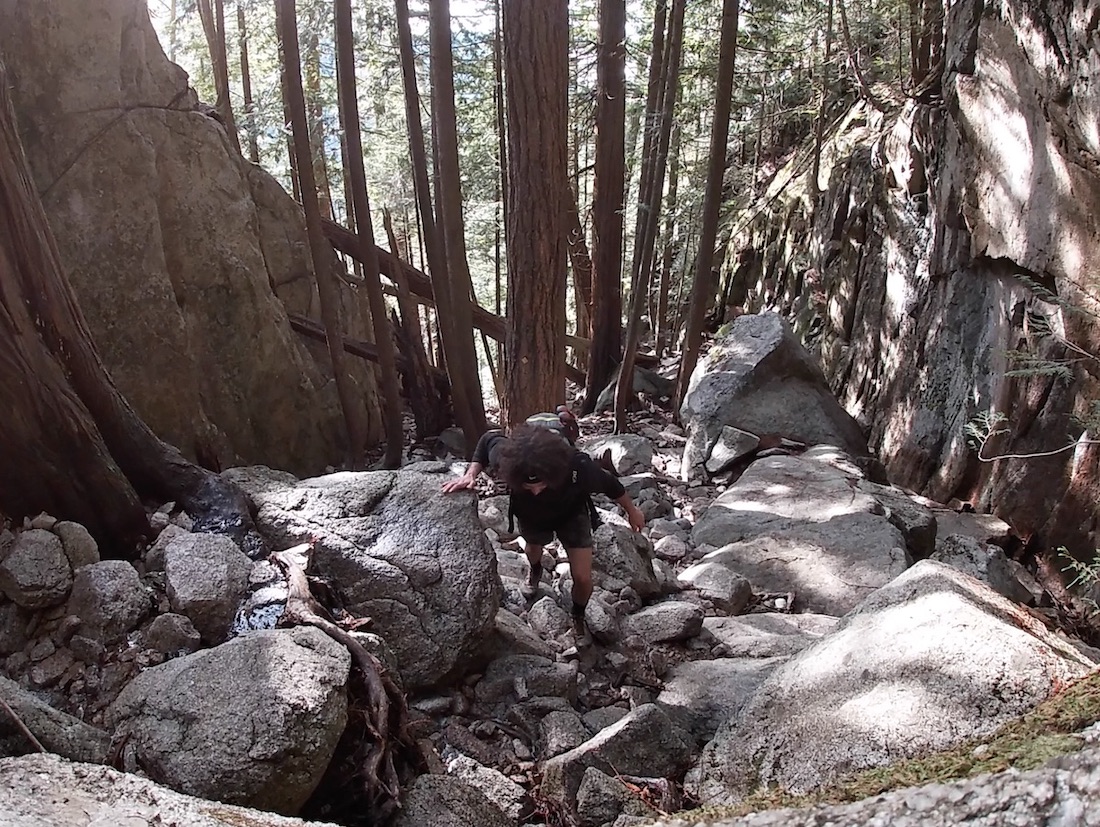
You are going to pass two more signs marking second peak towards the left. Continue to follow signs pointing towards third peak. Shortly after the second signpost continue towards third peak and take a hairpin turn left on the granite towards the proper summit. Climb the rocks until you arrive on top of the Stawamus Chief Mountain.
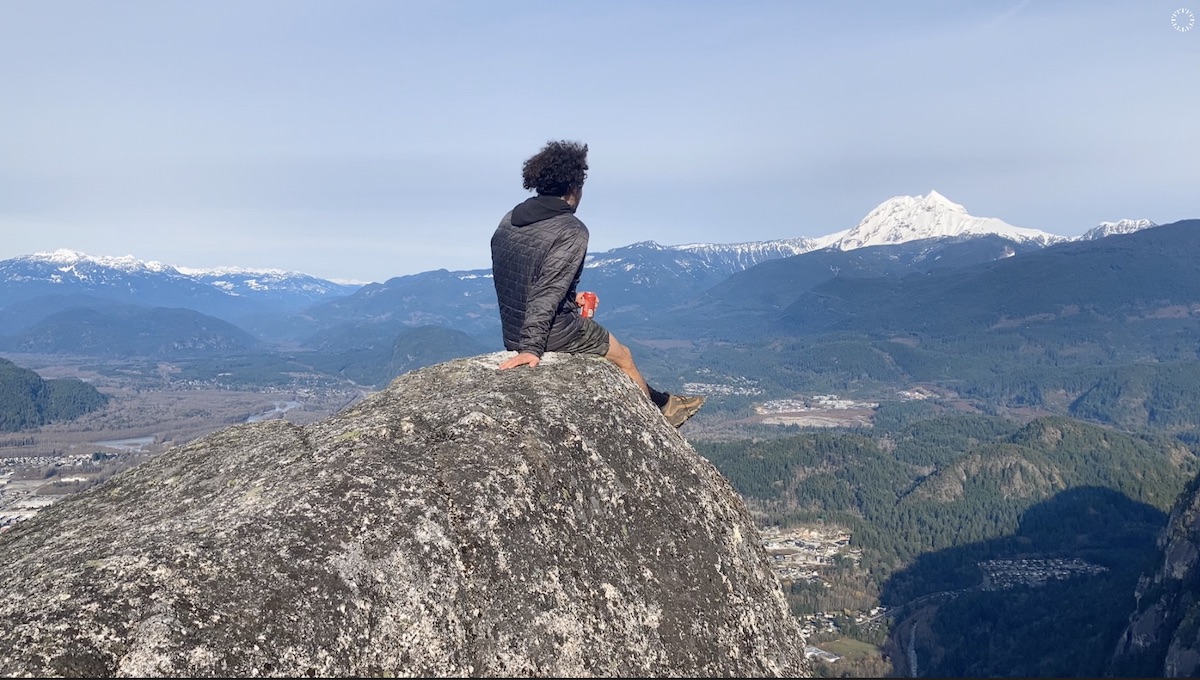
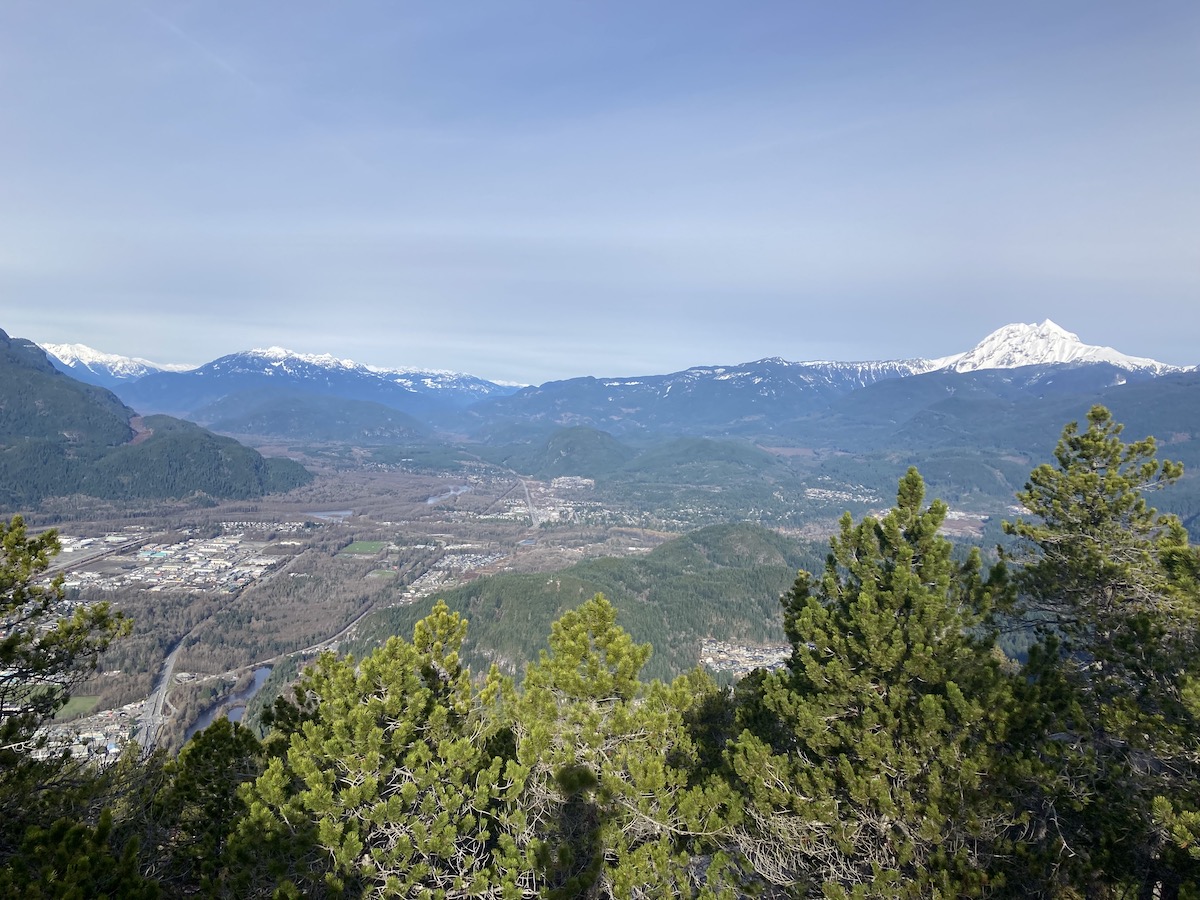
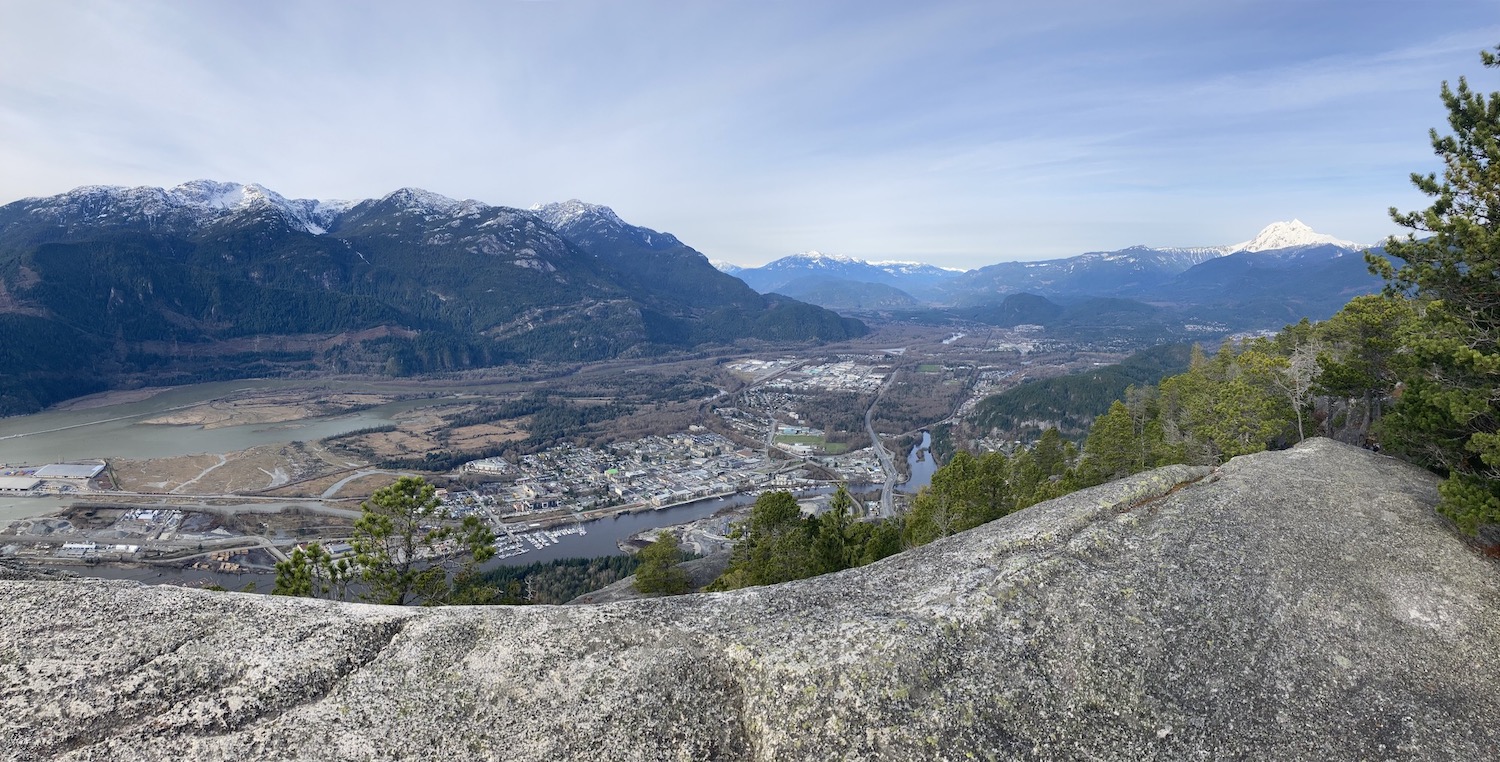
Spend some time exploring the summit. There’s vegetation up there so you will have to walk around a little bit to see the view from all sides. The view of Howe Sound is much less expansive from the third peak but you get a fabulous view of Squamish, Garibaldi and Diamond Head. Even on the busiest days, you will likely have the third peak all to yourselves. Since it is the least popular of the two viewpoints it’s the most secluded, which makes it a special.
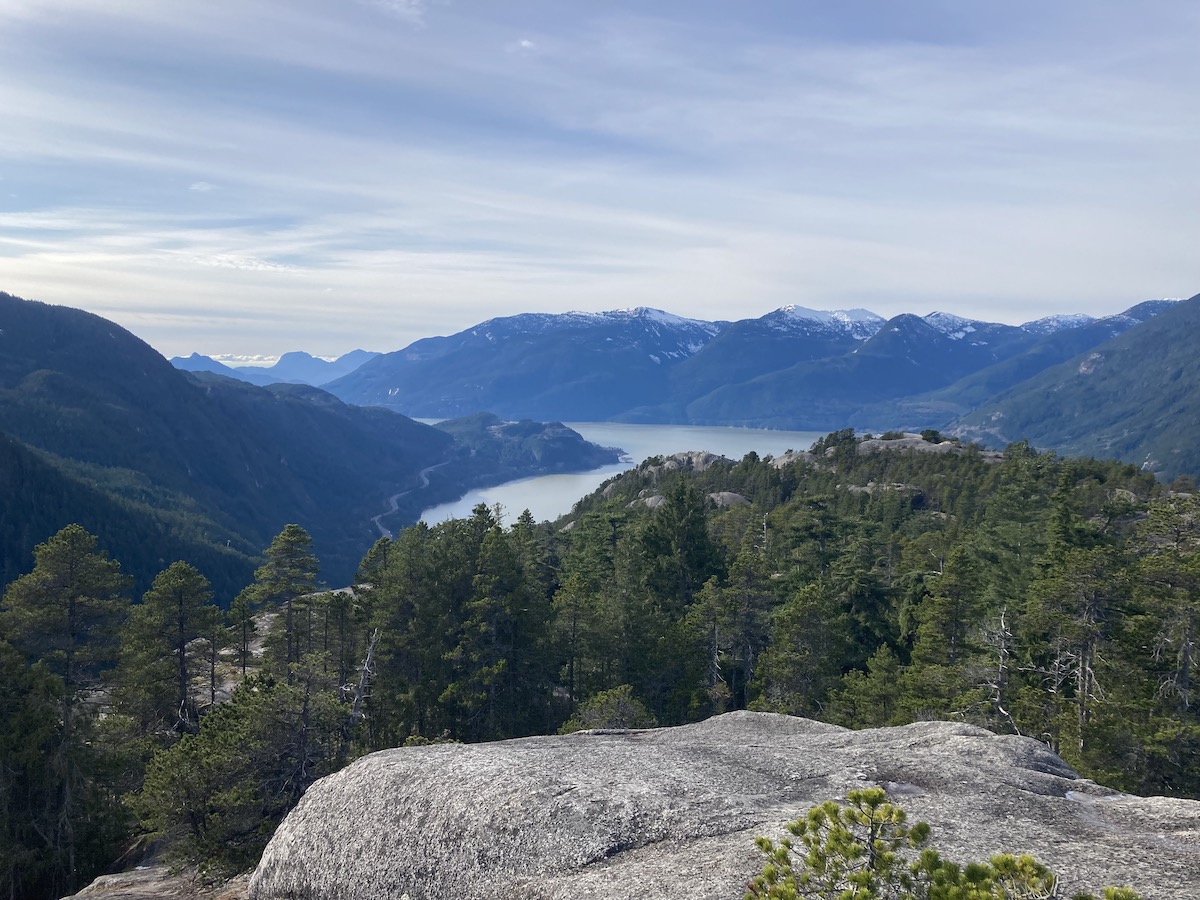
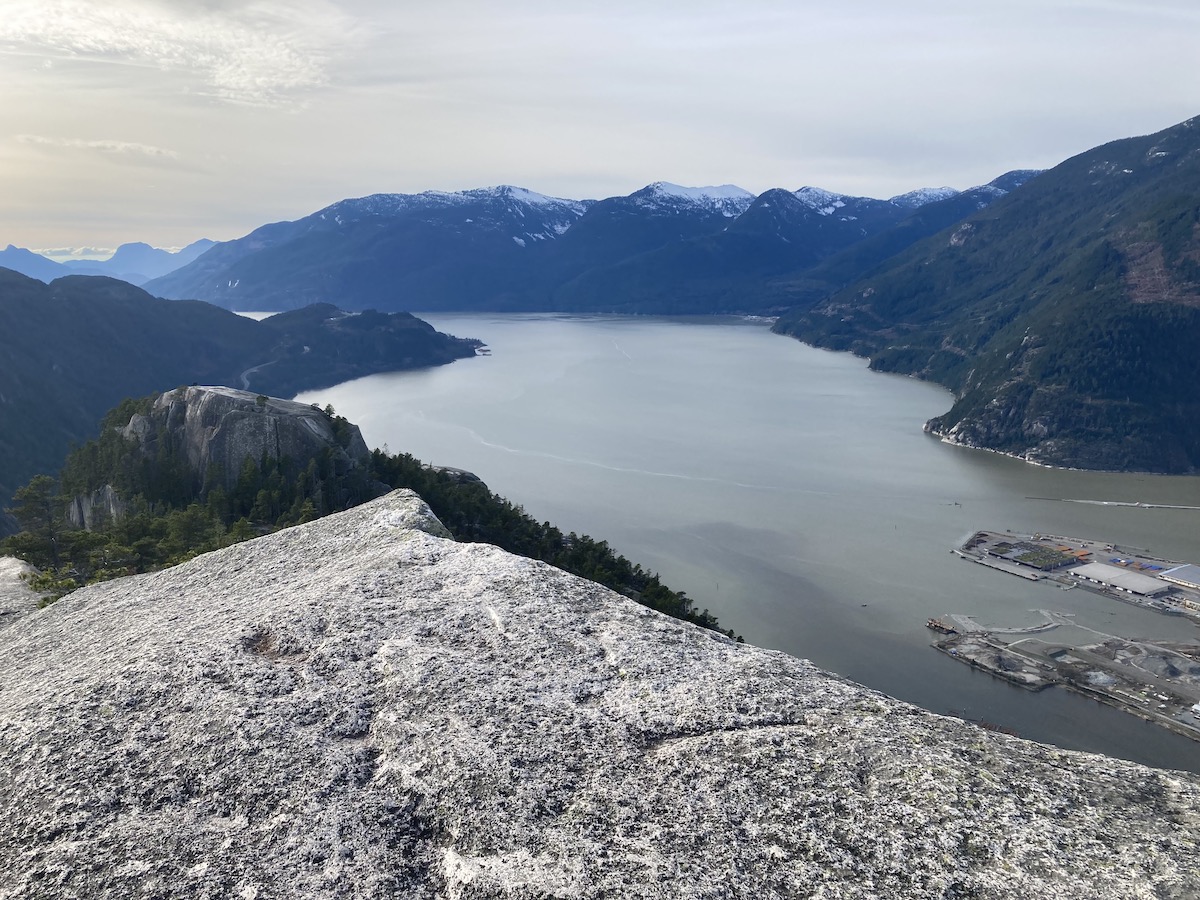
When you are ready to head to the second peak follow your tracks back down to the last sign post. Follow the sign to the left towards second peak. Trail markers will lead you along the ridge until you reach the 2nd peak viewpoint. If you are going to stop somewhere for a long break, this is the place. The views are absolutely breathtaking, and you get a little bit of everything. The panoramic view of Howe Sound is front and centre with great views of Squamish along the other side. I sat up top for a long time enjoying some cheese and crackers and people watching as hikers arrived on the first peak summit. While sitting on the second peak you can somewhat make out the scramble to the first peak.
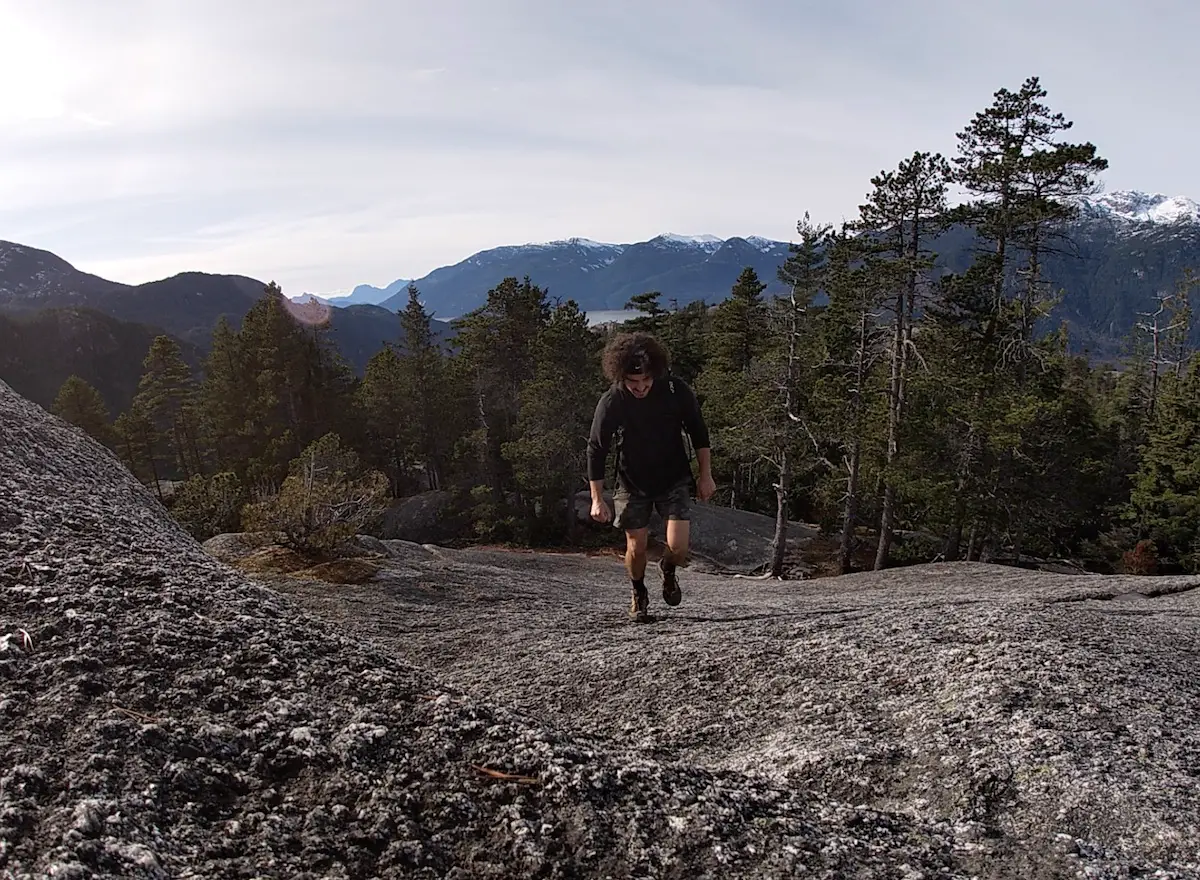
Once you’ve gotten your fix of the fantastic views it’s time for the exciting part. To get to the second/first peak scramble you have to loop around the huge and horrifying granite valley between the two peaks.

Follow trail signs descending down from the 2nd peak. As you climb down the rocks there are chains and ladders to assist you. Once the rocks turn into soil you will be connected with the other arm of the second peak trail. The scramble is just up to the right marked by a yellow warning sign on the rocks.
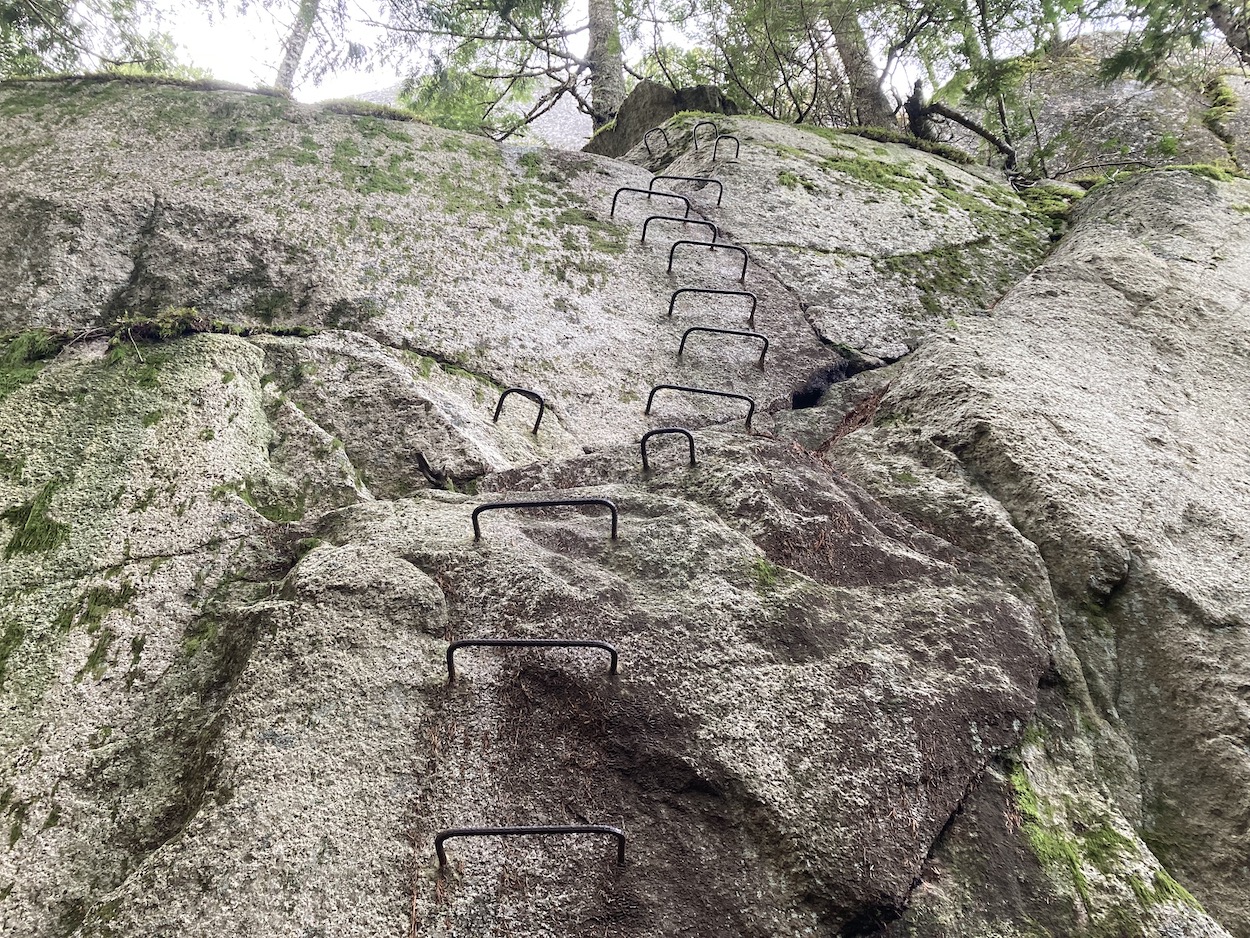
If you are afraid of heights, inexperienced, or the conditions are really bad, do not attempt this portion of the hike and continue down the second peak trail through the forest. However, for people feeling more adventurous get ready for some excitement. There is rebar ladder ascending up the granite wall. Please note this is not part of the BC parks trail network and is more dangerous than the other portions of the trail. Climb the rebar ladder until it ends. Then follow the rocks to the left side (there is a small marker in the trees). There are a few more rebar handles to assist you. Climb your way up the rocks finally turning towards the right arriving on the backside of the first peak. Walk up to the top of the first peak and enjoy the views. First peak has an unreal view of Howe Sound and once atop you can look back and retrace your steps along the third and second peaks.
Once you’ve taken your final gaze upon Howe Sound follow the first peak trail all the way back to the trailhead.
Squamish Chief Frequently Asked Questions
How hard is hiking the Chief?
The chief is a moderate/difficult hike. It is very well maintained but is very steep. Anyone can make it to the summit, just remember to wear appropriate footwear and take your time depending on your personal level of physical fitness
Are dogs allowed on the chief trail?
Yes. Dogs are allowed off leash once you are on the trail and out of the camping area.
How long does it take to hike the chief?
If you are hiking the first peak it will typically it will take hikers anywhere from 1-4 hours depending on your level of fitness and how much time you spend hanging out on the summit.
If you are heading to the second or third peak the trail becomes a bit longer so give yourself 3-5 hours for a round trip.
Should I wear hiking boots on the chief?
Hiking boots are recommended as there are wet sections and some rocky/rooty terrain to climb near the top. However, if you only have a pair of running shoes you will be okay, just be extra careful with your footing so you do not roll an ankle.
How high is the chief?
The third peak of the chief is the highest and it is about 700m above sea level
Can you hike the chief in winter?
Yes! The chief is the perfect trail for the fall and winter. Parking is free, the trail is quiet and since the elevation is low there will not be any snow unless there is snow in the city.
The Chief vs the Sea to Summit Trail (What is Better?)
In my opinion, if you can only choose one and are looking for the best views and adventure, opt to hike the 3rd, 2nd and 1st peaks of the chief.
For anyone who has knee issues, or just hates walking steep downhill in general, you may prefer the Sea to Summit trail because you can take a gondola ride down.
Happy Hiking!