

Many skiers on the west coast often neglect their edges. Sharp and burr free edges are the secret to buttery smooth carving turns. Also, they are almost required when you drop into a couloir and the first sound you hear is crunching as you try to get under your feet. When I was skiing in the East Coast people were obsessed with their edges, which is fair, because boiler plate ICE is the predominant and preferred snow condition by those haywire East Coaster’s.
For years I felt too nervous to tune my own skis. I would could always hear the voices of ski shops echoing in my head, “wax all you want but leave the edge work to the pros”. Finally, I grew a pair, did some research, attended a workshop, accumulated all the necessary tools and am able to confidently tune and sharpen the edges of my skis. I did this all in a few short weeks and to be honest I’m not that handy, so if I can do it, anyone can do it.
Gone are the days of relying on ski shops, suffering long wait times and having to battle with dull edges on Icy days. I have the power to keep my skis functioning perfectly, and doing so, will extend their lifetime tenfold and greatly improve my performance on the hill.
I had to do hours of research when I initially wanted to learn the best possible way to tune my skis. I created this step by step guide to save you time, hassle and most importantly, encourage you to start tuning your own skis and boards.
Table of Contents
The Basic Tools Required For Ski Tuning
Unlike waxing, proper base/side edge sharpening gear requires a bit more of a substantial investment. You will 100% make your money back, especially if you have a couple sets of skis and you tune your family’s gear as well. It is important to invest in high quality, durable and extremely functional ski tuning products. There are loads of great brands out there such as Swix, Toko, RaceWax, Sidecut and Tools 4 Boards.
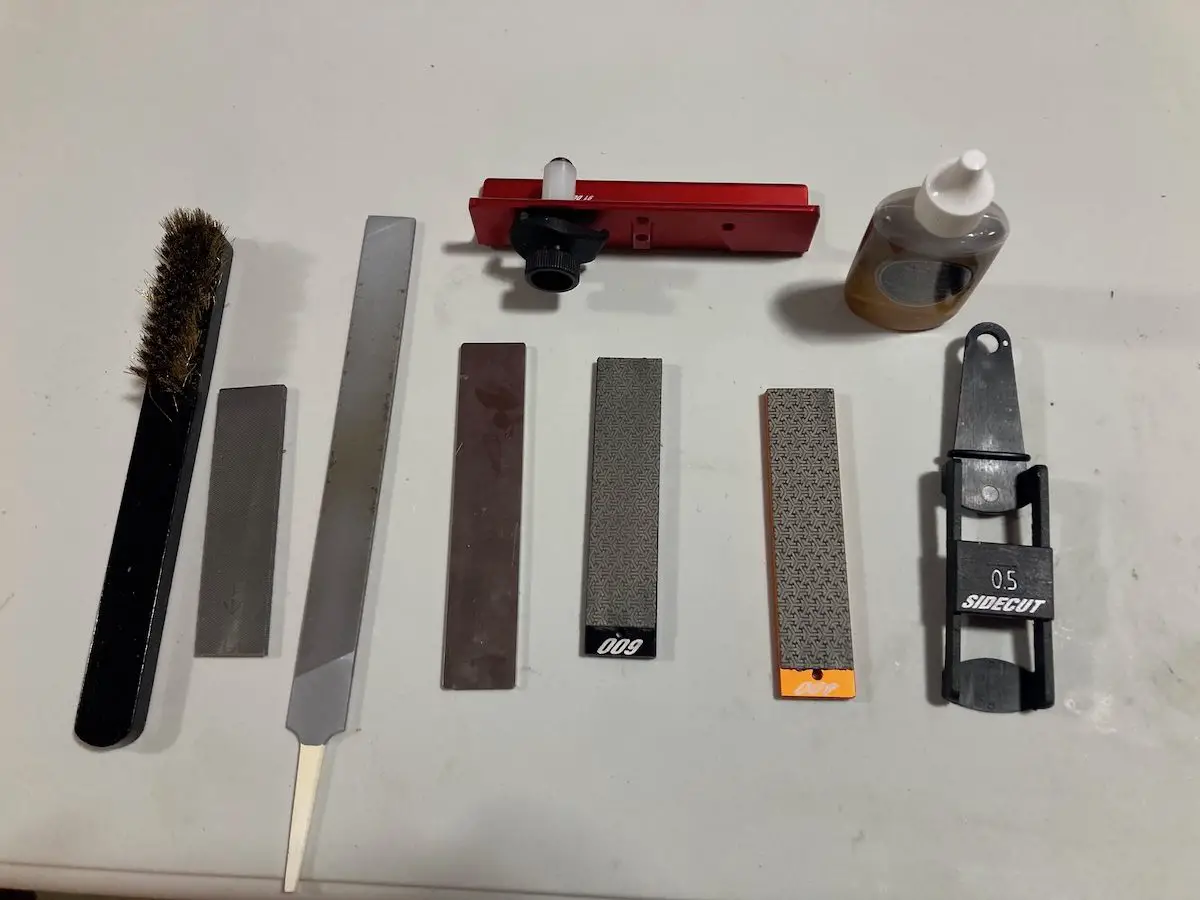
Listed below are all of the basic tools I would recommend if you are getting into ski tuning.
Diamond Stones
Diamond stones are the ultimate multi-tool for ski edges. They are key to removing burrs and dings on the edges of your skis. They come in different grits like sandpaper. Lower grits like 100 and 200 grit are best used for burr removal and sharpening Whereas 400-1000 grit are used in the polishing and finishing of ski edges after sharpening. Ideally, I would recommend having 200, 400 and 600 grit diamond stones in your arsenal.

File Guides
File guides hold your file and diamond stone in place at the desired edge angle. There are file guides specific to one edge angle (these are my preference) and there are multi angle file guides. The reason I prefer guides with one edge angle is to reduce the potential of user error by accidentally setting my ski to the wrong edge angle. If you do not know your current edge angle, ski shops typically set edge angles to 89° and this is the file guide angle I would recommend for most skiers. Racewax sells great set of reasonably priced aluminum single angle edge file guides at 87°,88°and 89°. You can also opt for a multi edge angle guide like the Winterstiger version below.


 Files
Files
The File is used to for both your base bevel and side edge. They come in different grits similar to diamond stones, measured in TPCM (tooth per centimeter). The lower the TPCM the more edge the file will remove. I would recommend using a 14 or 16 TPCM file for everyday edge work.

Edge Oil
I like to use edge oil when using diamond stones on my edges. This increases the life of the diamond stone and helps lubricate the side edge when sharpening/polishing. You can also just put a 70/30 mix of water/alcohol in a spray bottle and spray the edges before using the diamond stone (this option is cheaper)
File Brush
Keeping your tools clean is of the utmost important when tuning skis. A brass file brush has wire teeth and should never be used on your skis. It is strictly for cleaning your files before new passes.
Base Bevel Guide
I typically only touch my base edges with a file when I absolutely have to. Small plastic guides work perfect and it is handy to have 0.5°, 0.7° and a 1° guide at your disposal. Bevel guides are available in standard angles or in multi angles like the Toko version below.

True Bar
A metal bar that is completely straight and allows you to see if your ski base is ‘railed’ (edges higher than the base) or ‘base high’ (edges lower than the base). Use your true bar to assess the base and see the areas that may need adjusting.
Sidewall Remover
Sometimes you will try and file a ski edge but it will never get sharp. This problem occurs because the plastic sidewall of the ski is interfering. Before you sharpen you will need to remove some sidewall.

Step By Step Ski Tuning Process
First things first, I’m going to spew a lot of information at you. Don’t feel overwhelmed! Even if you don’t tune your skis perfectly and make a few mistakes you will learn from them, and your skis will be in better shape than they were before. If you’re not trying to set world cup GS records or land a cork 1440, whatever edge work you do to your skis is going to work awesome!
Step 1: Prep Your Work Area
The first step is getting your work space ready. Make sure to choose someplace you don’t mind getting messy since you always finish edge sharpening with a wax. Fortunately, I have access to a ski tuning room in Whistler and I use two ski vises to hold my skis. I purchased my ski vices online (unfortunately I can’t find the model anymore) they fit perfectly to any workbench or table, so I bring them along with me every ski trip. Any ski vides will do! Unlike waxing, you cannot get away with working on your edges on makeshift vices like books. You want your skis to be secure the entire time you tune them to reduce the potential of slippage when running the file and diamond stone along the edges.

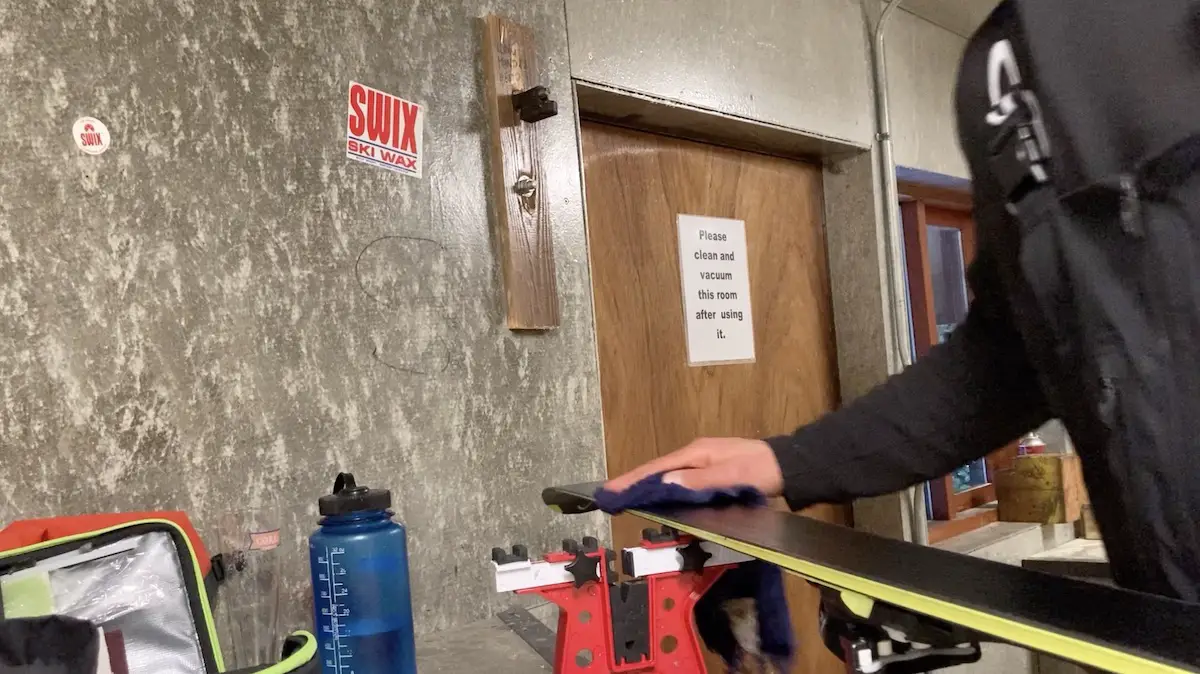
Step 2: Base Prep and Setting the Base Bevel
The first step is to give your skis a quick wipe down with a cloth and base cleaner to make sure they are clean and debris free. If you do not know your base bevel then you are going to set it for the first time. Use the true bar and run it up and down the ski assessing the base. Determine if your ski base is ‘railed’ (edges higher than the base) or ‘base high’ (edges lower than the base). If you ski base is not flat you do not want to set your base bevel and will have to take it into the shop for a base grind.
If you have never set or do not know the base bevel on your skis, plan to set the bevel on the entire ski.
If you know what your base bevel is set at then only work gently on the areas that may be railed or base high, typically the tips or the tails.
What Base Bevel Angle Should I Set?
Base bevel guides come in 3 different angles 0.5, 0.7 and 1. (0.5) is the most aggressive angle and is great for a pair of carving skis that you want to be really response. A base bevel of 1 is ideal for a powder or park ski that you want to be a little more floaty. Always start at a 0.5 try it out and work your way to 1.
NOTE: You only have to set your base bevel once and then maintain it! You can sharpen ski edges frequently but do NOT set the base bevel every time you sharpen. Once you set the base bevel only work on the base bevel when you must attend to burrs with a diamond stone.
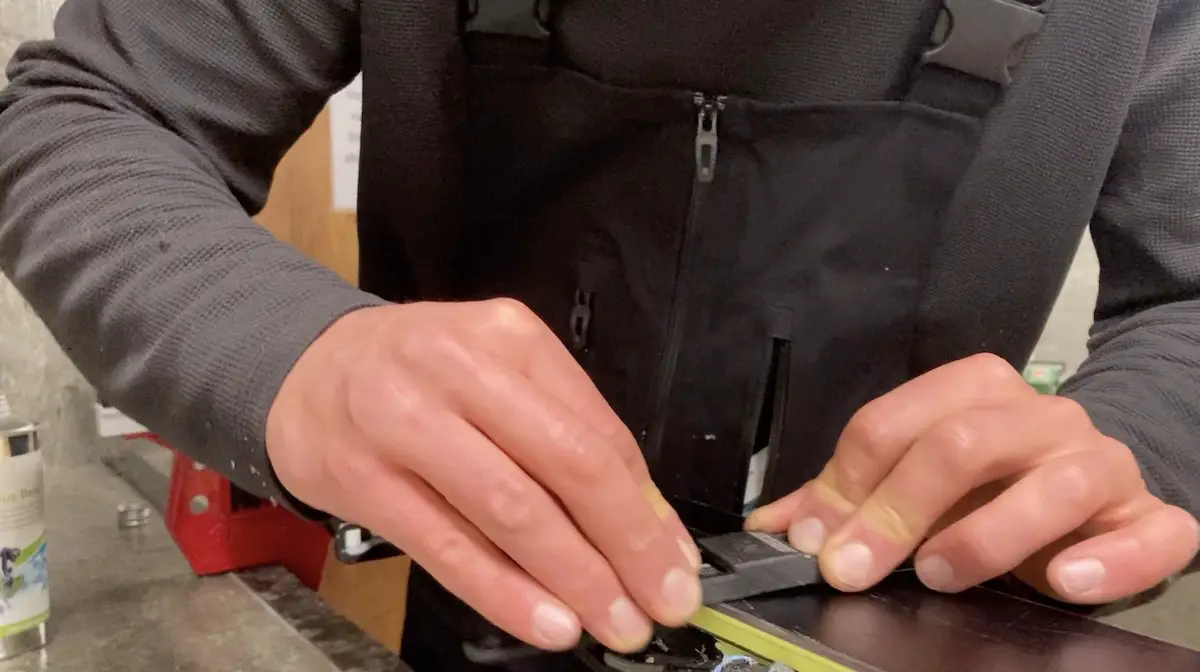
How To Set The Base Bevel
Begin with a file on the base
Once you have decided on the base bevel angle you will be using lay your ski flat on the vices. Always work on the edge that is furthest away from you. Begin by placing your 14-16 TPCM file into the guide. Ensure your file is in the right way. Place the guide and file on the base of your ski and with a light pressure pull towards you. Work the whole distance of the ski (or problem areas) until there is less resistance and minimal filings. Constantly clean the ski with a paint brush or cloth to ensure you aren’t pushing filings into the base. If you notice burrs that are not filing out go ahead and try the 200 grit diamond stone in the file, the diamond stone is much harder than the file and can be used to get rid of pesky burrs prior to filing. Flip the Ski 180 and do the other side. Rinse and repeat on your other ski.

Once you have used the file on all 4 edges it is time to use diamond stones to polish the base bevel. Before using the diamond stone mix 70/30 water/alcohol in a spray bottle and spray the base edges. This will act as lubrication for your diamond stones allowing them to be cleaner and work better. The process with the diamond stone is identical to the file except it cuts both ways, so you can move the diamond stone back and forth as you work your way along the base. Place the 400grit diamond stone in the file guide and work it up and down all 4 edges on your skis. Stop when you feel lesser and even resistance along the ski edge and finish with one long pass. Continuously clean everything with a brush/towel. Then for a final polish use the 600grit diamond stone on all 4 base edges.
Step 3: Sharpening The Side Edge
Here comes the most exciting part. Unlike setting a base bevel which should only be done once or when needed, sharpening your side edges can be exercised every few weeks or whenever needed depending how much you ski.
Sidewall Removal
Sometimes the sidewall of your ski will be protruding over the metal edge making it impossible to sharpen your edges. This is super common and can be resolved simply by removing some sidewall. There are many different options to remove sidewall including going at it with a file. I prefer to use the sidewall specific remover from Sidecut tuning products.
Choosing The Side Edge Angle
Most recreational skiers use an edge angle of 90° or 89° and experts/racers use 88°-87°. The edge angle you decide to set is personal preference and might take some experimentation. Just make sure you start at 90/89°. On my carving specific skis I set them to an 88° angle whereas my powder and all mountain skis I have set to 89°. Unless you are really in tune with the feel of your skis you probably will not notice a 1 degree difference in edge angle. What you will notice however, is the difference between sharp and dull edges. Most ski shops will typically set the edge to 89° or 90° when you bring it in for a sharpening. My recommendation would be to start lower and increase the edge angle as needed. It is not as easy to reverse the edge angle once it is set.
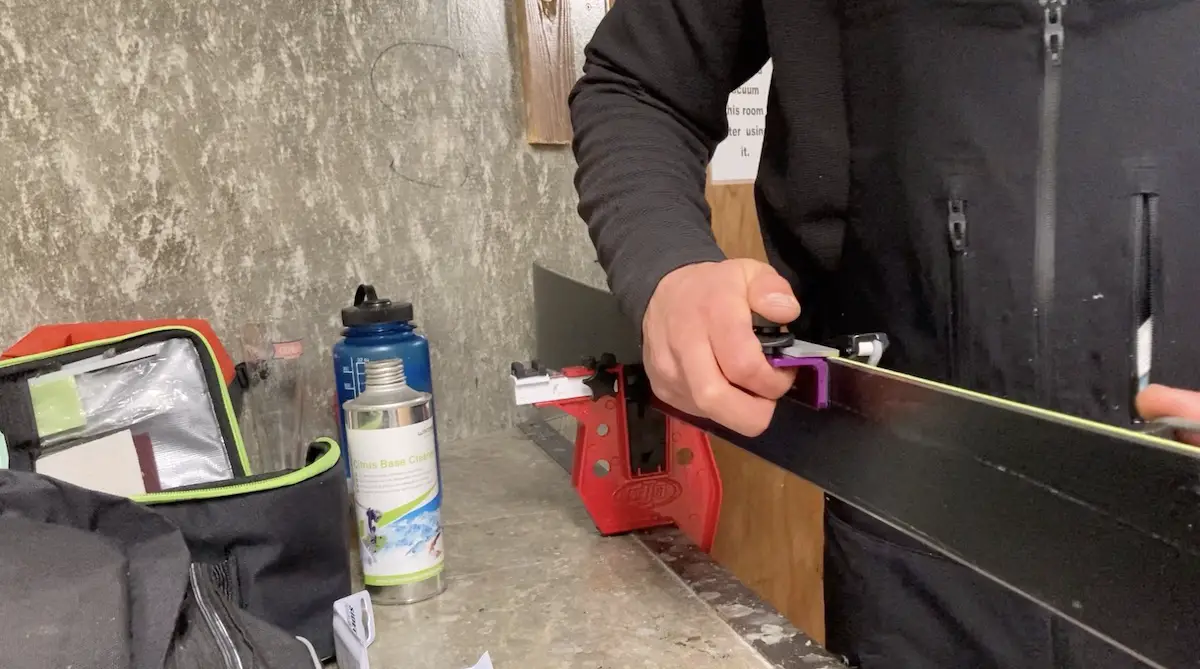
Secure Your Skis
Secure your skis in your ski vices with your bindings facing toward you. Double check to make sure they are secure so you don’t slip while using the file or diamond stone on the edges.
Remove Edge Burrs
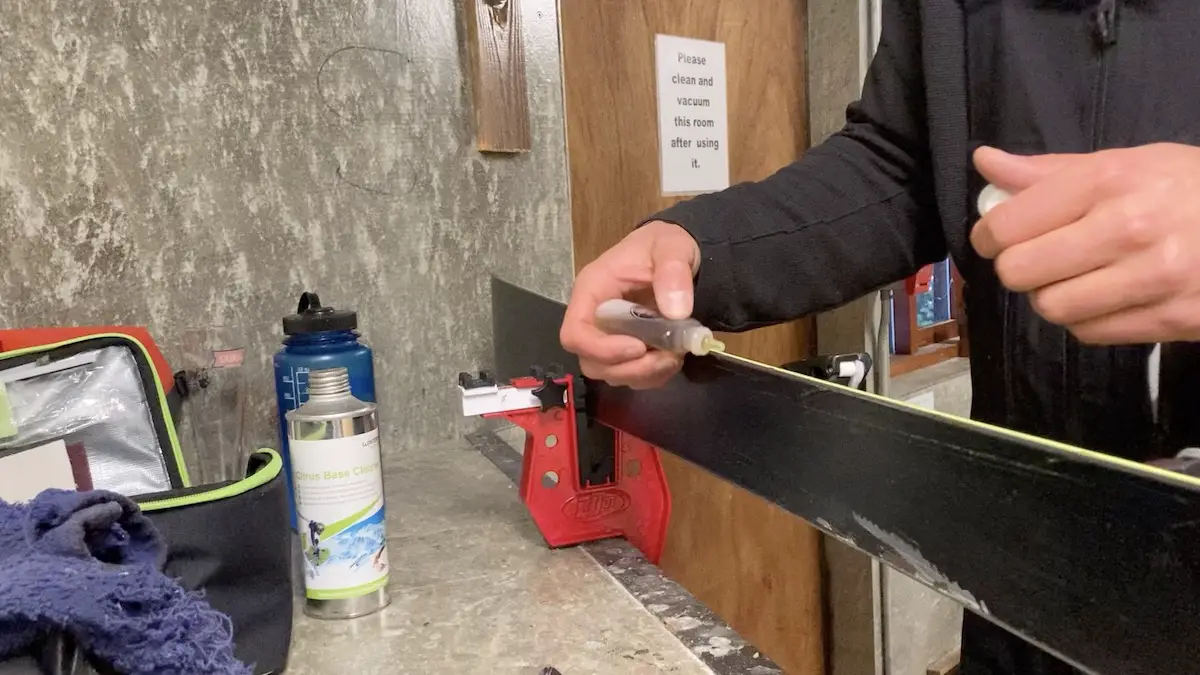
The first step is to remove any edge damage or burrs. This can be done using a 200 grit diamond stone. Place your 200 grit diamond stone in the file guide, apply some alcohol/water spray or edge oil and run the 200 grit diamond stone back and forth along the areas that need it.
Sharpen The Edges with The File
Place your 14-16 TPCM edge file into your file guide. You do not need any lubrication when using the file. Use even pressure, pulling the file and guide along the edge towards you. Make sure to keep the file and edge clean as you go. You should see filings leaving the ski and pulling the file should become easier. The edge should look even and be nice and sharp. Clean and repeat on all 4 edges.
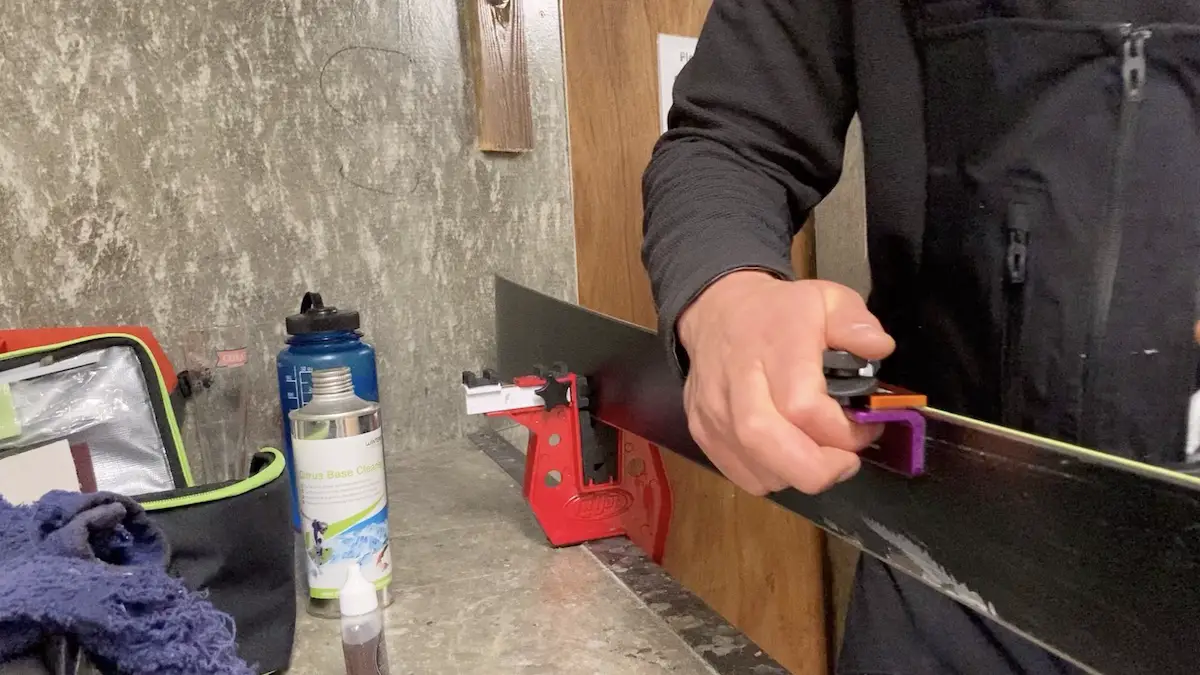
Polish Edges With Diamond Stones
Start with a 400 grit diamond stone. Spray the edge with lubrication or apply edge oil. Place the stone into the file and begin working it back and forth along the ski edge. When you feel decreased and even resistance do one full pass and stop. Clean and repeat on all 4 edges. Using the same process, finish with a 600 grit diamond stone on all 4 edges.
NOTE: Always keep your diamond stones clean. They will work better and last way longer. I always use a dab of oil on my diamond stone and wipe it clean with a cloth between ski edges to ensure it performs its best every time. Also remember to constantly be cleaning your file with a wire brush during and after using it.
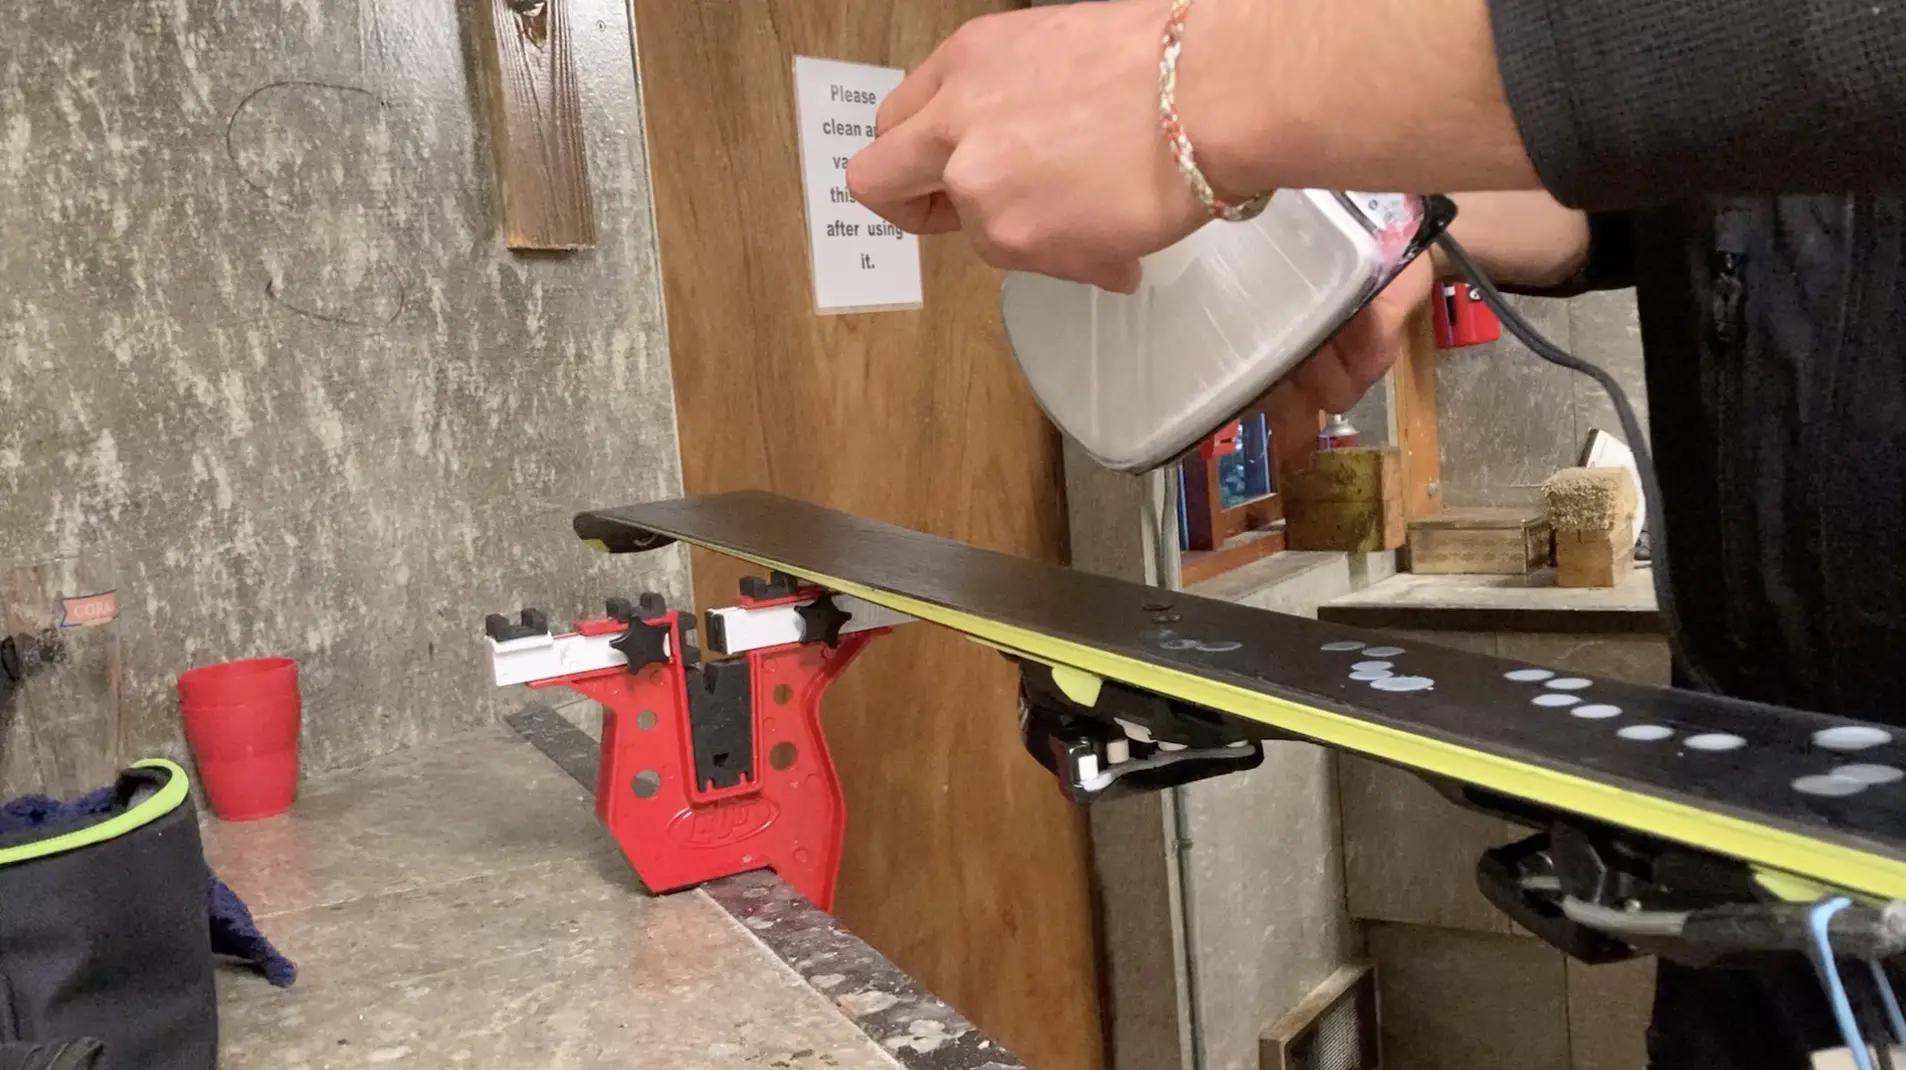
Step 4: Waxing
Clean up your skis and get them waxed. If you are not familiar with waxing check out my Beginner guide to waxing skis HERE.
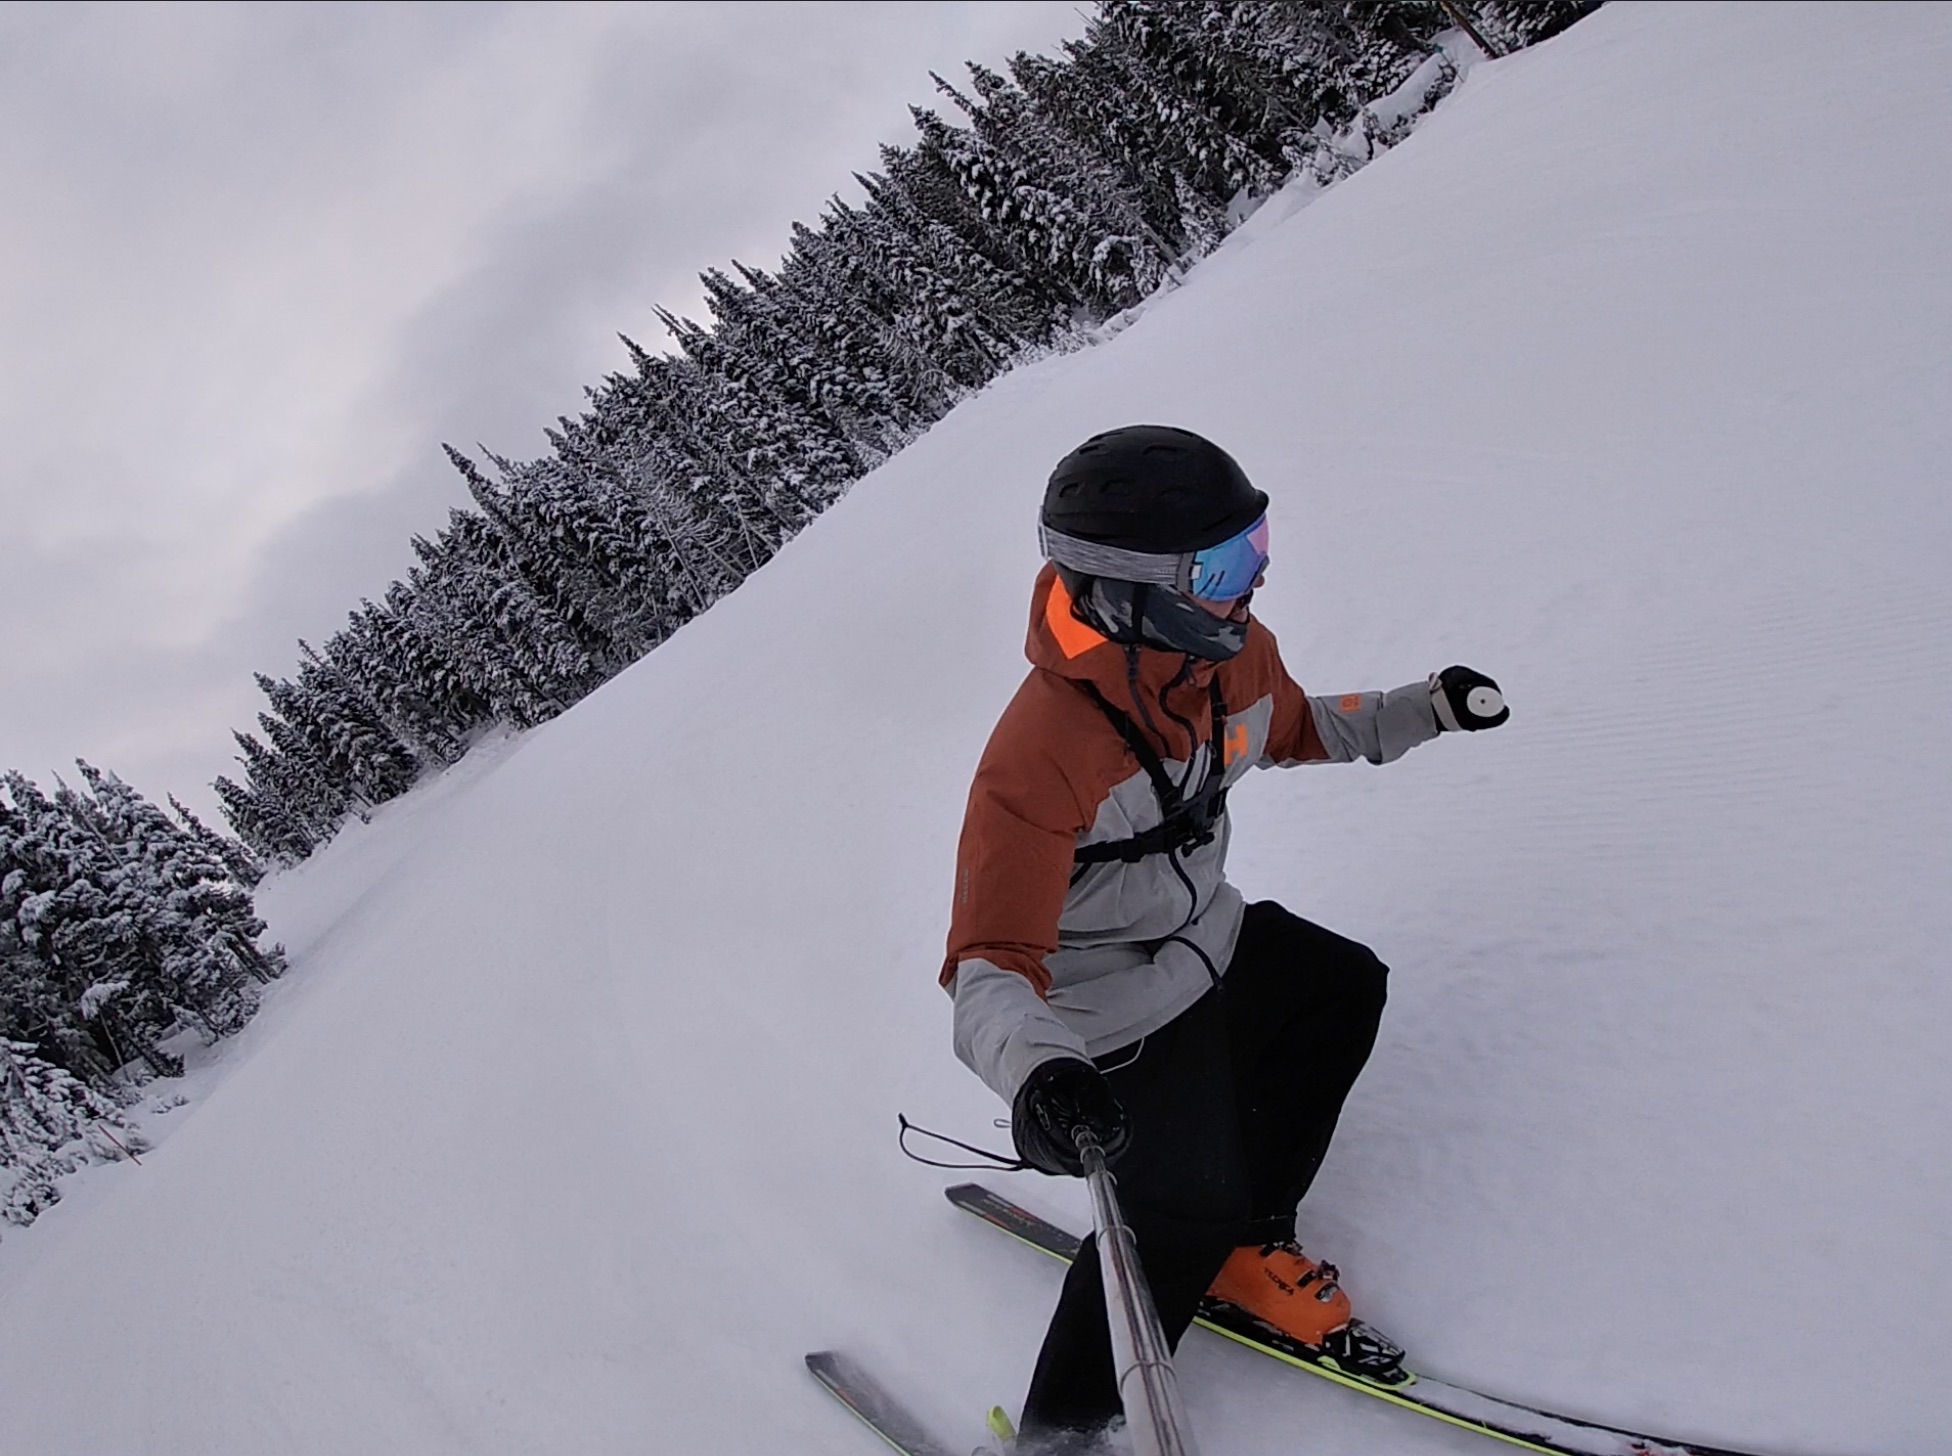
Step 5: SEND IT
Your skis are ready to shred. Now you can hit the hill on the iciest of days and always have the confidence to lay down your edges. Trust me, your performance will be greatly improved by skiing on sharp edges.
Within a few short months I went from an average joe with zero tuning experience to having my friends and family beg me to prep and maintain their skis. I’m the least handy guy ever. If I can tune skis, ANYONE CAN DO IT. I hope this guide helped provide a blueprint for tuning and will motivate you to take your ski maintenance into your own hands.
Please let me know if you have any questions in the comments, I would be thrilled to help!


One Response