Time to get started!
Maybe you recently watched “All.I.Can” or you’ve been watching ski clips on YouTube for years. You can just imagine yourself tossing cork 1080’s to the tune of Sail. Let’s face it…. It’s time for you to get out there. Although you won’t be riding like the pro’s yet, there is nothing better in the winter than strapping a couple hard planks to your feet and barreling down an icy hill.
You said you would do it last year, and the year before, but this year is different, it’s Covid and there is literally nothing else to do, so your really going to try. Good, actually Great…. You have now taken the first step to leave the dark and gloomy stretches of the suburbs and city for a white glistening paradise.
Since I don’t want you to continue your bad habit of not committing to getting out there I’ve created a guide that helps you navigate the biggest barrier which has likely stopped you from getting into skiing and riding in the first place… THE COST and HASSLE OF BUYING GEAR.
Winter sports are not as expensive as you think. This guide is here to help you get geared up as cheap as possible and get you out on the slopes this winter.
Table of Contents
The Gear
The first big step and a major roadblock for a lot of people is purchasing ski gear. Yes… skiing does have a start up cost, but these costs are not as astronomical as people make it out to be and year over year is leaps and bounds cheaper than hockey gear and the upkeep associated.
You have two options – Buy New or Buy Used.
My recommendation if you’re just starting out is to buy almost everything USED minus your helmet (non negotiable) and ski boots (if possible). A great skier isn’t built because they had the best gear – it’s all about time on the mountain. Once you become more passionate about skiing, trust me… ski gear costs will feel more essential to your life than paying rent and you’ll be treating yourself to the newest and greatest a little more than you should.
Lets Make this Simple and Start from The Top Down
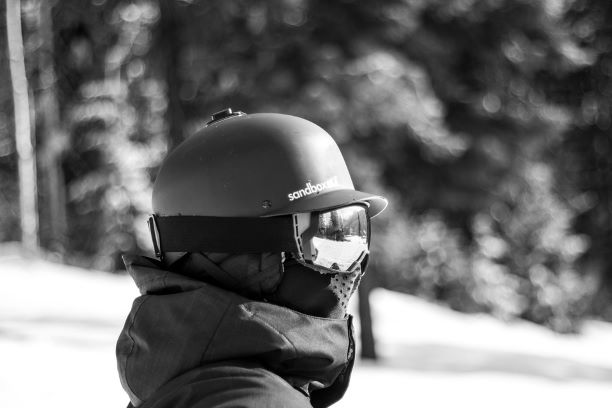
Helmet:
The one non- negotiable piece of equipment that you have to buy NEW is a helmet. The integrity of a ski helmet can be lost with just one big yard sale (ski term for crash). Your brain is your most important asset folks so protect it appropriately and wear a helmet. Helmets look cool these days, are practical and warm, it’s a no Brainer. So What brain bucket should I buy? You can choose choose your own style and preference from here. The two main parties are the people who wear a beanie and toque under their helmet and remove the earflaps and those that keep them on. Buy something that is comfortable and fits properly. If you’re planning on wearing a beanie or balaclava under your helmet, bring it to the store when trying on helmets. The Smith Holt and Giro Ledge are both great options under $100. You wont have to sacrifice safety or style. If you’re looking to spend a little more for top of the line safety features, you can find my top ski helmet picks here.

The Giro Ledge
Goggles:
Goggles are a very important piece of equipment. Sunglasses well for sunny days, when conditions are clear and you aren’t charging to hard. When learning, if the weather is good you can get away with wearing none at all. But I would 100% recommend owning and wearing a pair (at least on your helmet) at all times. A day of skiing can be totally uncomfortable for both a beginner and an expert if you forget them. Think about driving while sticking your head out the window of in a blizzard – doesn’t feel good. Goggles protect your eyes from the elements, sun, wind, and snow. If you’re skiing it sometimes helps to see where you are going. Goggles may seem intimidating but the purchasing process shouldn’t be intimidating. Here’s a goggle guide to help you choose the perfect fit for you.
There are some great lower cost new options and higher end options. The more expensive the goggle, it usually means the better lenses that you have. If you’re just starting out this is a great item to buy from craigslist, Facebook marketplace, or a consignment store. Just make sure to try them on WITH YOUR HELMET ON so you can ensure a comfortable fit. Check the lenses and ensure they are clear of any cracks or gaps. Here are my top goggle picks for all price points.
Balaclava, Neck Warmer, Beanie, Face masks
All of these items are personal preference and what you will use may depend on the area you are skiing and how cold it is going to be. There are a multitude of different styles you can choose from. . I personally like to wear a balaclava or gaiter and keep it around my chin, this means I have my neck and ears covered but my mouth is free to breathe. It gets pretty gross wearing a facemask all day and remember that if you tuck your facemask into your goggles there is a higher likelihood of getting foggy lenses. You can pick any of these items up for 10-20 bucks new or a couple bucks used. Just make sure to wash it if you’re buying it used! If a used face mask grosses you out, here are the best neck gaiter and balaclava options on the market.
Base/Mid Layers
Base layers are the layers that you wear under your ski jacket and pants. People wear a wide variety of things underneath their jacket and pants. Merino wool long underwear and long sleeve shirt and a fleece are my go to option. I would recommend wearing athletic type wear so you can stay warm, keep cool, and not have anything on that is restrictive. The thinner and warmer the better – always start cold – wear more than you think you need and take layers off as the day goes. If you are wearing sweats or a thicker pant material under your ski pants, DO NOT tuck them into your ski boots, this can create pains in your legs. Just about everyone can rummage up something from their closet that will keep them warm under their ski outfit. If you do plan to buy base layers they are perfect as multipurpose for all winter sports and for hanging out in the house. Layering is the key to staying warm, and if you want to learn how to layer like a professional skier or snowboarder, you can read more here.
The Socks
A higher sock just below your knee is best for skiing. The thinner the better! Circulation is what keeps your feet warm, not thickness of the sock. It’s super easy to pickup a ski specific sock on the cheap. These socks can be used for all sports all times of the year so a pretty good investment. Once again a merino blend or 100% merino wool sock is best. Here are my absolute favourite ski socks on the market, guaranteed to keep your piggies happy all day long.
The Ski Jacket & Ski Pants
This is one area where a lot of people drop loads of unnecessary cash on. The mountain isn’t a fashion show, it’s a personal sport and no one really cares how new or designer your jacket and pants are. Always buy your jacket and pants on sale or used – focus on fit, functionality, and quality. If possible look for a jacket that has a 5-10,000 mm rating or greater and pants that have 10,000mm rating or higher and an elastic inner cuff that goes over your ski boot (this keeps the snow out). This is just a recommendation and you can totally get away with using any sort of ski pant or jacket that you find at a local consignment store.
However, if your primary focus is the Apres and not the skiing.. Go pickup a crazy dysfunctional/expensive ski outfit that you can run at the bars and maybe you’ll pickup a few extra ladies or lads.
Ski Poles
It’s best to learn to ski without poles as you perfect your balance and edging. However, for older folks and people who have mobility issues or tire easily poles can give you a sense of security and help push you around easier than skating on your skis in lift lines. Buy poles used – I usually find mine at garage sales or in dumpsters. Rule of thumb when fitting poles, flip them upside down and hold the tip of the pole with your hand on the basket. If your arm makes a 90 degree angle, or close to it, then the pole is a decent fit.
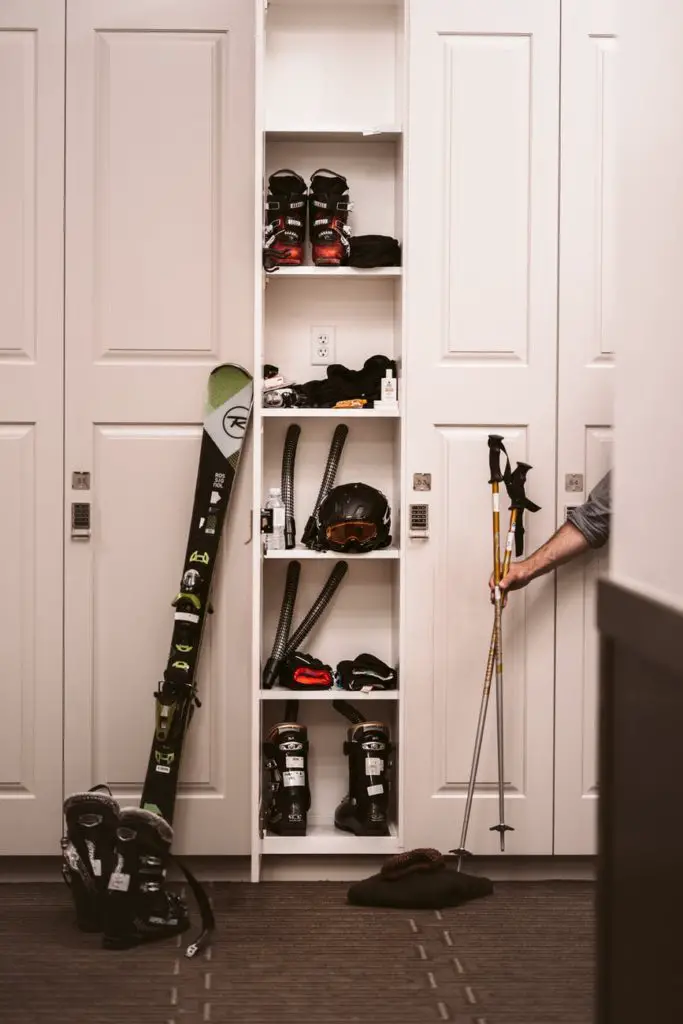
Skis and Ski Boots
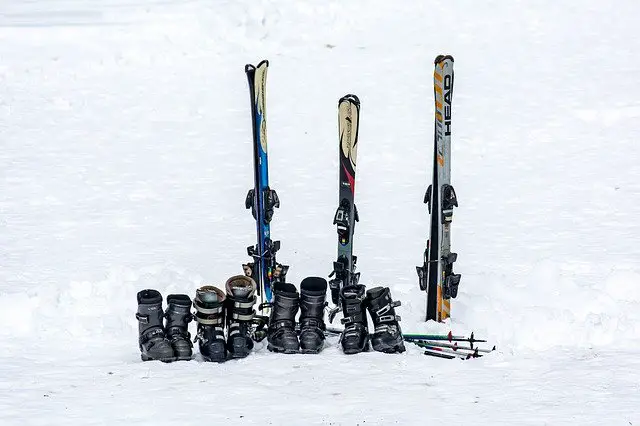
Boots
Properly fitted boots are of the utmost importance when skiing. For a more experienced skier I would always recommend going to a professional boot fitter.
Do you need new boots when learning? No not at all. So long as your boots are comfortable and fit decently you will be more than happy using them until you become more advanced and want to begin investing more in skiing.
Boot fitting is a super complicated process and I’ve created the ultimate guide which includes everything you need to know about boot fit. But, for the purposes of this guide I’ll keep it simple for you guys here so you can find a used boot that fits well.
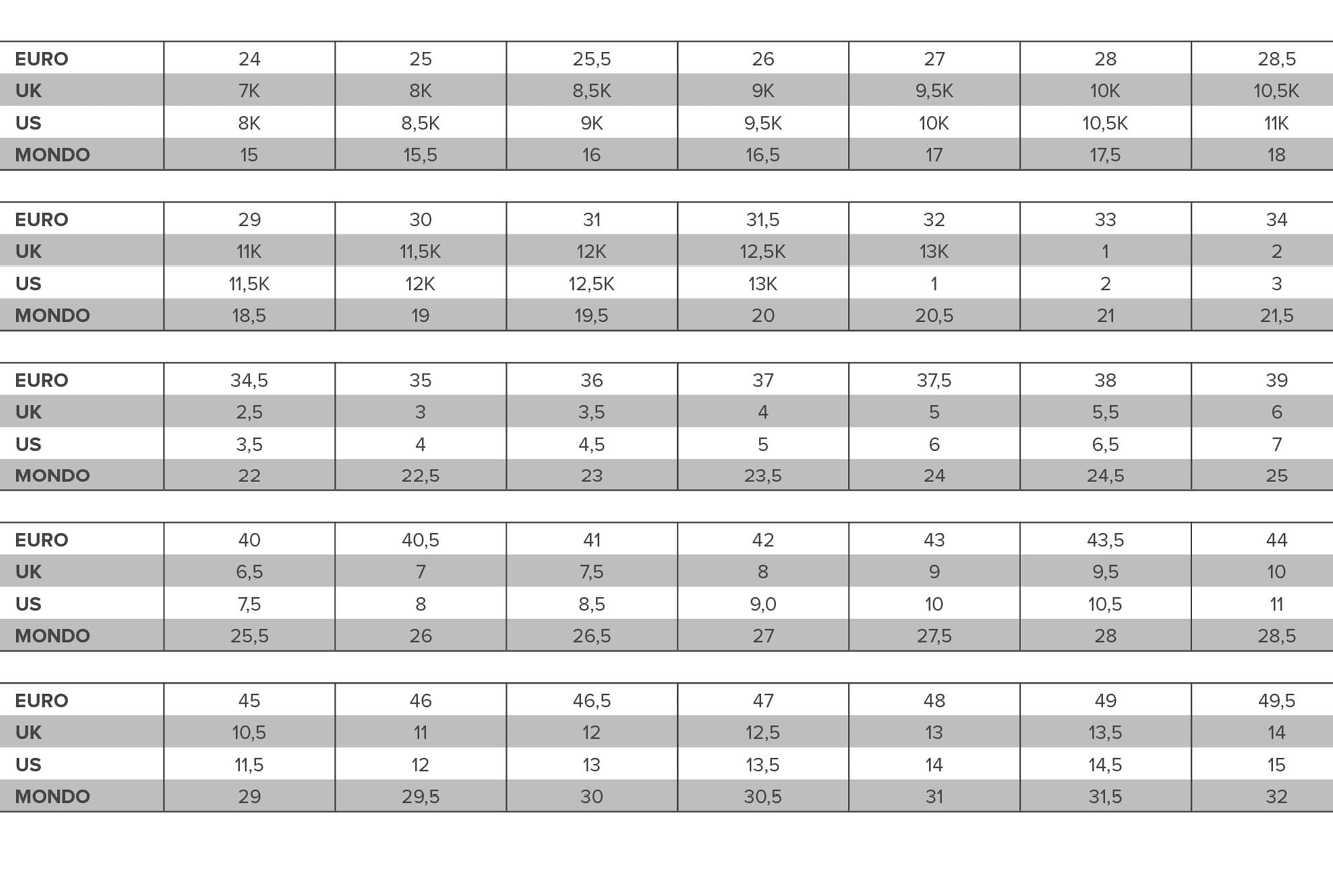
The first step is to make sure you know the size of both your feet – if one foot is larger than the other use the larger foot as your measurement. Ski boots are typically measured in mondosize. Use the attached chart to figure out what your shoe size is in mondosize. When learning to ski, boot fit and comfort are crucial. This will allow you to focus your time on your skiing and not your feet. If your boots are painful it’s a real bummer and you may have to spend more time in the lodge than riding. When you find a boot that is your size make sure to try it on with the sock that you will be using when you ski. Put the boot on with all of the buckles undone. Stand up and pull your foot into the boot liner, then kick your heel into the back of the boot. Once you have set your heel into the back of the boot do the buckles up so your foot feels tight. Walk around, move around, lean forward and lean backwards. If your toes have way to much room or your heel is sliding around these boots are too big. Conversely, if you feel pain and pressure points these boots may not be a go. You want them to be snug and comfortable. Your toes should just be tickling the tip of the liner, kick your heel on the ground and do up the buckles again. If you heel is locked in place and not moving up and down this boot should do the trick.
Skis & Bindings
When your starting out the type of skis you have really does not matter. The power is in the skier. For someone starting out, I would recommend buying a ski with bindings. If your standing up straight your ski tip should stand between your nose and neck. So long as your skis are shaped (not pointy at the tip like the skis from the 80s) they will work just fine and you will not be at a disadvantage.
Bindings are what keep your boots attached to your skis, and what also release your skis from your boots if you fall. If you are buying used purchase a pair that has the bindings already mounted. Bindings are mounted to certain boot sizes unless they are demo bindings which means they can easily slide and adjust to all boot sizes.
Ideally you can buy skis boots and bindings all together so you will not have to get the bindings mounted to your boot size. However if you find a pair of skis you want and the bindings do not fit your boot size, ask how many times the bindings have been drilled or mounted. If it is less than 3 than they will be okay to take into your local shop for a binding adjustment.
In most cases after buying used gear I recommend taking it to a local ski shop so they a professional can set your DIN setting and tune your skis properly so you will be as safe as possible on the mountain.
Most mountains rental shop workers are more than willing to check your bindings and DIN out for you and make small adjustments if you ask them nicely.
Best Places to Buy
Facebook marketplace, craigslist, ski sales, ski swaps, garage sales, end of the year sales of old rental equipment at mountains and sports consignment stores. Just do some google searching and I’m sure, in no time, you’ll be all kitted up for the mountain.
Year Long Rentals
Another cheap option (more expensive than buying used) is to rent gear for a season from your local ski store. Most ski stores will rent boots skis and poles for the season and make sure everything is fitted properly for you. Programs like this are especially great for growing kids whose feet change sizes every single year.
Tickets and Passes
If you’re serious about learning, invest in a season pass to your local mountain. The Vancouver hills are quite cheap when you purchase the passes ahead of time. Grouse, Cypress and Seymour have the best deals around $400 and this includes a full season of riding plus free tickets to other resorts. Cypress is a little more expensive but you can buy a night skiing only pass.
$400 really isn’t that expensive, think of it as an investment in fun! It’s unlimited entertainment from December until May. Something to keep you healthy and keep you busy. I’m sure a lot of us are guilty of going to the bar or restaurants on a Friday night and spending well over $100. A couple less dinners a month, or a few less bar outings and you’ll be good to go.
If you don’t want to commit to a seasons pass, you’ll get less days on snow, improve way less, and probably end up spending more money because odds are you will enjoy riding. But my tip for you would be to buy night skiing or discounted weekday skiing days so you can ski as cheap as possible. The one benefit to this is you’ll be able to try a couple different resorts instead of just a single one
Lessons
If money isn’t an obstacle I would always recommend to spend your first couple days on the snow with an experienced instructor via a lesson. However, resort lessons are ridiculously expensive. An option is to look on your local classified websites to find someone willing to teach you for a much more reasonable price. Just keep this on the down low because resorts don’t like getting undercut.
If it’s not feasible to pay for a lesson the next best thing is to go with a friend who is willing to give you some pointers. I’ve even met super nice people on online facebook groups who were willing to teach others just for the fun of meeting someone new.
If getting social isn’t your thing and you want to figure it out yourself – go for it. It’s going to be a lot more challenging but it’s doable. Watch some videos online and read a couple articles to get a hang for basic ski progression. Then head out to the mountain and start slow.
Another great trick is to shadow someone else’s lesson on the mountain. Keep your distance, but be just close enough so the instructor doesn’t see you and do all the drills they are doing. Bingo, a free lesson!
Make this year the year, for real!
Although this isn’t going to be free you are committing to an activity you can do year over year. I haven’t bought new gear in about 6 years, so every year you just have to worry about the odd thing. If you live in British Columbia, You have won the skiing lottery because there are plenty of resorts and terrain for you to explore. Get out there and play.
If you have any questions about gear and fit shoot me a message or write a comment and I would be happy to help.